Develop embedded firmware for Pico using Rust or Zephyr with pico-vscode
A little over a year ago, we launched the Raspberry Pi Pico extension for Visual Studio Code with the goal of simplifying project setup and configuration. Since then, we’ve received lots of feedback from developers saying it really helped them get started with embedded firmware development. From beginners struggling to wrap their heads around CMake configurations, toolchains, and SWD debugging, to experienced developers who just want to spin up a quick prototype — there are countless ways people use our extension.
Since launch, we’ve focused on continuously improving the user experience — guided by extensive community feedback — while adding new features to make development smoother and more enjoyable. But with the world of embedded firmware development evolving faster than ever, and with new technologies and approaches emerging every month, two in particular stood out to us as ideal candidates for integration into the Pico VS Code extension: Zephyr and Rust. These technologies make it easier for more people to dive into MCU development, while also giving seasoned developers powerful tools tailored to their preferred workflows.
Zephyr, introduced in 2016 by the Linux Foundation and Wind River Systems, has gained significant traction in the past year — and rightly so. Built on the Rocket RTOS kernel, Zephyr bridges the gap between Linux and the world of low-power embedded systems. With familiar concepts such as the Device Tree and a robust, modular architecture, it’s a great entry point for developers coming from Linux kernel development backgrounds or professionals looking for a flexible, production-ready RTOS for their next project.
And then there’s Rust — a language many of you already know and love for building safe, high-performance software, from developer tools to web servers. Over the past few years, Rust has made big strides in the embedded ecosystem. Thanks to the efforts of the Rust Embedded community and the rp-rs project, you can now write modern, fast, and memory-safe firmware for your Pico boards in Rust — using a language you might already feel right at home with.
As these technologies mature, they often introduce new expectations for how projects should be structured and configured. That’s why we’ve worked hard to integrate both Zephyr and Rust into our extension — making it easier to get all the right dependencies installed, set up a new project in minutes, and start experimenting without the usual friction.
How do I get started?
First things first — make sure your Visual Studio Code installation is up to date.
- On Windows and Linux: open the Help menu from the menu bar and select Check for Updates…
- On macOS: open the Visual Studio Code menu (on the far left of the menu bar) and select Check for Updates…
Once that’s done, make sure you’ve got the latest version of the Raspberry Pi Pico extension installed. Open the Extensions Marketplace in the Activity Bar and search for:
@id:raspberry-pi.raspberry-pi-picoSelect the extension, and you’ll see the installed version number on the right-hand side of the README. If there’s an update available, you’ll see a blue Update to… button next to the logo. Click it, then restart the extension when prompted.
Before continuing, make sure you have all the default required dependencies for your operating system installed — you can find the most up-to-date list in the extension’s README. (Currently, this additional setup is only required for macOS and non–Raspberry Pi OS Linux distributions.)
Rust prerequisites
To use Rust, you’ll need the rustup tool installed and available in your system PATH, along with a compiler for your host platform.
- Linux: We recommend installing GCC using your system’s package manager
- macOS: The compiler is included with the Xcode Command Line Tools, which you should already have installed if you followed the extension’s README
- Windows: Follow the installation instructions provided by the
rustupinstaller or the official documentation
Zephyr prerequisites
Zephyr has a few more prerequisites. While the Pico extension handles most of them automatically, there are still a couple of tools that need to be installed manually:
wget(Windows, macOS, and Linux)7-Zip(macOS and Linux)python3-venv(Linux)
Note: Starting with Zephyr SDK 1.0.0,
wgetis included for macOS and Linux, so we’ll be able to remove this requirement once that version is officially released.
On Debian-based Linux distributions, install these tools with:
sudo apt install wget p7zip-full python3-venvOn macOS, you can use Homebrew:
brew install wget p7zipThe python3-venv module is already included in the standard Python 3 installer on macOS.
With all that out of the way, it’s time for the fun part — creating your first Rust and/or Zephyr firmware projects!
New Zephyr firmware
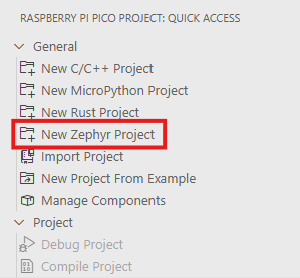
To create a new Pico Zephyr project, open Visual Studio Code and click the Pico icon in the Activity Bar on the left. This opens the Quick Access panel, where you can select New Zephyr Project to launch the Zephyr project wizard.
The wizard is divided into three sections, but to create your first project you’ll only need to focus on the top section: Basic Settings.
Enter a project name, choose a location for your project folder, and select the board type you want to target (you can always change this later).
For your first project, we recommend choosing a non-wireless board variant, since Zephyr doesn’t currently support the simple ‘Blinky’ example on wireless boards.
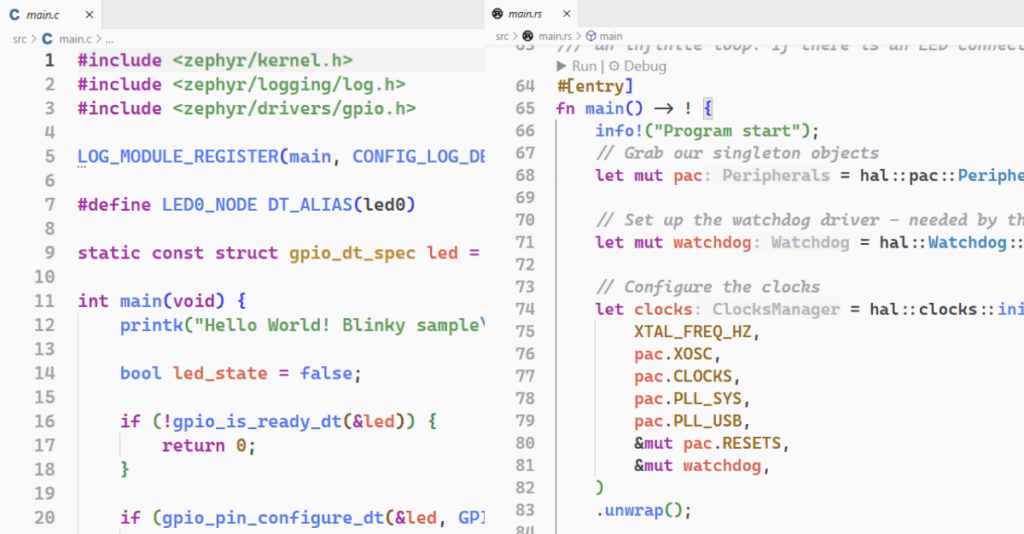
Next, open the project template selector and choose Blinky. This template includes example code to blink the on-board LED.

Once you’re happy with your settings, click the green Create button in the bottom-right corner.
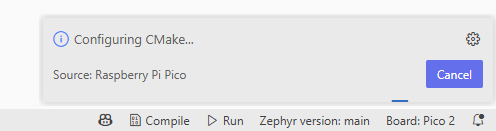
The extension will now install all required dependencies and set up a Zephyr workspace for you. This process can take a while — the full toolchain is over 2.0 GB in size — so make sure you have enough disk space available.
After setup is complete, your new project will open automatically.
When opening a Pico Zephyr project, the extension automatically checks that all requirements are installed and configured correctly. We recommend waiting until the progress indicator in the bottom toolbar disappears before interacting with the project.
By default, the extension will automatically configure your build folder. This usually takes about 30 seconds.
The first step in any new Pico Zephyr project is to click the Compile button in the bottom-right toolbar. This ensures that all Zephyr auto-generated C headers are created so that IntelliSense can correctly resolve Zephyr includes.
Once compilation is finished, you can either:
- Click Run to load the firmware onto your Pico, or
- Use the Debug side panel to flash and debug your Pico with a Raspberry Pi Debug Probe (if you have one connected)
Next steps
To get the most out of your new Zephyr-based firmware, we recommend visiting the official Zephyr documentation for a comprehensive introduction to its system architecture, APIs, and development workflows.
For questions, tips, or to share your projects with others, join the conversation in the Raspberry Pi Forums — there’s a dedicated section for Raspberry Pi Pico and Zephyr development where you can get help from the community and the Raspberry Pi team.
New Rust firmware

To create a new Rust Pico project, open Visual Studio Code and click the Pico icon in the Activity Bar on the left. This opens the Quick Access panel, where you can select New Rust Project to launch the Rust project wizard.
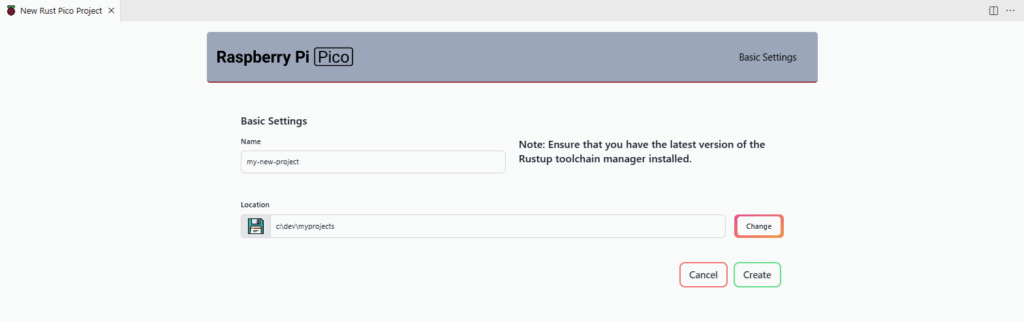
The Rust project wizard is designed to be as simple as possible. First, enter a project name and choose a location where you’d like the new project folder to be created.
By default, each new Rust project starts from a template that includes example code to blink Pico’s on-board LED. It supports both RP2040– and RP2350-based devices — including the RISC-V target — which you can later select in the toolbar, next to the Run button.
Once you’re happy with your settings, click the green Create button in the bottom-right corner. The extension will automatically install the necessary dependencies and Rust toolchains for you, which may take a few minutes. After that, your new project will be generated and opened automatically in VS Code.
If you haven’t already installed them, VS Code will suggest a handful of useful extensions for embedded Rust development — including Cortex-Debug, rust-analyzer, and Debugger for probe-rs. We highly recommend installing these for the best development experience.
Next steps
To dive deeper into embedded Rust development on Raspberry Pi microcontrollers, check out the official documentation for the relevant hardware abstraction layers (HALs):
These resources provide excellent overviews of the APIs, as well as examples for working with peripherals, timers, GPIOs, and more.
For help, feedback, or just to chat about your Rust-on-Pico projects, head over to the Raspberry Pi Forums. There’s a dedicated area for Raspberry Pi Pico and Rust development where you can exchange ideas, ask for assistance, and connect with fellow developers.
Contributors who made this possible
Bringing Zephyr and Rust support to the Raspberry Pi Pico ecosystem was only possible thanks to the hard work and dedication of many open-source contributors. Here are some of the people and communities that made it happen:
Zephyr support
- Magpie Embedded — contributed major components to the Zephyr project to enable full support for the Raspberry Pi Pico (W) and Pico 2 (W) boards
- The Zephyr Project team and all the contributors who helped integrate and refine Pico support within Zephyr — your work made this collaboration possible
Rust support
- The rp-rs developers and organisation — for building and maintaining excellent hardware abstraction layers (HALs) and tools for Raspberry Pi microcontrollers
- The Rust Embedded Working Group — for laying the groundwork that makes Rust a great fit for resource-constrained and embedded environments
- The probe-rs team — for providing modern tools that make debugging Rust firmware on Raspberry Pi microcontrollers straightforward and reliable
We hope these improvements to the pico-vscode extension will help make your development experience smoother and more enjoyable.
The post Develop embedded firmware for Pico using Rust or Zephyr with pico-vscode appeared first on Raspberry Pi.
from News - Raspberry Pi https://ift.tt/5FuJLXT
Labels: News - Raspberry Pi, IFTTT

0 Comments:
Post a Comment
Subscribe to Post Comments [Atom]
<< Home