How to get started with your Raspberry Pi AI Camera
If you’ve got your hands on the Raspberry Pi AI Camera that we launched a few weeks ago, you might be looking for a bit of help to get up and running with it – it’s a bit different from our other camera products. We’ve raided our documentation to bring you this Getting started guide. If you work through the steps here you’ll have your camera performing object detection and pose estimation, even if all this is new to you. Then you can dive into the rest of our AI Camera documentation to take things further.
Here we describe how to run the pre-packaged MobileNet SSD (object detection) and PoseNet (pose estimation) neural network models on the Raspberry Pi AI Camera.
Prerequisites
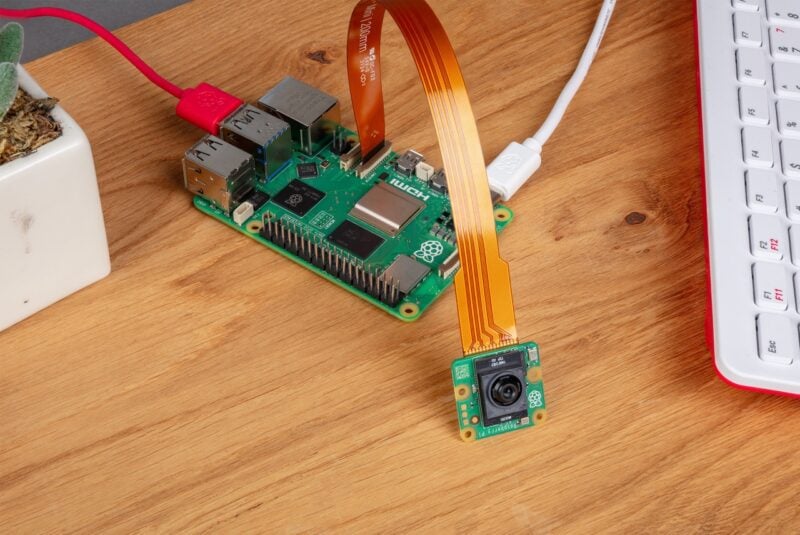
We’re assuming that you’re using the AI Camera attached to either a Raspberry Pi 4 or a Raspberry Pi 5. With minor changes, you can follow these instructions on other Raspberry Pi models with a camera connector, including the Raspberry Pi Zero 2 W and Raspberry Pi 3 Model B+.
First, make sure that your Raspberry Pi runs the latest software. Run the following command to update:
sudo apt update && sudo apt full-upgradeThe AI Camera has an integrated RP2040 chip that handles neural network model upload to the camera, and we’ve released a new RP2040 firmware that greatly improves upload speed. AI Cameras shipping from now onwards already have this update, and if you have an earlier unit, you can update it yourself by following the firmware update instructions in this forum post. This should take no more than one or two minutes, but please note before you start that it’s vital nothing disrupts the process. If it does – for example, if the camera becomes disconnected, or if your Raspberry Pi loses power – the camera will become unusable and you’ll need to return it to your reseller for a replacement. Cameras with the earlier firmware are entirely functional, and their performance is identical in every respect except for model upload speed.
Install the IMX500 firmware
In addition to updating the RP2040 firmware if required, the AI camera must download runtime firmware onto the IMX500 sensor during startup. To install these firmware files onto your Raspberry Pi, run the following command:
sudo apt install imx500-allThis command:
- installs the
/lib/firmware/imx500_loader.fpkand/lib/firmware/imx500_firmware.fpkfirmware files required to operate the IMX500 sensor - places a number of neural network model firmware files in
/usr/share/imx500-models/ - installs the IMX500 post-processing software stages in
rpicam-apps - installs the Sony network model packaging tools
NOTE: The IMX500 kernel device driver loads all the firmware files when the camera starts, and this may take several minutes if the neural network model firmware has not been previously cached. The demos we’re using here display a progress bar on the console to indicate firmware loading progress.
Reboot
Now that you’ve installed the prerequisites, restart your Raspberry Pi:
sudo reboot
Run example applications
Once all the system packages are updated and firmware files installed, we can start running some example applications. As mentioned earlier, the Raspberry Pi AI Camera integrates fully with libcamera, rpicam-apps, and Picamera2. This blog post concentrates on rpicam-apps, but you’ll find more in our AI Camera documentation.
rpicam-apps
The rpicam-apps camera applications include IMX500 object detection and pose estimation stages that can be run in the post-processing pipeline. For more information about the post-processing pipeline, see the post-processing documentation.
The examples on this page use post-processing JSON files located in /usr/share/rpicam-assets/.
Object detection
The MobileNet SSD neural network performs basic object detection, providing bounding boxes and confidence values for each object found. imx500_mobilenet_ssd.json contains the configuration parameters for the IMX500 object detection post-processing stage using the MobileNet SSD neural network.
imx500_mobilenet_ssd.json declares a post-processing pipeline that contains two stages:
imx500_object_detection, which picks out bounding boxes and confidence values generated by the neural network in the output tensorobject_detect_draw_cv, which draws bounding boxes and labels on the image
The MobileNet SSD tensor requires no significant post-processing on your Raspberry Pi to generate the final output of bounding boxes. All object detection runs directly on the AI Camera.
The following command runs rpicam-hello with object detection post-processing:
rpicam-hello -t 0s --post-process-file /usr/share/rpi-camera-assets/imx500_mobilenet_ssd.json --viewfinder-width 1920 --viewfinder-height 1080 --framerate 30After running the command, you should see a viewfinder that overlays bounding boxes on objects recognised by the neural network:

To record video with object detection overlays, use rpicam-vid instead:
rpicam-vid -t 10s -o output.264 --post-process-file /usr/share/rpi-camera-assets/imx500_mobilenet_ssd.json --width 1920 --height 1080 --framerate 30You can configure the imx500_object_detection stage in many ways.
For example, max_detections defines the maximum number of objects that the pipeline will detect at any given time. threshold defines the minimum confidence value required for the pipeline to consider any input as an object.
The raw inference output data of this network can be quite noisy, so this stage also performs some temporal filtering and applies hysteresis. To disable this filtering, remove the temporal_filter config block.
Pose estimation
The PoseNet neural network performs pose estimation, labelling key points on the body associated with joints and limbs. imx500_posenet.json contains the configuration parameters for the IMX500 pose estimation post-processing stage using the PoseNet neural network.
imx500_posenet.json declares a post-processing pipeline that contains two stages:
imx500_posenet, which fetches the raw output tensor from the PoseNet neural networkplot_pose_cv, which draws line overlays on the image
The AI Camera performs basic detection, but the output tensor requires additional post-processing on your host Raspberry Pi to produce final output.
The following command runs rpicam-hello with pose estimation post-processing:
rpicam-hello -t 0s --post-process-file /usr/share/rpi-camera-assets/imx500_posenet.json --viewfinder-width 1920 --viewfinder-height 1080 --framerate 30
You can configure the imx500_posenet stage in many ways.
For example, max_detections defines the maximum number of bodies that the pipeline will detect at any given time. threshold defines the minimum confidence value required for the pipeline to consider input as a body.
Picamera2
For examples of image classification, object detection, object segmentation, and pose estimation using Picamera2, see the picamera2 GitHub repository.
Most of the examples use OpenCV for some additional processing. To install the dependencies required to run OpenCV, run the following command:
sudo apt install python3-opencv python3-munkresNow download the picamera2 repository to your Raspberry Pi to run the examples. You’ll find example files in the root directory, with additional information in the README.md file.
Run the following script from the repository to run YOLOv8 object detection:
python imx500_object_detection_demo.py --model /usr/share/imx500-models/imx500_network_yolov8n_pp.rpk --ignore-dash-labels -rTo try pose estimation in Picamera2, run the following script from the repository:
python imx500_pose_estimation_higherhrnet_demo.py
To explore further, including how things work under the hood and how to convert existing models to run on the Raspberry Pi AI Camera, see our documentation.
The post How to get started with your Raspberry Pi AI Camera appeared first on Raspberry Pi.
from News - Raspberry Pi https://ift.tt/OSMvain
Labels: IFTTT, News - Raspberry Pi

0 Comments:
Post a Comment
Subscribe to Post Comments [Atom]
<< Home