Ydtechnologius
This is a collection of news and articles on tech and gadgets.Informative news on technology, gadgets and news.Latest Technology News, Gadget Reviews, Latest Gadgets, Latest Gizmos and Latest News in Tech.
Welcome to the ‘ber months! If you don’t think the ‘ber months are the best time of the year, you are wrong. However, we did have an epic summer of travel and community outreach. Every Raspberry Pi fan who came up to our booths, the hundreds of handshakes shared between us, and the gazillions of stickers and merch items handed out made for a memorable few months. Here are some highlights and a look ahead to an even busier autumn.
Open Sauce 2025 was a blast as always
Summer highlights
Open Sauce in San Francisco: Back in July, we met a bunch of makers, tech enthusiasts, YouTubers, and other Open Sauce–goers in the Bay Area, and got to see Raspberry Pi–powered creations absolutely everywhere. It was fab.
DEFCON in Las Vegas: At this year’s DEF CON, we ran a few workshops on our RP2350 microcontroller, and on our secure boot tools for our Raspberry Pi Compute Modules. We also demoed our new AES library, which has been hardened against side-channel attacks, and a few of the victors from our first RP2350 hacking challenge walked us through their winning attacks.
Raspberry Pi Pico workshops in Kigali, Rwanda: Over the course of two days in July, we helped run a free workshop teaching participants how to solve real-world challenges using sensors, networking, and cloud technology on our Raspberry Pi Pico microcontrollers.
Raspberry Pi Pop-Up Store in Bristol, UK: Back home in the UK, we brought the Raspberry Pi Store to Cribbs Causeway, Bristol, and helped local enthusiasts try and buy a range of Raspberry Pi products, books, and merch.
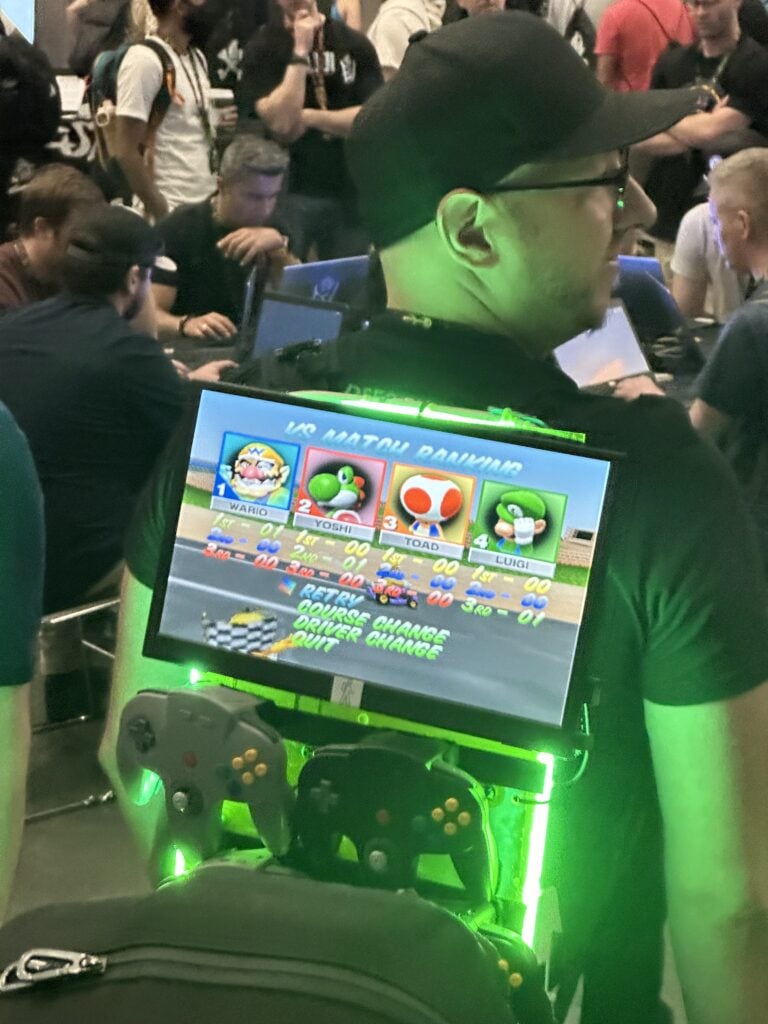
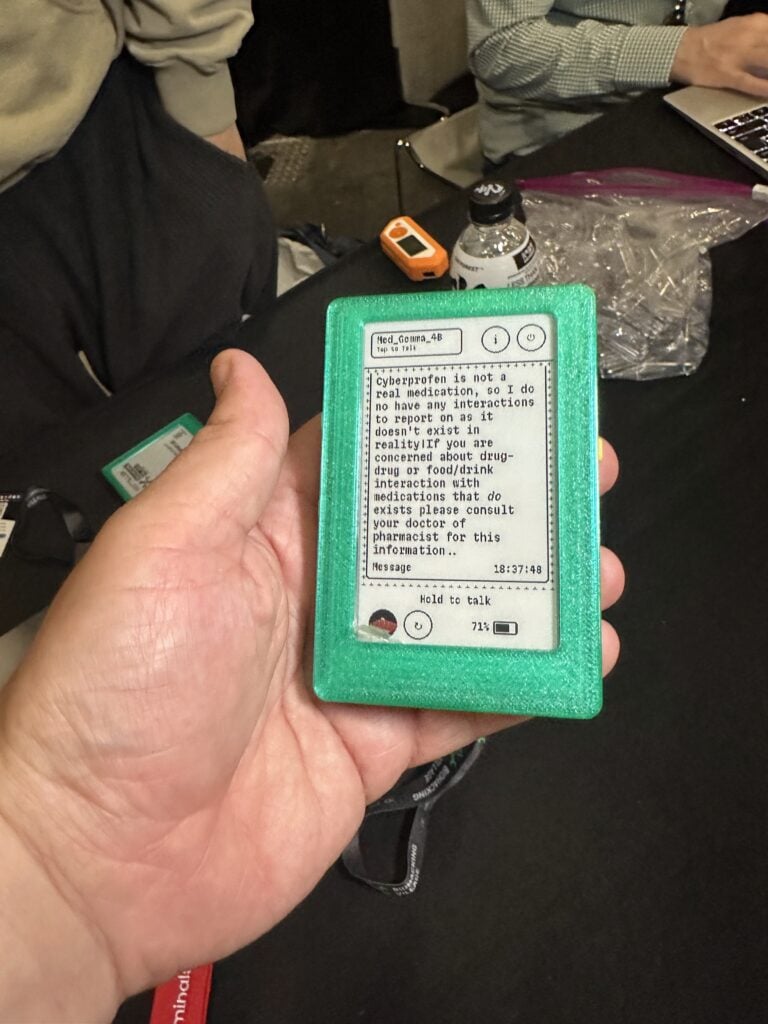
Our RP2350 chip powered the Biohacking Village badges (right) at DEFCON this year
All the community-led Raspberry Jams also kept going over the summer, and we enjoyed staying up to date with their happenings across socials.
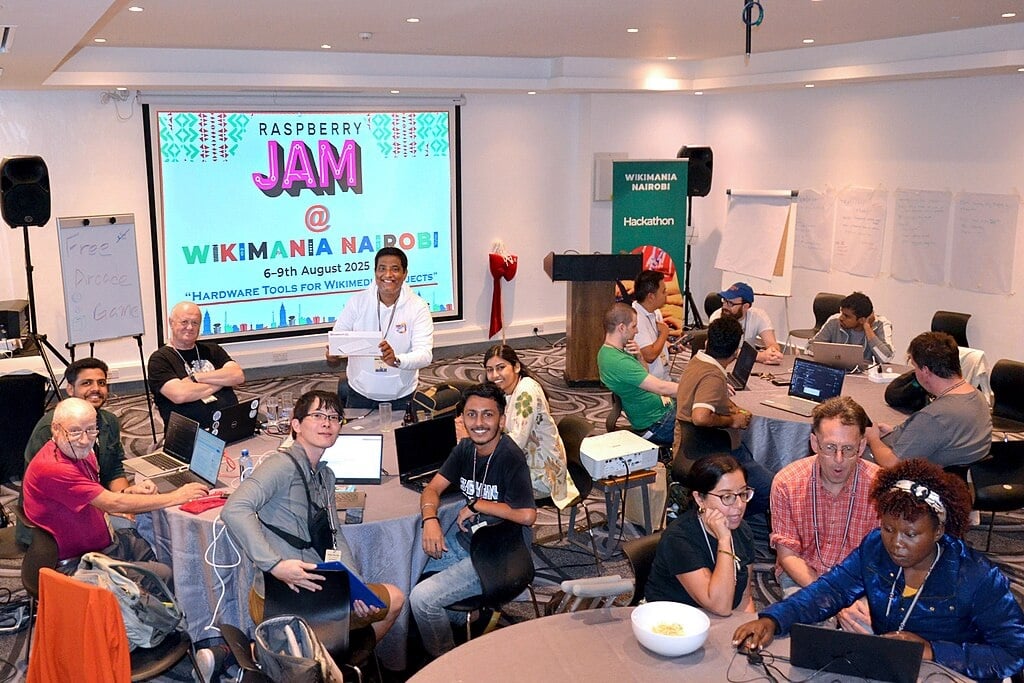
The first ever Raspberry JAM to be held at Wikimania 2025, Nairobi
Autumn adventures ahead
But the fun doesn’t stop there — autumn promises even more Raspberry Pi goodness at a conference space near you. Here’s a list of the official Raspberry Pi events coming up:
September:
FIEE 2025: São Paulo, Brazil (9–12 September)
SIDO 2025: Lyon, France (17–18 September)
Electronica India 2025: Bangalore, India (17–19 September)
CIIF 2025: Shanghai, China (23–27 September)
Microelectronics UK: London, United Kingdom (24–25 September)
Maker Faire Bay Area: Mare Island, California, USA (26–28 September)
Drone X 2025: London, United Kingdom (30 September–1 October)
October:
Maker Faire Rome: Rome, Italy (17–19 October)
November:
Maker Faire Shenzhen: Nanshan, Shenzhen, China (15–16 November)
Our Raspberry Pi Pico workshops in Kigali, Rwanda
Beyond the events in the UK, we’ll be crossing various ponds in the coming months to meet enthusiasts in Brazil, France, India, China, Italy, and the US. Whether through trade shows, expos, or Maker Faires, we’re excited to be bringing Raspberry Pi to you! Visit our official events page for more details or to arrange a meeting with the team.
How much data can a terabyte store? TL;DR: Loads. For example, you can save a quarter of a million photos, 200,000 songs (my first MP3 player held just 40… it got awfully repetitive), 250 HD movies, or 20–30 AAA games.
To facilitate your consumption of the aforementioned media, we decided you should have the option to purchase a 1TB capacity SSD from us.
A Raspberry Pi SSD unlocks outstanding performance for I/O intensive applications on Raspberry Pi 5 and other devices, including super-fast startup when booting from SSD. It is a reliable, responsive, and high-performance PCIe Gen 3-compliant SSD capable of fast data transfer, and is available in 256GB, 512GB, or 1TB capacities.
You’ll need a Raspberry Pi 5–compatible M.2 adapter, such as the Raspberry Pi M.2 HAT+, to use our SSDs.
Other fun peripherals
While we’re here, we thought it might be a fun idea to remind you of some of the other peripherals we manufactured for your pleasure.
Raspberry Pi Bumper
For a minimalistic yet effective layer of protection, the flexible silicone Raspberry Pi Bumper snaps onto the bottom and edges of your Raspberry Pi 5. We magicked this product up after our engineers kept trying to make their own versions of a half-case, so they could fiddle with their Raspberry Pi boards while keeping them safe from their desks at the same time.
It costs a whole $3 and might be just the solution you’re looking for.
Raspberry Pi SD Cards
As well as SSDs, we also offer our official microSD cards. They are available in 32GB, 64GB, 128GB, and 256GB capacities, and come optionally pre-loaded with Raspberry Pi OS. Any one of these will optimise data transfer speeds on your Raspberry Pi computer and help ensure you get the smoothest user experience from your device.
Raspberry Pi Active Cooler
If you’re putting your Raspberry Pi 5 through its paces, you might want to chill it out with a Raspberry Pi Active Cooler. It’s a dedicated clip-on cooling solution for Raspberry Pi 5, combining an aluminium heatsink with a temperature-controlled blower fan to keep your Raspberry Pi 5 at a comfortable operating temperature, even under heavy loads.
Your turn
What’s your favourite lesser-known Raspberry Pi product? Let us know in the comments. It doesn’t have to be an official one — we love seeing all the weird and wonderful things our Approved Resellers think up.
Like many of my colleagues here at Raspberry Pi, I am a child of the 1980s home computer revolution. My BBC Micro, with its 32K of RAM and BASIC interpreter, provided me with my first exposure to computer programming, and to engineering more broadly: the idea that a large problem could be decomposed into small problems; that those problems could be solved; and that the small solutions could be composed to solve the original problem.
But long before I bought my own BBC Micro, and even before I typed a first tentative two-line BASIC program into the shared BBC Micro in the corner of my school classroom, I’d already had some experience with computer programming. Many of you will remember the series of illustrated computer books produced by Usborne in the 1980s. In one of these I found instructions for building a limerick generator: a cardboard spinner to generate random numbers, a set of lookup tables, a short program to be copied onto a long strip of paper, and a cardboard slider to mark the current position in the program. I remember offering to build copies for my classmates: “Give me a pound and I’ll give you a computer!”
Hands-on learning
So, when I first met Hannah Hagon at the Cambridge Raspberry Pi Jam in 2023, her Unplugged Tots material — offline educational activities that set the stage for future programming — seemed very natural to me.
As I watched my own children, Aphra and Kit, working their way through the activities with Hannah’s girls, Charlotte and Emily, I recognised a dawning understanding of the same basic principles — sequencing, iteration, conditionals — that I had learnt from that Usborne book four decades earlier. And when the opportunity arose for Raspberry Pi Press to publish the first Unplugged Tots book, I jumped at it.
Screen-free activities
The activities in Unplugged Tots form part of a tradition that stretches back, past the home computer revolution, to a time when computers were so rare, and computing time so expensive, that even university students and professional engineers were encouraged to mentally simulate their programs offline before submitting them to be run as batch jobs. They remain highly relevant, even in an era of AI-assisted vibe coding, and of $4 Raspberry Pi Pico computers running high-level languages like MicroPython.
As I know from personal experience, they provide children with a lower first rung on the ladder, reducing the conceptual leap when they encounter “real” programming environments. They offer accessible, easy-to-deploy experiences that teachers, parents, and club leaders can leverage to introduce large numbers of children to programming, without the hassle of setting up and tearing down rooms full of computers. And, perhaps most importantly, because they exist in the physical world, these experiences don’t need to compete for a child’s attention on a minute-by-minute basis with the myriad entertainment activities available in the virtual one.
Raspberry Pi Press has always provided us with new ways to pursue the Raspberry Pi mission, beyond the provision of affordable hardware and software. Hannah, Jack, Mark, Sam, Sarah, Brian and I have had a blast bringing this first Unplugged Tots book to life. We hope you’ll have as much fun with these activities as we have, and that your children will look back on this book with the same affection that we have for the computer books of our childhoods.
Benignly tracking someone’s activity levels using radar and a Raspberry Pi could give families peace of mind.This #MakerMonday, we’re sharing a project from Raspberry Pi Official Magazine with heart: the Supersense SenS2 dementia aid.
Many readers will recognise the dilemma of an ageing parent or family member who is determined to stay in their own home, maintain their independence, and not be a burden to others. Cost, convenience, and quality of life for them and those providing care is a difficult balance all round. Cambridge startup Supersense’s Matt Ash and James Brown have direct experience with this precise scenario and used their knowledge to create a Raspberry Pi–controlled hub to support the families of those living with dementia.
SenS2 uses radar to check unobtrusively for routine activity. It features several different sensors and uses machine learning to plot the person’s usual routines and flag up deviations that may signal something’s wrong. Crucially, it also sends daily messages to confirm that all seems well, so contact from the service becomes second nature.
The Supersense SenS2 hub uses radar to detect a dementia patient’s movements at home; sensors on Raspberry Pi 4 monitor light, heat, and humidity
Sensitive subject
Medical experts and families recognise that patients with dementia should ideally continue to live in their own homes and be in familiar environments for as long as possible. Three quarters of GPs report that those who do tend to lead longer, more enriched lives, prompting calls for technology to identify issues that might crop up.
The Supersense team’s own experiences showed that family members living some distance away often understand the problems their loved ones face, but need to be forewarned of emerging issues. “With dementia, it’s difficult for people to explain the problems they are having day to day, because they either forget or they just can’t find the words,” suggests Matt, recalling his and his siblings’ experience of caring for their mum.
Opening the case reveals the SenS2’s internal electronics, including a Raspberry Pi 4
“It wasn’t quite clear what was wrong if she was sounding anxious, because she just couldn’t explain herself.” Visiting could often involve a kind of detective work to discern the underlying problem, since their mother could not articulate what was wrong. Supersense set about using technology to help families in that situation, “giving family carers a bit more information about how their loved ones are doing when they can’t be there, but also guidance on how their loved one is progressing in terms of their symptoms and what they can do about it.”
Matt observes that “people with dementia struggle with wearable technology”, and with adapting to new technology. This Raspberry Pi 4–based radar hub can recognise movement through two or three walls of a home and monitors temperature levels to ascertain whether the heating has come on. “It just sits in the living room and quietly collects information about their loved ones and their pattern of life. Are they up and about in the morning, have they had a bad night’s sleep?”
Less intrusion
Using radar is considered to be less intrusive than having cameras or motion sensors placed strategically around the home. “The person moving just looks like a block moving around,” says Matt. “You can’t see what they’re wearing or what they’re watching on TV. It really respects the privacy of the individual.” SenS2 does not directly act as a fall detection device, but it will send out a WhatsApp to the family if movement is not detected for a while or is out of character.
Logging into the Supersense dashboard shows useful activity trends over weeks and months
James says feedback from families affected by dementia has shaped both what the system does and how it works, “from avoiding the need for wearables or cameras to testing ideas quickly in real homes”. Building SenS2 around Raspberry Pi 4 has been “a big help in making that possible, [letting] us move fast, learn from real situations, and build something that can flex as we go”, and that provides “simple, helpful updates for families”.
Reassuring presence
Supersense builds a model of the individual’s pattern of life and how it’s changing over time. For those who like graphs and data, there’s a dashboard showing longer-term trends that reveal changing daily patterns such as spending less time in the kitchen or sleeping more this month than last. Increased restlessness at night could prompt the family to take the individual out more during the day to help regulate diurnal patterns.
Families on the pilot scheme found that the SenS2 hub was a reassuring presence
The simplicity of using a family and carer WhatsApp chat for updates, rather than yet another app, has proven popular with early testers who were given demos in carer cafes. “You don’t need the latest smartphone. You don’t need to download anything. You can just use WhatsApp and use natural language.” Most people just want a thumbs-up emoji to say everything’s normal.
Quick FACTS
WhatsApp messages and emails provide daily updates — most reassure family members that the dementia patient is up and about as usual
Trends over time identify longer sleep patterns or reduced activity (changing patterns may suggest the disease is progressing or more help is needed)
Supersense intends to add extra sensors based on trial feedback
Elvis Andrés Ayala, an electronics engineer passionate about developing accessible technology for space exploration, wrote to us to share the progress of their project Trinidad, which has been made possible thanks to Raspberry Pi hardware.
Version one of Trinidad
Extreme conditions
Last year, Elvis had the opportunity to participate in a NASA scientific mission, EMIDSS (Experimental Module for the Iterative Design of Satellite Subsystems), during which he launched the first version of the Trinidad system: an image acquisition module based on a Raspberry Pi Zero 2 W and a Raspberry Pi Camera Module 3, housed in a 3D-printed enclosure. This device was able to reach an average altitude of 42 km in the stratosphere, where it successfully captured images (example below) under extreme conditions, including temperatures below -50 °C.
Sensory upgrade
This year, Elvis was able to develop Trinidad Version 2 — an improved system that integrates new sensors and enhanced capabilities. As well as capturing images, version 2 can also collect relevant environmental data from the stratosphere. This updated version is scheduled to launch, like the first, aboard a stratospheric balloon from NASA’s base in Fort Sumner, New Mexico.
Trinidad Version 2, with added sensors
Affordable aerospace systems
Elvis’ goal was to demonstrate that it’s possible to create functional, low-cost aerospace systems using commercially available components. It is his hope that systems like Trinidad can become powerful educational tools for universities and schools, opening the door to new opportunities for students and enthusiasts who dream of reaching space.
Absolutely cracking shot of the stratospheric balloon on re-entry
Our favourite thing about reading the brand-new issue of Raspberry Pi Official Magazine, out now, was learning that a special 30th-anniversary edition of DOOM has been released for SNES, and that an RP2350 microcontroller chip runs the custom hardware you play it on.
Did you know that you can still technically make games for old consoles? It’s been a popular thing to do for special editions and anniversaries (promo material for the film Sonic the Hedgehog 3 was even distributed on working Mega Drive / Genesis cartridges). Now it’s the turn of DOOM on SNES, celebrating its 30th anniversary with an updated re-release.
The RP2350 chip replaces — and upgrades — a Super FX chip; it slots into the original SNES hardware and runs without any modding to the console
“We’ve updated and expanded the game with tons of new features, including 14 new levels, improved frame rate and performance, added circle-strafing, and even vibration effects with our new rumble game controller.” Randal Linden of Limited Run Games (LRG) tells us. “The final project uses custom software, tools, firmware, and hardware to create a unique cartridge that works in any Super Nintendo!”
That custom hardware? An RP2350 microcontroller chip, of course.
Super effects
DOOM on SNES was one of the few games to make use of the Super FX chip created for Star Fox (named Starwing in the UK, for weird legal reasons). This resulted in an extra hurdle in creating new, compatible carts for 30+-year-old consoles.
“[The Super FX chip] is a high-speed RISC co-processor that can be used to accelerate and optimise game logic, math, and graphics rendering,” Randal tells us. He would know: he was basically a one-man team behind the original port to SNES. “When we started working on DOOM SNES 2025, our initial focus was on FPGAs to simulate the Super FX chip, but the RP2350 offered advantages that were impossible to resist: first and foremost was the lower cost of the device, both in terms of production but also for development. Next, the numerous GPIOs and efficient PIO programs enabled us to interface the various memory devices used by the cartridge hardware with the Super NES easily and effectively. Finally, the Raspberry Pi SDK is open source and fully documented, which made our bring-up process nice and easy.”
The proof of concept was a little system nicknamed Imp, one of the enemies in DOOM
To prove the concept would work, LRG put together a mini console that they referred to as Imp, using off-the-shelf parts and a Raspberry Pi Pico 2.
“We were able to prove our new ‘FX 3’ system was rendering and playing the game properly, even though at this point we weren’t connected to a SNES. We could also run lots of metrics and debugging quickly to get the FX 3 core stable,” Randal mentions. The original SNES port used a slightly upgraded version of the Super FX chip created after Star Fox, colloquially referred to as Super FX 2, hence the FX 3 moniker. “We then designed our initial SNES PCB designs around socketing a Pimoroni PGA2350; it was a great way to prove the concept was then able to run on a SNES itself.”
Rip and tear
According to Randal, RP2350 has three main functions in the final product: it acts as a high-speed interface to multiple memory devices, simulates the Super FX chip, and performs ‘graphics format conversion operations’.
“We have a pre-production tool which takes the Super NES program executable code, processes it, and generates C source code which is then compiled using the Raspberry Pi Pico SDK,” Randal explains. “The resulting program includes logic which sets up PIO and DMA chains to respond to memory accesses in parallel with the Super FX simulation. After the frame buffer is generated by the Super FX simulation, the graphics conversion logic processes the image from its chunky graphics format into the required Super NES planar format.”
The packaging apes the Super Nintendo game boxes of the time
Creating the game like this also allowed them to add more content that wouldn’t have fit on the original cart — supposedly only 16 bytes were free when it was released.
Playing with super power
“DOOM is widely recognised as one of the greatest games of all time, but when it first came out, the best (and only) way to play the game was using an expensive PC,” Randal says. “At the time, many people didn’t have a high-end computer, but they did have a Super Nintendo, so it was for them that I developed DOOM for SNES.”
It is much more powerful than any game released during the original run of the SNES
The game itself will be out and ready to slam into your slightly yellowed Super Nintendo later this year. The moons of Mars are waiting.
Raspberry Pi Official Magazine #157 out NOW!
You can grab the latest issue right now from Tesco, Sainsbury’s, Asda, WHSmith, and other newsagents, including the Raspberry Pi Store in Cambridge. It’s also available from our online store, which ships around the world. And you can get a digital version via our app on Android or iOS.
You can also subscribe to the print version of our magazine. Not only do we deliver worldwide, but people who sign up to the six- or twelve-month print subscription get a FREE Raspberry Pi Pico 2 W!
We have one of those fancy Bank Holiday Monday things next week, meaning we won’t see you for #MakerMonday, but didn’t want you to miss out on this fantastic build featured in the latest issue of Raspberry Pi Official Magazine. We love a nostalgia-driven project at the best of times, and this maker’s build video got us directly in the feels. Make sure to give it a watch below.
“Ever since I was a kid, I’ve loved robots,” begins Exercising Ingenuity in the build video that accompanies this astonishing creation. It’s heavily inspired by Thomas Burns’s Alexatron robot, which also used 3D-printed animatronic eyes with a sound-wave displayed on a CRT screen representing the robot’s mouth. Yes, this awesome-looking machine is a front end to the power-hungry, occasionally useful AI service, ChatGPT.
The maker tried to reuse as many parts as possible from the original TV, including the audio speaker
The Tommy-B-003 also uses a CRT, this time taken from a Panasonic TR-003C portable television with a 3-inch pop-up screen. CRTs can store charge for a long, long time, so the creator of this robot had to follow all the safety guidance, making sure to discharge it properly by grounding the high-voltage anode.
The maker followed Will Cogley’s guide to 3D printing, painting, and casting in epoxy resin to get a realistic (some would say uncanny) pair of eyes.
The body is made out of laser-cut plywood, upholstered with canvas and black vinyl to recreate the look of a vintage piece of electronics, such as an oscilloscope from the 1950s.
One of the loveliest build videos we’ve ever seen
A Raspberry Pi 4 Model B connects to ChatGPT, runs the servos for the eyes, and accepts input from the Useful Sensors Person Sensor, which performs facial recognition. The electronics run off a 12V drill battery, with buck converters to adjust that to the voltages required by each of the systems in the robot.
Warning!
Cathode ray tube
Be careful with projects involving old televisions and CRT equipment. Opening up a CRT can be dangerous, risking electric shock even if the TV is not plugged in.
Raspberry Pi Official Magazine #156 out NOW!
You can grab the latest issue right now from Tesco, Sainsbury’s, Asda, WHSmith, and other newsagents, including the Raspberry Pi Store in Cambridge. It’s also available from our online store, which ships around the world. And you can get a digital version via our app on Android or iOS.
You can also subscribe to the print version of our magazine. Not only do we deliver worldwide, but people who sign up to the six- or twelve-month print subscription get a FREE Raspberry Pi Pico 2 W!
Here is a taste of the latest book published by Raspberry Pi Press.The Computers that Made the Worldby Tim Danton tells the story of the birth of the technological world we now live in. It chronicles how computers reshaped World War II through the origins of 12 influential machines built between 1939 and 1950. In this first chapter, we learn about the Analytical Engine designed by Charles Babbage, whose name lives on in our official mascot, Babbage Bear. If you’d like to read the book in its entirety, you can order it online from Raspberry Pi Press.
Groucho Marx was very nearly right when he said there are two certainties in life. There are indeed two, but they aren’t death and taxes: they’re that humans have an innate need to count and that we all make mistakes.
The trouble is that mistakes cost lives. Anyone working in the fields of engineering or navigation in the 1800s relied on printed mathematical tables that contained pre-calculated answers to equations. This meant they didn’t need to work out the results by hand, and theoretically the answers would be far more accurate than someone attempting to work them out on demand. Theoretically: in reality, the tables contained errors almost impossible to spot that could cost lives and livelihoods.
Charles Babbage, 1860 (Image: Public Domain)
Not that Charles Babbage needed to worry about putting his own life at risk or poverty. With a generous inheritance and formidable intellect, he was an enfant terrible of the academic world, scorned by some, admired by others. By the time 1821 rolled around, when he had just turned 30, he had many achievements to his name: co-founder of the Analytical Society to promote continental advances in mathematics in England, Fellow of the Royal Society for his contributions to science and maths, and a founding member of the Royal Astronomical Society.
He and his friend John Herschel had taken on the job of preparing a set of star tables for the new society the previous year. “My friend Herschel, calling upon me, brought with him the calculations of the (human) computers, and we commenced the tedious process of verification,” Babbage is quoted as saying in one account. “After a time many discrepancies occurred, and at one point these discordances were so numerous that I exclaimed ‘I wish to God these calculations had been executed by steam’.”
From this exclamation – so the story goes – came the idea of creating a machine that could do exactly that. Specifically, to create complex logarithm ‘star tables’ to aid navigation.
He called the machine the Difference Engine because, rather than attempt to perform a complex equation for each value, the machine would build upon the previous result and add the difference. It was an idea that Babbage borrowed from a visit to Paris in 1819, where they were remaking their tables on an unprecedented scale after Napoleon decreed that France should move from imperial measurements (pounds and ounces, inches and feet) to metric.
By creating a machine to perform this work, Babbage would also bypass the errors inevitably made when transcribing results. Now all he had to do was design and build it. The design was the far simpler affair of the two, with Babbage designing a complex web of pinions, gears, and cogged wheels that would complete the task. His paper on the subject, ‘On the Theoretical Principles of the Machinery for Calculating Tables’, won the Royal Society’s first ever Gold Medal – its highest accolade.
He had the design, he had the backing of the Royal Society. Now all Babbage needed was the money. Here, he turned to the British government, who awarded him £1500 (which conveniently translates into roughly £150,000 today) towards the project. In tandem with so many stories of computers in the rest of this book, that rough costing turned out to be woefully low.
The Difference Engine was a precision instrument even by today’s standards, and Babbage had high ambitions: to calculate results up to 20 digits rather than the then standard six digits, and there needed to be somewhere to store calculations. A basic mechanical calculator had been invented before, but this was several orders of magnitude more complicated. Take its size alone: the Difference Engine would be big enough to fill a room.
Despite the work of one of Britain’s most talented machinists, Joseph Clement, the challenge proved too much. After ten years of effort and with nothing to show for their investment other than a collection of completed parts and pleas for more money, the government said enough: no more funds. Clement also walked away from the project, taking Babbage’s plans with him as hostage until Babbage gave him money he was still owed.
This enforced break from the project may have been a piece of great fortune. It gave Babbage time and space away from the Difference Engine, and when he was eventually reunited with his plans – having finally agreed a settlement with Clement after 16 months – and started looking through them, he came up with an even better idea.
The idea would become known as the Analytical Engine, and it was a piece of thinking a century before its time. This wouldn’t be a single-purpose machine like the Difference Engine. You could change its function – reprogram it, in modern parlance – to perform any task you liked.
To describe the Analytical Engine’s main elements is to echo what makes up a modern-day computer. Babbage conceived of four key components: a mill, store, reader, and printer. The mill was where calculations took place, like today’s CPU or the accumulators in early digital computers. The store is where information would be held before it was processed. And the reader and printer hardly need any introduction, being equivalent to the input and output devices that we are all accustomed to.
Again, Babbage didn’t hold back when it came to ambition: his store would hold a thousand numbers up to 50 digits long. To put that into perspective, even Alan Turing wasn’t that optimistic when setting out his plans for the ACE. Babbage would also create an automatic printer to avoid any possibility of human mistakes. For a reader, he would use punched cards, building upon technology already created by Joseph-Marie Jacquard for the loom. But rather than use these to weave multicoloured patterns on fabric, they would hold instructions and data.
Here, we shall introduce Ada Lovelace (née Augusta Ada Byron) for the first time. Famously, she was the daughter of Lord Byron, poet and lothario. Ada’s mother, Annabella Milbanke Byron, legally separated from her husband when Ada was only two months old over concerns about Byron’s mental health, his relationship with his half-sister, and rumours over his sexuality; Byron left the country, never to return and never to see his daughter again.
Annabella was a leading advocate for education, eventually establishing a school in London for the underprivileged, and she gave her intelligent daughter every chance to thrive through private tutors. Tutors who she largely outgrew, eventually resorting to teaching herself through books.
Ada married Baron William King in July 1835 at the age of 19, becoming Countess of Lovelace three years later when he was created an Earl. By this point, she had already met Babbage and become intrigued by his machines. The two became firm friends, and it was Babbage she turned to when seeking guidance for a tutor who could help guide her. He suggested Augustus De Morgan, a mathematician and logician best known for De Morgan’s laws, who would also have given her insights into the workings of Babbage’s Analytical Engine.
Despite being a prolific writer, Babbage never set down his own description of the Analytical Engine on paper. The first printed account came in 1842, when Italian mathematician Luigi Menabrea published ‘Notions sur la machine analytique de M. Charles Babbage’ in a Swiss journal. Menabrea had attended a presentation by Babbage in Turin, introducing the assembled scientists to radical concepts such as conditional branching, and it took Menabrea almost two years to complete his 23-page article.
Ada took on the task of not only translating this article into English but adding her own copious notes. The end result was published in London a year later under the title ‘Sketch of the Analytical Engine invented by Charles Babbage Esq.’ with an additional 41 pages simply titled ‘Notes by the translator’. The only hint of the translator’s identity being an ‘A.L.L.’ at the end; a typesetter’s error, as those are not Augusta Ada Lovelace’s initials.
There is one particular section that brings the Analytical Engine to life: “We may say most aptly that the Analytical Engine weaves algebraic patterns just as the Jacquard-loom weaves flowers and leaves,” wrote Ada. There is a hint of poetry there, as we might expect from Lord Byron’s daughter, but also the crucial point that Babbage’s invention was far more than an accumulator of numbers.
The translation was collaborative, with much correspondence between Babbage and Lovelace during its creation. Ada’s crowning glory, which earns her the title of ‘world’s first programmer’ in many people’s eyes, is her sequence of mathematical operations that could be performed on the Analytical Engine to calculate Bernoulli numbers. Even today, it resembles code.
She also looked beyond mathematics: “Suppose, for instance, that the fundamental relations of pitched sounds in the science of harmony and of musical composition were susceptible of such expression and adaptations,” Ada wrote, “the engine might compose elaborate and scientific pieces of music of any degree of complexity or extent.” Tragically, this was to be her last big contribution: she died at the age of 36, probably from cancer; she was buried next to Lord Byron, at her request.
Despite all the positive coverage for the Analytical Engine, it was destined to never be built. The machine was even more complicated than the Difference Engine and the British government simply wasn’t interested in spending any more money on Babbage’s hare-brained schemes.
Could it have been built using technology from that era? In his 22-page article that explores the Analytical Engine in great detail, Allan Bromley concluded that the answer was yes. “Analyses such as these [on machining accuracy and weights] lead me to believe that the Analytical Engine could have been built with the technology at Babbage’s disposal, although the work would undoubtedly have been demanding and expensive,” he wrote.
What’s certainly true is that things were much easier for Howard Aiken, creator of the Harvard Mark I, who once joked that, “if Babbage had lived 75 years later I would have been out of a job.” It’s hard to argue with that conclusion (although Babbage may have got distracted by a new invention instead). After all, electricity is a much friendlier supplier of power than steam, and despite Bromley’s optimism it’s worth noting that even the failed attempt at creating the Difference Engine pushed the boundaries of machining at the time.
Babbage eventually gave up on the idea of the Analytical Engine, deciding instead to design a simplified version of the Difference Engine. Again, he never made this machine, but a real-size replica of the Difference Engine No. 2 based on Babbage’s designs can be found on display at the Science Museum, London. You’ll also find another Difference Engine there, but this one was created in Babbage’s lifetime and based on his first design. It was made by a Swedish inventor and his son: Georg and Edvard Scheutz. Babbage even saw his creation when they brought it to London, where it went on display at the Royal Society. It was used to generate and print mathematical tables, but sadly proved temperamental.
The tragic side effect on the Scheutz family and Babbage was that building mathematical engines brought neither happiness nor wealth. The Swedish pair would die bankrupt, while Babbage grew gradually more bitter about the government’s failure to back his machines and his failure to bring his inventions to life. Although – and those of a squeamish nature should look away now – Michael Williams, editor-in-chief of the IEEE Annals of the History of Computing, gives context to Babbage’s reported irascible nature in later life by the string of medical conditions he was suffering from: “Who would not be ‘crusty’ with kidneys and urinary tracts and arteries such as these?” Williams wrote.
Nor should we simply write off Charles Babbage as simply a man before his time. He achieved incredible things during his life, with accomplishments covering everything from the invention of the ophthalmoscope to a ‘black box’ to help detect the reason for train accidents to proposing a scientific method for using ring dating to determine the age of trees.
There is one other factor to consider, one that is driven home by the stories of the computers elsewhere in this book. Ultimately, you can argue, it wasn’t the lack of technology that halted the creation of the Analytical Engine. You also need a driving force. Money, almost without limit. These conditions are rarely found in peacetime: it took war to drive the development of the ENIAC, and Colossus, and without this how long might we have had to wait for truly electronic computers?
The Computers that Made the World on sale now!
The story of computing in World War II takes us through Germany, the UK, and the US, before covering the explosive post-war years when anything seemed possible.
Discover the fascinating stories behind the Manchester Baby, EDSAC, EDVAC, UNIVAC, Princeton IAS, and Alan Turing’s Pilot ACE and the birth of artificial intelligence. This new title is now available at our online store — and in the offline store — for £19.99. You can also find it on Amazon UK or Amazon US. In The Computers that Made the World, you’ll not only learn about the computers that shaped the world we live in, but what happened behind the scenes.
Last year we launched the refreshed 7″ Raspberry Pi Touch Display 2 as a successor to our original 2015 Touch Display, offering a simplified form factor and higher 720×1280-pixel resolution at the same $60 price point. Today we’re excited to announce a new 5″ variant, available to buy now from Raspberry Pi Approved Resellers. It shares the same resolution and easy setup as the 7″ variant, at the low price of $40.
Key features
Except for its size, the specification of the new 5″ variant is almost identical to that of its bigger sibling:
All necessary cables, connectors, and mounting hardware included
A plug-and-play multi-touch display
What makes Raspberry Pi Touch Display 2 particularly appealing is its seamless integration with the rest of the Raspberry Pi product ecosystem.
Its capacitive touch screen works out of the box with full Linux driver support – no manual calibration required, no hunting through device trees, and no wrestling with incompatible touch controllers. Connect it to your Raspberry Pi (our installation guide shows you how, including connecting to the Raspberry Pi’s standard 5V GPIO supply for power), and you have a fully functional multi-touch display that just works. Now you can concentrate on your project instead of hardware hassles.
To illustrate our new 5″ display’s capabilities, I decided to create a simple slideshow application using AI-assisted development. This seemed like a perfect opportunity to explore and demonstrate both the hardware’s multi-touch features and modern development workflows.
Developing code with AI
Not everyone thinks AI is the future of software engineering, but I find it important to understand how technology advances, so this year I’ve been dipping my hand into coding with AI. To give you an idea of how easy this is, I thought I’d share all the prompts I gave to Cursor (using the Claude Sonnet 4 model) to develop a very simple slideshow application for the 5″ variant of Raspberry Pi Touch Display 2.
You can see the prompts I used to drive the model in the italicised text below. After each prompt or set of prompts, I’ve included some notes about why I used them and how effective they were at getting me closer to the result I wanted.
A brief for a touch display slideshow application
I began by giving the AI a high-level, but quite specific, brief:
I would like to create a simple application running on the Raspberry Pi remote device which has a touch panel attached. The application should display images from a local directory as a slideshow. Touching the display should stop the slideshow and allow the user to manipulate the position and be able to zoom in using standard gestures
This gave a working and usable application, but zooming and panning didn’t work. It seemed only to support a single touch. This is because of some of the choices made by the compositor to convert touches into mouse click or doubleclick events (the compositor does this so the touchscreen works with the UI correctly).
Capturing touch events
Two finger zoom doesn’t work, does the application use the multi-touch interface to handle zoom gestures?
The “touches” in the top left are always zero, even though there are multiple cursors on the screen with multiple touches
The raw test is detecting two presses when there is only one
The AI suggested parsing the touch events from the raw input device, but it was incorrectly parsing both the multi-touch events and the mouse events generated by the driver. Once fixed, it was working well, but it wasn’t taking into consideration the display rotation from landscape to portrait.
The display is a portrait display, but it is being rotated. So the coordinates need to be adjusted
You should use kmsprint on a modern device
Both axes are inverted, can you reverse the direction?
That is not working correctly, how about you put some boxes on the screen and I’ll tap them so you can identify the correct mapping
Cursor first of all tried to use xrandr to get the screen resolution, so I had to tell it to use kmsprint instead. Then it got things working, but the orientations of the x and y axes were incorrect. I suggested it create a calibration test application to identify the translation of coordinates.
Translating coordinates
Can you just display one box at a time for me to press so you can confirm the correctness of the raw touch positions for a single touch. Then repeat with two boxes for two finger touch?
That is correct left-right although the box doesn’t go past around 700
No that’s still not working. How about you place a box into each corner of the screen one at a time and I’ll click them. From that you should have all the information to translate a single finger touch event
The top right box is not in the top right, it’s closer to middle top… Does your code correctly get the screen size
This was a relatively long trial-and-error process, in which it was important to advise the AI to approach this in the right way. I asked it to put four boxes onto the screen successively and I’d click them, and then from those values the AI should be able to calculate the translation correctly. It also had some trouble with the maximum and minimum widths and heights.
Keeping the AI on task
Great, that works correctly, can you extract the code and make a library from it?
This is an important point: in real software engineering, when we get something like this working it’s important to extract its functionality and create a library for it, so the functionality can be shared with other applications. AI generally doesn’t do this very well and will keep editing a single long piece of code, which can get edited and modified without you asking as it hallucinates random changes for no apparent reason. By extracting the code into a separate library (which has some test functionality), we can make sure the AI is focused on the application.
I think the code is getting confused between panning and zooming the images. It looks like when trying to pan it’s also zooming as well.
The problem is that the zoom is being significantly over estimated, there should be a 1:1 ratio of the size of the zoom to the size of the change in the two touch points
To test the zoom, can you temporarily disable panning so I can just zoom an image
Ok, that is working, but the center of the image is changing with the zoom
The zoom now works correctly, can you re-enable the panning but track both pan and zoom at the same time.
The problem here is that the zoom was being altered for every touch event received, so it wasn’t a linear pinch or zoom. The AI worked out what the problem was independently of my input – I just made sure it was working on one thing at a time.
Testing zoom in the slideshow application
Tidying up
Please remove any reference to key processing or mouse processing. This is only touch controlled.
Please remove any debug or logging print calls
These are final clean-up steps. I went through the code it had generated to see if there was a lot of cruft that wasn’t needed.
Running the touchscreen slideshow code yourself
If you’d like to try running the code yourself, or if you’d like to reuse and improve the multi-touch library, you can do the following:
git clone https://github.com/ghollingworth/slideshow
cd slideshow
./run.sh
With our new 5″ Touch Display and some AI-generated code, you, like Gordon, can enjoy a compact slideshow of your gardening successes/culinary threats
Coding with AI: Advantages, limitations
Here, it’s taken me just a couple of hours to generate an application that I couldn’t otherwise have produced nearly as quickly. However, I still don’t know how the application is architected, if I wanted to add some functionality I’m not sure I’d know where to start, and I’m not convinced the application is complete or bug-free!
For some applications, using AI to generate code is really useful and can speed up software development significantly; writing test applications or development systems are two examples of where it can be very helpful. But it’s critical to be aware of the limitations of this approach. At Raspberry Pi we’re taking a strictly targeted and heavily supervised approach, using these new tools only on test software and build scripts, and reviewing their output very carefully.
Build cool stuff with the new 5″ Raspberry Pi Touch Display 2
I hope my quick demo has given you an idea of how easy it can be to develop interactive applications with our multi-touch displays. Touch Display 2 offers a straightforward way to integrate a high-quality user interface into countless applications, whether those are personal builds, research projects, or commercial solutions, and our new 5″ variant provides an even more compact option if you’re targeting the smallest form factors.
Both 5″ and 7″ variants of Raspberry Pi Touch Display 2 are available to buy now from our worldwide network of Approved Resellers. As ever, we’ll enjoy seeing what you do with it.
Did you know that when you download and flash one of our Raspberry Pi OS Lite images, you’re largely flashing… nothing? Looking at our latest 64-bit lite image from 13 May, it’s supposedly 2,632 MiB decompressed, yet for some reason it occupies only 1,643 MiB of disk space, just 62.4% of that amount. Why is our disk image one-third empty? And, more importantly, can we use this knowledge to reduce image flash times and SD/eMMC wear?
Raspberry Pi OS Lite image sizes
First of all, what do we mean by ‘empty’? When we decompress our image file, the xz software tool will, by default, detect long sequences of binary zeros and skip over them, creating ‘holes’ in the output file. Many file systems support this sparse feature because, by using it, we both reduce the time spent writing zeroes to disk and economise on disk space. We can use tools like filefrag and binvis.io to discover where these holes are in our decompressed disk image and visualise them:
We have a culprit! The largest hole in our disk image coincides with our FAT32 512 MiB bootfs partition, which is used in early boot to load firmware or the Linux kernel. It’s hardly surprising that this is the case: this 512 MiB partition contains only 65 MiB of files, leaving plenty of extra space for future software updates.
Although we’ve identified the main source of our holes, we still have a problem to solve if we wish to reduce flash and verification times: how do we differentiate between holes that are deliberately zero, and holes that are uninitialised or unused clusters in our bootfs partition?
A solution with bmap
Thankfully, there’s a simple solution. We recently augmented the Raspberry Pi OS image builder, pi-gen, to add bmap support; some readers may have already noticed the .bmap files appearing in the downloads section. The bmap files are a record of which blocks of the image file contain important information that must be flashed and verified, and which blocks can be skipped. Using the information in the .bmap file allows us to keep a record of blocks that are unimportant and can be left uninitialised (white), and blocks that contain useful data (black/blue):
In the case of our 2025-05-13 Lite image, 23.8% (627 MiB) of the blocks can be left uninitialised. Ignoring these results in a significant speed-up when flashing and verifying the image. We can, for instance, use bmaptool to copy our latest 64-bit Lite image to a 32GB Raspberry Pi SD Card:
$ bmaptool copy https://downloads.raspberrypi.org/raspios_lite_arm64/images/raspios_lite_arm64-2025-05-13/2025-05-13-raspios-bookworm-arm64-lite.img.xz /dev/mmcblk0
bmaptool: info: discovered bmap file 'https://downloads.raspberrypi.org/raspios_lite_arm64/images/raspios_lite_arm64-2025-05-13/2025-05-13-raspios-bookworm-arm64-lite.bmap'
bmaptool: info: block map format version 2.0
bmaptool: info: 673792 blocks of size 4096 (2.6 GiB), mapped 513250 blocks (2.0 GiB or 76.2%)
bmaptool: info: copying image '2025-05-13-raspios-bookworm-arm64-lite.img.xz' to block device '/dev/mmcblk0' using bmap file '2025-05-13-raspios-bookworm-arm64-lite.bmap'
# ...
bmaptool: info: copying time: 1m 17.1s, copying speed 26.0 MiB/sec
Whilst bmap is a useful format to preserve hole information and thus enable space-saving sparseness in standard Raspberry Pi OS images, there are differing requirements when mass-provisioning devices with rpi-sb-provisioner.
rpi-sb-provisioner uses Fastboot to flash individual partitions, so we took the opportunity to have a closer look at Android’s sparse image format to see whether greater efficiency could be achieved. Whilst the option to create Android-sparse format ext4 images has been available in verions of mke2fs for many years (via -E android_sparse), no such tool existed for FAT — until now, that is! Introducing…
fat2simg: a new tool to create Android-sparse format FAT32 disk images
Instead of detecting blocks to be discarded by looking at holes in the underlying filesystem (typically with a 4096-byte granularity), fat2simg works by having a deeper understanding of the data it’s reading — in our case, FAT partitions. fat2simg reads the File Allocation Table in the FAT Region to determine which clusters are in use and which may be discarded. Because clusters can be as small as 512 bytes, this approach can offer a greater granularity than relying on filesystem holes. It can also discard deleted files.
By way of a synthetic example, let’s take a look at a 40MiB FAT32 partition image with 512-byte clusters. We create a couple of directories in our FAT image: one containing a 512-byte file of all zeros, and the other containing a 512-byte file of random data.
The first 512 KiB of the image is visualised below for both bmap and Android-sparse formats:
The Android-sparse format not only works on the more granular 512-byte block size, but also tracks which blocks are zero-initialised (shown in blue). This can lead to further performance improvements, as it’s possible to skip zero-initialised blocks on storage that is blank or has already been erased. In this case, there’s 336 KiB of data to write with bmap, but only 4.5 KiB to write with Android-sparse. Additionally, the Android-sparse format both compresses smaller (1.1K vs 7.1K with xz -6) and does so without the additional 2.3K file that bmap needs to track the holes.
Faster secure boot with rpi-sb-provisioner
To achieve secure boot on Raspberry Pi 4- and 5-generation devices, rpi-sb-provisioner also makes use of FAT ramdisks (referred to as boot.img) . We’ve recently updated our tool rpi-make-boot-image to ensure that the smallest possible ramdisk is created in order to speed up boot times. If FAT32 is used, the created images are now cluster-exact. This functionality mirrors that of the mke2fs -d option for ext4, which creates exact-sized disk images for a given set of files.
The various Raspberry Pi tools that I discuss in this post are packaged and available in Raspberry Pi OS repositories. We encourage you to take a look at fat2simg, rpi-make-boot-image and rpi-sb-provisioner on GitHub and explore what might be useful for your applications. We hope these tools will benefit enthusiast and industrial customers alike, and they help achieve feature parity for FAT filesystem use.