Thursday, November 27, 2025

Cloud-init on Raspberry Pi OS

As some of you may have already noticed, the latest Raspberry Pi OS release based on Debian Trixie now includes cloud-init. This marks the beginning of a transition away from our legacy first-boot customisation system based on the firstrun.sh script.

Cloud-init is a cross-platform, distribution-agnostic tool used to automatically configure systems on first boot. (Definition adapted from the official cloud-init documentation.) With it, you can provision your Raspberry Pi images with users, network settings, SSH keys, storage configurations, and much more — all without manually logging in after flashing the image.

How can I use it?

If you’ve downloaded the latest image (released on 2 October 2025), you’ll find that three new files have appeared on the boot partition. This is the FAT32 partition that your computer automatically mounts when you insert a freshly flashed Raspberry Pi OS microSD card. It already contains familiar files like config.txt, but now you’ll also see:

  • meta-data
  • network-config
  • user-data

For most users, meta-data can be left untouched — it simply enables cloud-init to process the other configuration files correctly. Advanced users may use it for more complex provisioning workflows, but it’s safe to ignore in typical setups.

Cloud-init uses YAML for its configuration files. If you’re new to YAML, it’s worth taking a quick look at the official documentation, as indentation and formatting matter. For now, we’ll focus on the two most relevant files: user-data and network-config.

General configuration (user-data)

The user-data file is the central place for your configuration. With the exception of networking, almost everything cloud-init sets up on first boot is controlled from here.

You can use it to create a default user, define your locale, install additional packages, configure SSH access, and much more — all of which is covered in the official cloud-init documentation.

Unlike many other distributions, Raspberry Pi OS includes a few Raspberry Pi–specific extensions for cloud-init configuration. These allow you to enable hardware interfaces such as I2C, SPI, serial, and 1-Wire, and even activate USB gadget mode (rpi-usb-gadget) automatically.

Here’s an example configuration that sets up a user and demonstrates all the currently supported Raspberry Pi–specific options:

#cloud-config

# Set the hostname for this device. This will also update /etc/hosts if manage_etc_hosts is enabled.
hostname: mypi2025
manage_etc_hosts: true

# Set the system timezone
timezone: Europe/London

# Create a default user account and apply permissions
users:
  - name: pi
    groups: users,adm,dialout,audio,netdev,video,plugdev,cdrom,games,input,gpio,spi,i2c,render,sudo
    shell: /bin/bash
    lock_passwd: false  # Set to true to disable password login entirely
    plain_text_password: mysecretpassword123  # Alternatively, use 'passwd:' with a hashed password for better security
    ssh_authorized_keys:
      - ssh-ed25519 mykeystuff  # Replace with your actual SSH public key
    sudo: ALL=(ALL) NOPASSWD:ALL  # Allow passwordless sudo for this user

# Raspberry Pi–specific options (provided by the cc_raspberry_pi module)
rpi:
    spi: true               # Enable SPI interface
    i2c: true               # Enable I2C interface
    serial: true            # Enable serial console and UART interface
    onewire: true           # Enable 1-Wire interface
    enable_usb_gadget: true # Enable USB gadget mode

# Additional Raspberry Pi OS option (not available on generic cloud-init images)
enable_ssh: true  # Enables the SSH server on first boot

# Optional: Disable SSH password authentication if using SSH keys only (recommended for security)
# ssh_pwauth: false

For more details, you can refer to the cc_raspberry_pi module in the official cloud-init documentation.

Note:
The #cloud-config header at the top of the file is mandatory — cloud-init will not process the file correctly without it.

Networking configuration (network-config)

The network-config file defines how your Raspberry Pi should set up its network interfaces on first boot. As the name suggests, this is where you configure Wi-Fi or Ethernet settings before ever powering on the device.

Here’s a simple example that connects your Raspberry Pi to a Wi-Fi network:

network:
  version: 2
  wifis:
    # Make sure the target is NetworkManager which is the default on Raspberry Pi OS
    renderer: NetworkManager
    # The connection name
    wlan0:
      dhcp4: true
      # !VERY IMPORTANT! Change this to the ISO/IEC 3166 country code for the country you want to use this microSD card in.
      regulatory-domain: "GB"
      access-points:
        "My Net-Work":
          password: "mysupersecretpassword"
      # Don’t wait at boot for this connection to connect successfully
      optional: true

When you power on your Raspberry Pi with this microSD card inserted, cloud-init will process this configuration and attempt to connect to the specified network automatically — allowing you to SSH in or continue working without needing to attach a screen or a keyboard.

You can configure far more than just basic Wi-Fi credentials: multiple networks, priority fallback, static IP assignments, VLANs, and more are supported. For a full reference, see the official cloud-init networking documentation.

With the introduction of cloud-init, Raspberry Pi OS also includes Netplan, a unified abstraction layer for network configuration used by several modern Linux distributions.

More about Netplan

Netplan is now the primary source of truth for networking on Raspberry Pi OS. It uses its own YAML-based configuration format and can render network settings for both systemd-networkd and NetworkManager, depending on which renderer you choose. The major advantage of this approach is portability — a Netplan configuration can be reused across any Linux distribution that supports it, regardless of whether it uses NetworkManager or networkd underneath.

To use Netplan directly, place your configuration files in /etc/netplan/ — this is also where cloud-init stores your generated network configuration from network-config without modification. From there, you can generate the active configuration using:

sudo netplan generate

This writes the appropriate configuration files for the selected backend (NetworkManager on Raspberry Pi OS). To activate the configuration, run:

sudo netplan apply

You can still use nmcli as usual to inspect or manage connections. Since many existing tools and scripts rely on nmcli or the NetworkManager D-Bus API, there needs to be a communication layer between Netplan and NetworkManager. Canonical provides three patches that enable this two-way interoperability, allowing NetworkManager to signal configuration changes back to Netplan.

For Raspberry Pi OS, we’ve gone a step further and introduced additional patches to improve this workflow:

  • NetworkManager will only interact with connections that use the netplan- prefix. If you want a new connection to be persisted by Netplan, give it that prefix when creating it, and it will be stored in Netplan’s configuration.
  • When generating profiles, NetworkManager loads all Netplan-defined connections and writes its interpreted runtime configuration back in a format Netplan can understand.
  • During this process, all .yaml and .yml files under /etc/netplan/ are cleared to avoid conflicting definitions across multiple layers.
  • This does not affect manually created connections stored in /etc/NetworkManager/system-connections/.
  • Any profiles generated at runtime by Netplan will appear under /run/NetworkManager/system-connections/ and will also use the netplan- prefix.

This approach ensures consistency between both systems and prevents configuration drift when editing or reloading profiles via NetworkManager tools.

Wrapping up

With cloud-init and Netplan now integrated into Raspberry Pi OS, first-boot provisioning becomes far more powerful, repeatable, and portable across different setups. Whether you’re configuring a single device or preparing dozens of Raspberry Pis for a classroom, a lab, or an IoT deployment, these new tools make it easy to define everything up front — users, networking, interfaces, and more — before the system even powers on.

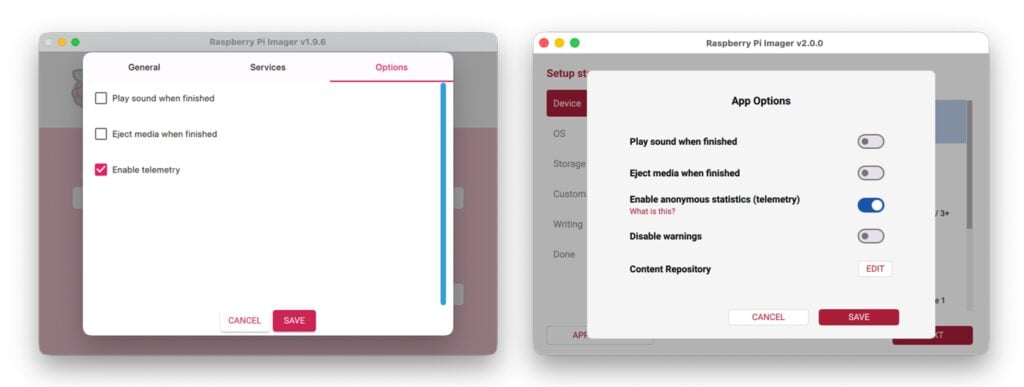
With the release of Raspberry Pi Imager 2.0, cloud-init configuration for Raspberry Pi OS is now generated by default. This makes it easy to further customise your setup after writing the image — simply edit the generated user-data or network-config files on the boot partition. Imager 2.0 also understands the Raspberry Pi–specific rpi: options, so features like SPI or I2C can be enabled directly in the customisation UI.

The legacy method still works, but cloud-init and Netplan open the door to a much more flexible and modern workflow. We’ll continue expanding support for Raspberry Pi–specific cloud-init modules and streamlined provisioning features in future releases.

If you create interesting user-data or network-config templates, or have feedback about the new system, we’d love to hear from you in the forums.


Header image resources: Background designed by Freepik. Icons by ziadarts, Dimas Anom, and Gregor Cresnar via Flaticon.

The post Cloud-init on Raspberry Pi OS appeared first on Raspberry Pi.


from News - Raspberry Pi https://ift.tt/id3reS0
Tuesday, November 25, 2025

The new Raspberry Pi sustainability portal

Raspberry Pi’s commitment extends beyond pioneering technology. As the business grows — and with it, our environmental impact — being transparent about our sustainable practices remains a priority. To support this focus, we’re delighted to introduce the Raspberry Pi sustainability portal.

While it’s currently fairly simple and modest in its content, the portal will gradually become the central repository for all information relating to our sustainability efforts. Its release marks a step forward in making sure that our focus is clear, and that our performance is accessible and easy to understand for everyone who is interested.

What the portal offers today

The portal is designed to serve as an anchor point for our sustainability work. Initially, you’ll find information about our approach to sustainability, as well as links to everything we’ve written about the actions we’re taking and planning. This includes short articles and perspectives from across the business on how we are integrating sustainable thinking into our operations and product design.

A platform for growth and disclosure

Crucially, the portal is not a static document; we plan that the breadth and depth of the information displayed will grow significantly over time. As our initiatives mature and our data collection processes become more sophisticated, we will continually update it with more detailed metrics and targets, providing deeper insight into the impact of our supply chain and operations. We aim to go beyond compliance, and we’re committed to giving clear, factual evidence of our progress towards a more sustainable business model. 

We’re inviting all our partners and customers, and the wider Raspberry Pi community, to have their say as well. By opening up our data, we’re hoping to foster a productive conversation about how Raspberry Pi can continue to innovate responsibly.

The post The new Raspberry Pi sustainability portal appeared first on Raspberry Pi.


from News - Raspberry Pi https://ift.tt/VQpBmdW

Monday, November 24, 2025

A new Raspberry Pi Imager

Today, I’m delighted to introduce Raspberry Pi Imager 2.0: a complete reimagining of the application that’s been brewing in our development pot for the past year. It brings a new wizard interface, the opportunity to pre-configure Raspberry Pi Connect, and improved accessibility for screen readers and other assistive technologies.

Five years ago, we introduced Raspberry Pi Imager in the hope that we could make getting started with Raspberry Pi much simpler than the typical workflow of the time. Since then, we’ve added new features, expanded customisation options, and listened carefully to your feedback. But as the application progressed, so did the strain on the interface. Eventually, the size of the customisation form grew so large that it became unwieldy. Today’s update responds to this challenge.

What’s new? Everything (almost)

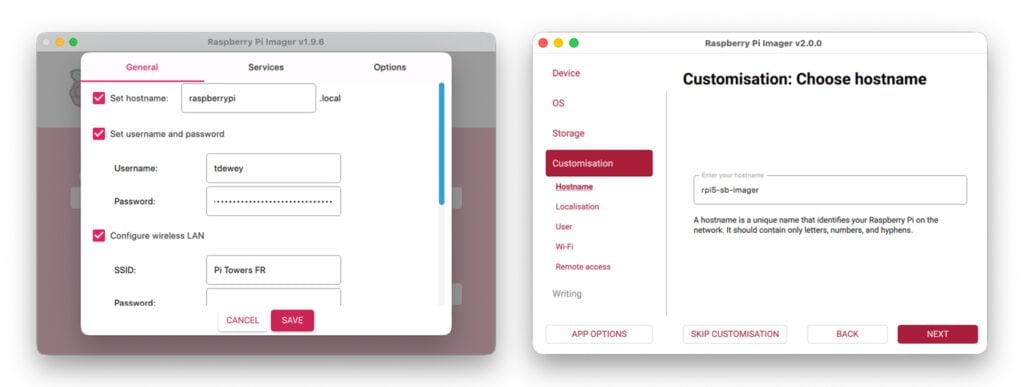
One thing was clear: for Imager 2.0, we needed to make a radical UI change. OS customisation is one of the most popular aspects of Raspberry Pi Imager, but we’d left it hidden in a separate window. Why hide the good stuff?

Separately, we had a list of features we wanted to offer, from improvements in the network installer through to wider accessibility. Following the launch of Raspberry Pi Connect, an obvious hope was to enable Connect sign-in during imaging, rather than after booting.

But what would we choose to do?

Reader, we chose all of the above.

Imagers old and new

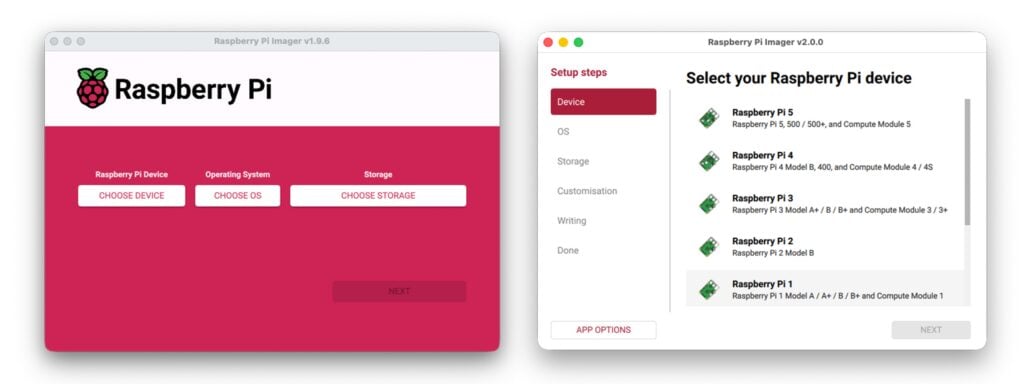
A wizard appears

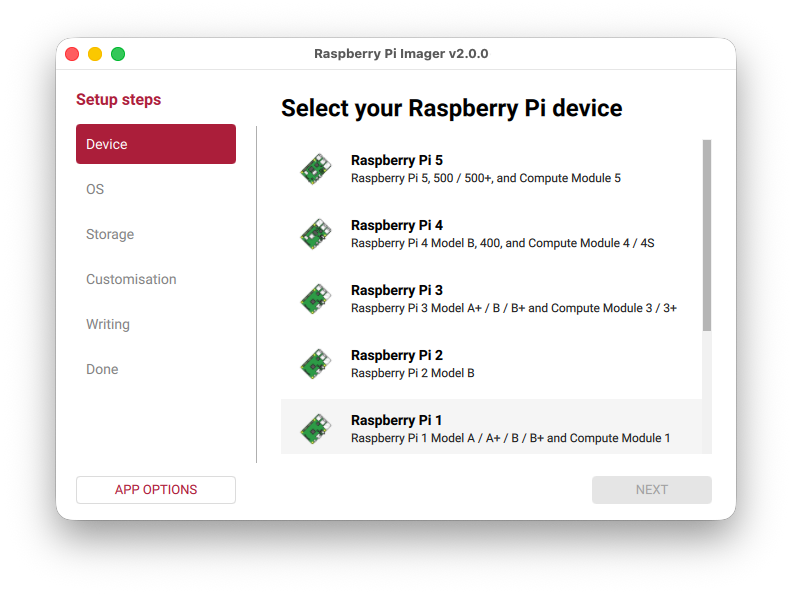
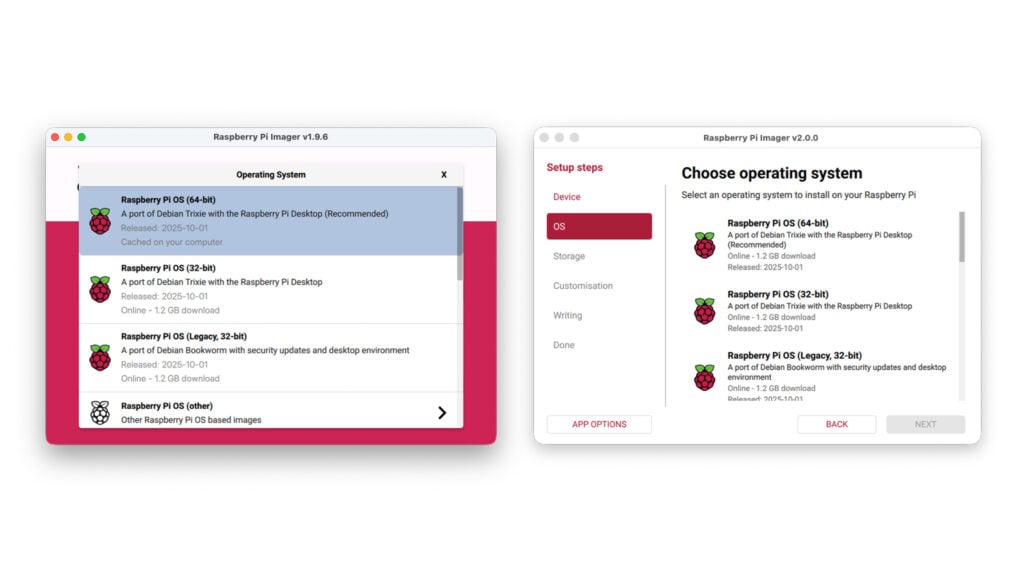
The most obvious change is the new step-by-step wizard interface. In order to make OS customisation a first-class citizen, we needed to bring it into the main interface, so now you’ll progress through a series of clearly defined stages:

  1. Select your Raspberry Pi device
  2. Choose your operating system
  3. Pick your storage device
  4. Configure your system (hostname, location, user account, wireless LAN, remote access, Raspberry Pi Connect, and interface options)
  5. Write your image
  6. Done!

Each step gets the full window to itself, with room for helpful descriptions, validation feedback, and relevant links. It’s a more spacious, less crowded experience all round.

Raspberry Pi Connect: pre-configured and ready to go

One extremely popular customisation the original Raspberry Pi Imager offered was the ability to configure, at the point of writing your SD card, your remote access credentials, giving you the chance to pre-program your SSH public keys.

What if, however, you wanted to use the much simpler Raspberry Pi Connect? With Imager 2.0, you can do just that. Simply authenticate during the imaging process, and when your Raspberry Pi boots for the first time, it’ll already be connected to your Raspberry Pi Connect account — ready to offer screen sharing or remote shell access from the start.

Accessible by design, not by chance

Raspberry Pi Imager is a much-loved, widely used application that represents, for many people, their very first interaction with Raspberry Pi. Every user deserves the best possible experience.

Each control in the new interface includes accessibility labelling for screen readers and other assistive technologies. The entire application is fully navigable via keyboard — no mouse required. We’ve paid careful attention to colour contrast throughout, ensuring text remains readable against its background in all situations.

The new colour scheme, built around Raspberry Red, is designed to make the UI easier to read (and to draw your attention to sensible choices). We use white space generously to establish clear boundaries between controls, making the interface easier to parse at a glance.

A massive thank you to our beta testers and contributors

To borrow a phrase: “It takes a village…”.

Raspberry Pi Imager 2.0 has seen extensive changes compared to the original, with an entirely new UI, significant alterations to the core software, and numerous new features. On top of that, there are hundreds of new translatable strings!
In early October, we started publishing open beta builds — and to the users who provided feedback early and in abundance, your contributions were invaluable. You’ve made this release considerably better than it might have been.

Our community translators deserve particular thanks. Translating not only the UI but also the accessibility strings of this application is a major task, and I’m continually humbled that people freely offer their time to ensure their communities can make the most of Imager.

Finally, I’d like to extend an extra-special thanks to my two interns this summer, Ben and Paul, both of whom have made large contributions to the UI and core code of Imager. The success of this launch is in no small part thanks to their efforts, and I hope they rightly celebrate it.

What’s next?

Raspberry Pi Imager 2.0 is available now for Raspberry Pi OS, Windows, macOS, and as a Linux AppImage. You’ll find download links on our software page.

If you want to get involved in more early-access software testing, check out our beta forums.

Happy imaging!

The post A new Raspberry Pi Imager appeared first on Raspberry Pi.


from News - Raspberry Pi https://ift.tt/3XC0IOs

Thursday, November 20, 2025

Electronic drum business cards built on RP2040

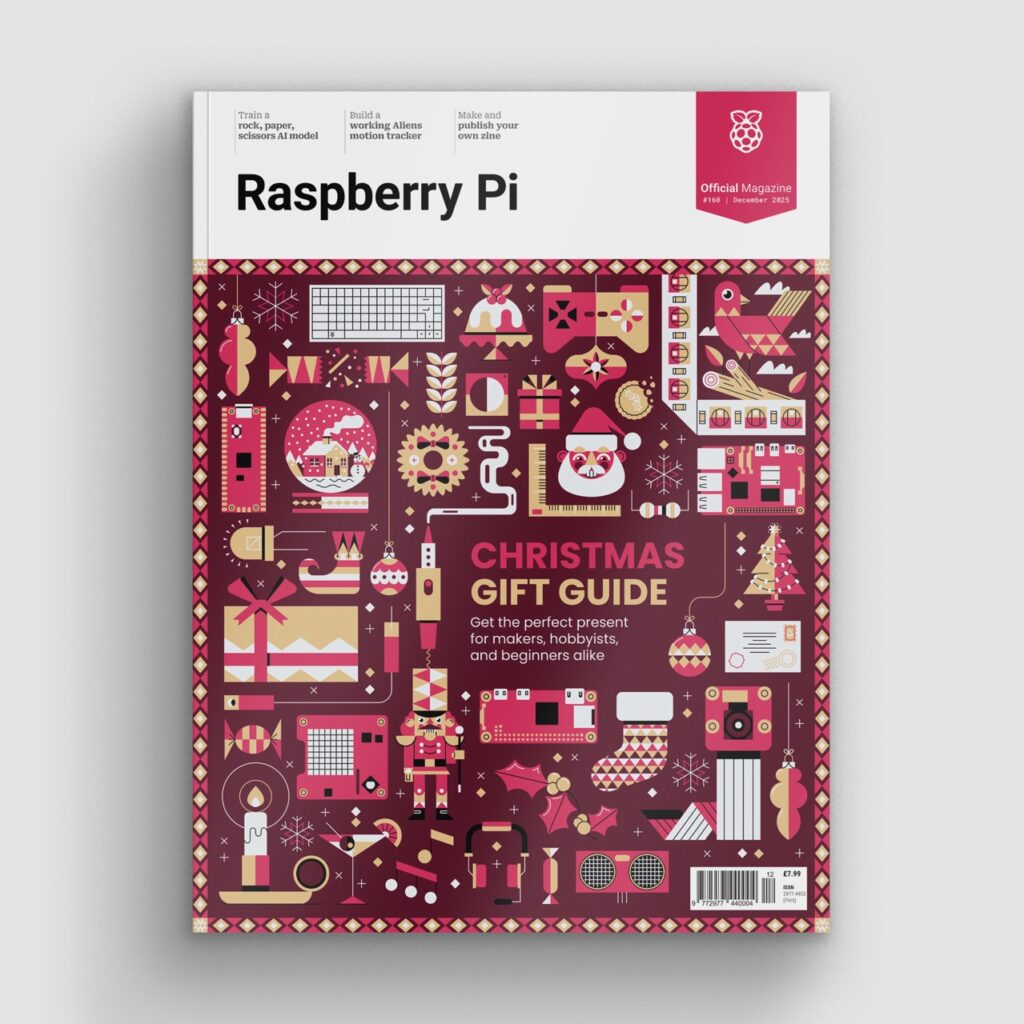
The festive issue of Raspberry Pi Official Magazine is on sale from today and features one of the finest front covers our beloved illustrator, Sam Alder, has ever created. We wanted to share a Christmassy project from its pages, and have managed to shoehorn this RP2040-based build in on the grounds that it involves a drum and that there happens to be a Christmas song called ‘Little Drummer Boy’. The math checks out… as long as you don’t think about it too much.

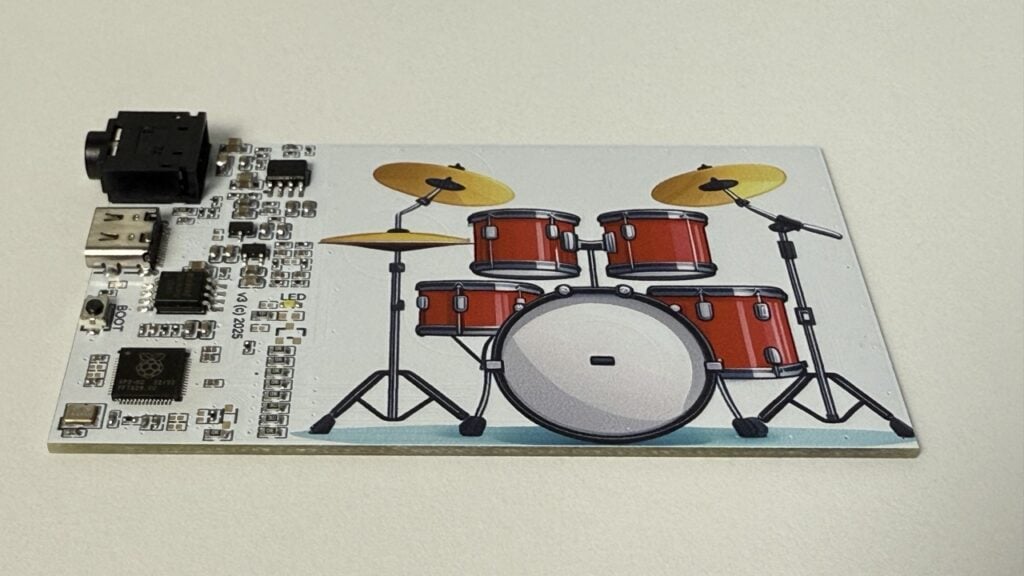
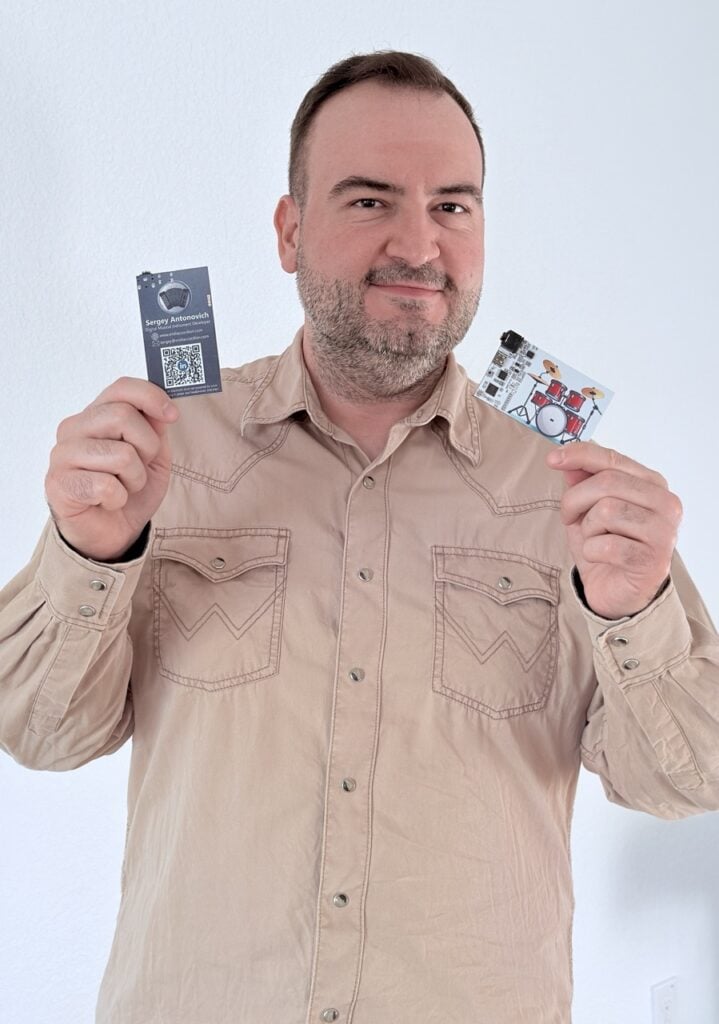
Want to drum your name into someone’s memory at a networking event? Then Sergey Antonovich has got you covered. The embedded systems engineer has reinvented the age-old business card by turning it into a playable electronic drum kit — and we’d hazard a guess that this one won’t end up languishing, forgotten, in someone’s pocket.

It’s a fully functional instrument, with touchpads hidden under the colour UV silkscreen;
Sergey designed it to be fun and intuitive: tap the printed cymbal to hear a crash

Sergey got the idea for the project some months ago. He enjoys building digital musical instruments — including ultra-portable, all-in-one digital accordions — and he was inspired by business cards that can fit an entire Linux system on a tiny PCB. Producing a business card that could be played felt like a natural fit. “It does three jobs at once,” he says. “It instantly grabs attention when you hand it over, it communicates exactly what I do, and it invites people to learn by reproducing the design.”

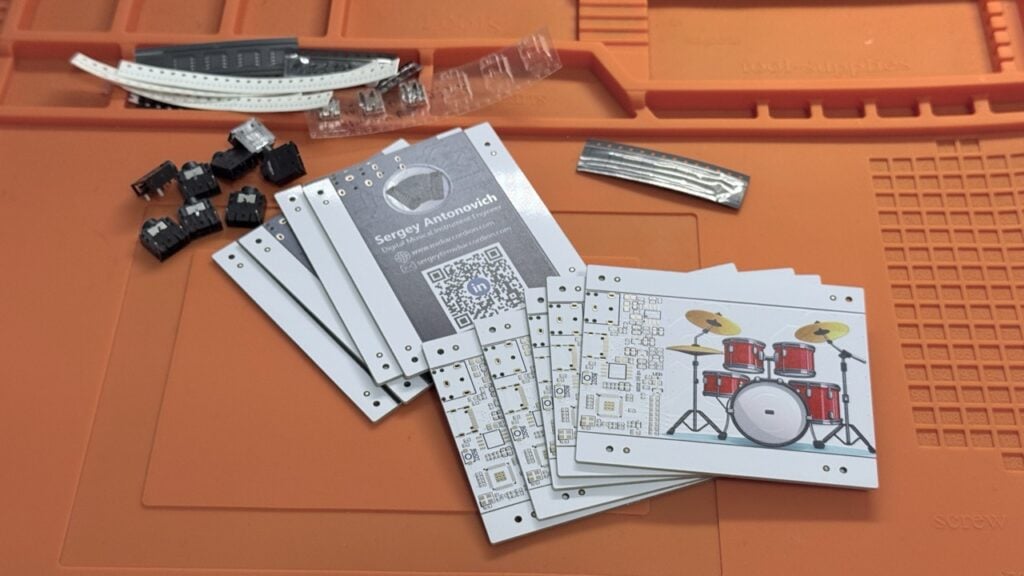
The cards are being prepared for hand-soldering — they are normally created in batches of ten

This led him to create a card that incorporated an F1C100s system-on-chip running Linux, as well as a TTP229 capacitive touch sensor. Recipients simply needed to power it up and listen via headphones connected to a 3.5mm TRS audio jack, while tapping on an image of a drum kit printed on the card. “Touchpads were hidden under the silkscreen art, so you could tap drums right on the print,” Sergey says. “It worked, looked great, and felt like a real instrument.”

Digital drumming

Yet Sergey wasn’t entirely happy, as the project proved costly and complex. “A Linux image/toolchain is doable, but heavy for beginners or classrooms,” he notes. “And even with trimming, a boot time of a few seconds was noticeable. I wanted instant-on.”

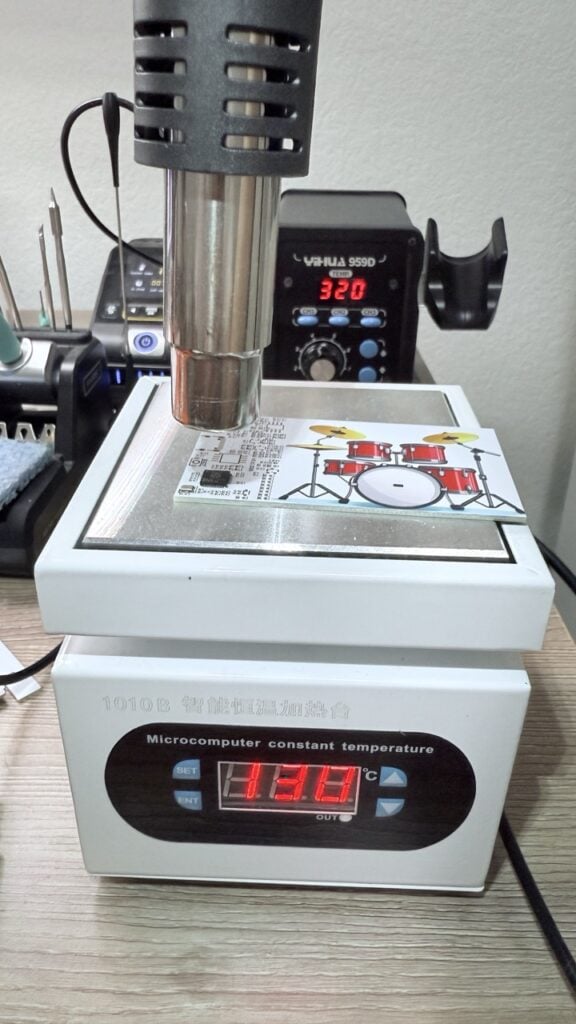
RP2040 was soldered manually onto the PCB using a hot plate and hot air

To resolve these issues, he turned to the Raspberry Pi RP2040 microcontroller. “It’s inexpensive and it uses external QSPI flash, which is large enough for multiple stereo drum samples,” he says. “It can also be programmed using CircuitPython, and this takes you from idea to music in an evening. There’s no heavy toolchain.”

Indeed, as Sergey points out, he really did have a build ready within hours. “I started from a CircuitPython build for a 16MB RP2040 board, prepared a tiny drum sample set, and wrote a short script that scans pads and plays stereo WAVs via audiomixer and audiopwmio.” 

Feel the beat

The result has been a fresh RP2040 + CircuitPython version optimised for instant power-on via USB-C, which is ideal for beginners while also being cost-effective and quick to create. The touchpads are read directly by RP2040, so there is no need for an external touch-integrated circuit, and 16MB of external flash memory is more than sufficient for the code and sound samples.

Thanks to CircuitPython’s touchio module, RP2040 senses the pad capacitance directly. “A finger increases the capacitance, which leads to changes in the charge/discharge time that result in a reliable ‘touched’ flag,” Sergey explains. An LED provides instant visual feedback, and the sound is output via two of RP2040’s PWM channels.

Sergey is an embedded systems engineer specialising in real-time system software and sensor integration for self-driving cars and delivery robots

Sergey now wants other people to make the project their own, which is why he has made it open source. But even though he has printed his own details on the reverse, including a QR code pointing to his LinkedIn profile, he says its use goes beyond sharing contacts. 

“It’s a memorable handout that grabs attention the moment you tap it,” he says. “But the goal isn’t just to hand someone a cool card — it’s to give you a tiny, hackable instrument you can learn from and extend.”

Raspberry Pi Official Magazine #160 out NOW!

You can grab this issue from Tesco, Sainsbury’s, Asda, WHSmith, and other newsagents, including the Raspberry Pi Store in Cambridge. It’s also available from our online store, which ships around the world. And you can get a digital version via our app on Android or iOS.

You can also subscribe to the print version of our magazine. Not only do we deliver worldwide, but people who sign up to the six- or twelve-month print subscription get a FREE Raspberry Pi Pico 2 W!

The post Electronic drum business cards built on RP2040 appeared first on Raspberry Pi.


from News - Raspberry Pi https://ift.tt/Fi1HI2N

Wednesday, November 19, 2025

How thousands of students are growing plants in space with Raspberry Pi

We had a blast seeing everyone’s kooky creations at Open Sauce this summer, and one of the interesting people we met was Ted Tagami, who told us about a dare he couldn’t turn down over a decade ago…

“In 2013, a dear friend dared me to build an advertising network using satellites in space. Being a child of the 1960s, the idea that running a space programme was possible for me was something I could not pass by. I was not interested in the advertising.”

“That daring friend became my co-founder when we launched Magnitude.io, with zero science or engineering knowledge of how to do this. Fast-forward four years, and ExoLab-1 became our first mission to the International Space Station. With one lab running in microgravity 400km above the planet, we launched with a dozen Californian schools networked with Raspberry Pi–powered, ground-based labs.” 

Turning classrooms into space-faring research labs

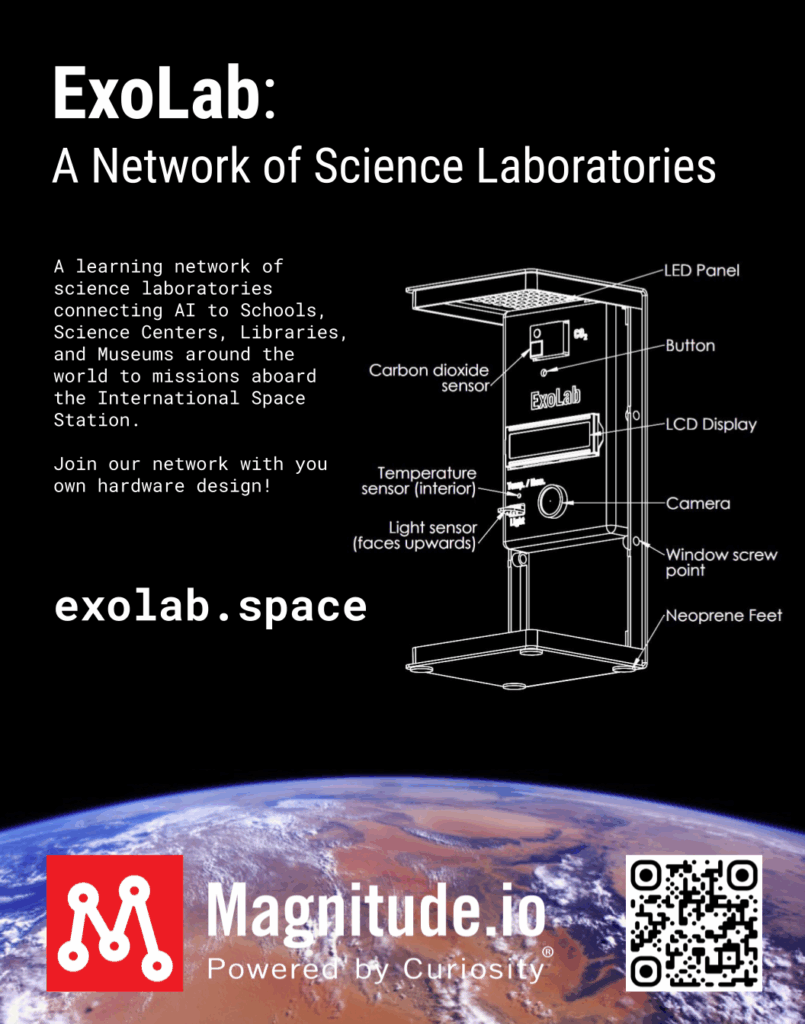
ExoLab is an educational programme that connects students around the world with real scientific research taking place aboard the International Space Station (ISS). Students in ordinary classrooms on Earth grow plants while an identical experiment unfolds simultaneously in microgravity.

Each participating school receives an ExoLab growth chamber that tracks temperature, humidity, light, and CO₂ levels while capturing timelapse images of plant development. Students plant seeds, collect data, and compare their findings with the parallel experiment happening in space — all in real time.

Over the course of a four-week mission, students join live broadcasts with classrooms all over the world. They hear directly from astronauts and NASA scientists, discuss everyone’s observations, and share their own discoveries.

So far, more than 24,000 students and 1400 teachers across 15 countries have taken part in 12 missions. Keep your eyes peeled for the results of ExoLab-13: Mission MushVroom!

Team Magnitude.io

Not the only Raspberry Pis in space

We liked how much ExoLab reminded us of the Raspberry Pi Foundation’s groundbreaking Astro Pi programme, which sees students run their own code on the International Space Station. While ExoLab works with NASA, Astro Pi sees students collaborate with astronauts from the European Space Agency.

The first pair of Astro Pi computers went up for Tim Peake’s Principia mission

Last year’s challenge was bigger than ever, with 25,405 young people participating across 17,285 teams. They’re now analysing the data they’ve received from the experiments that ran on the ISS. It’s free to take part, so if you know of a young person (under 19 years of age) who would like to launch their code into space, they can choose their mission and get started within an hour!

Rocketry, satellites, space waste, and more

We’re big fans of seeing Raspberry Pis in space, and we’ve seen everything from space-grade waste recycling to kaleidoscopic space art.

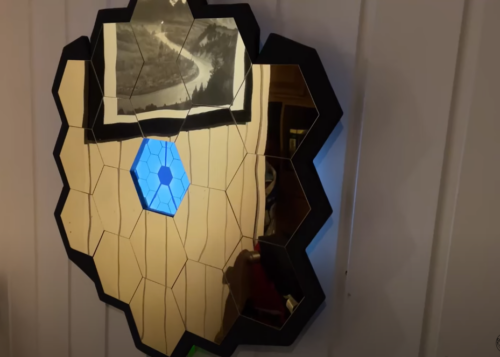
cellar nerd deep space mirror
This wall art was inspired by the James Webb telescope — and there’s a Raspberry Pi inside

If you’ve already done Astro Pi and would like to try a more challenging build, you could look into the ISS Mimic project, which sees student teams build a 1%-scale version of the International Space Station and code it so that it mimics the exact actions of the real thing up in orbit. (It’s very cool. We follow Team ISS Mimic around to events like Open Sauce — they also introduced us to the ExoLab folks.)

ISS Mimic doing its… mimicking

If we’ve piqued your interest, why not peruse the space archives on our website? There are more Raspberry Pis up there than you think!

The post How thousands of students are growing plants in space with Raspberry Pi appeared first on Raspberry Pi.


from News - Raspberry Pi https://ift.tt/8oIET5J

Monday, November 17, 2025

What can you build with Raspberry Pi Zero?

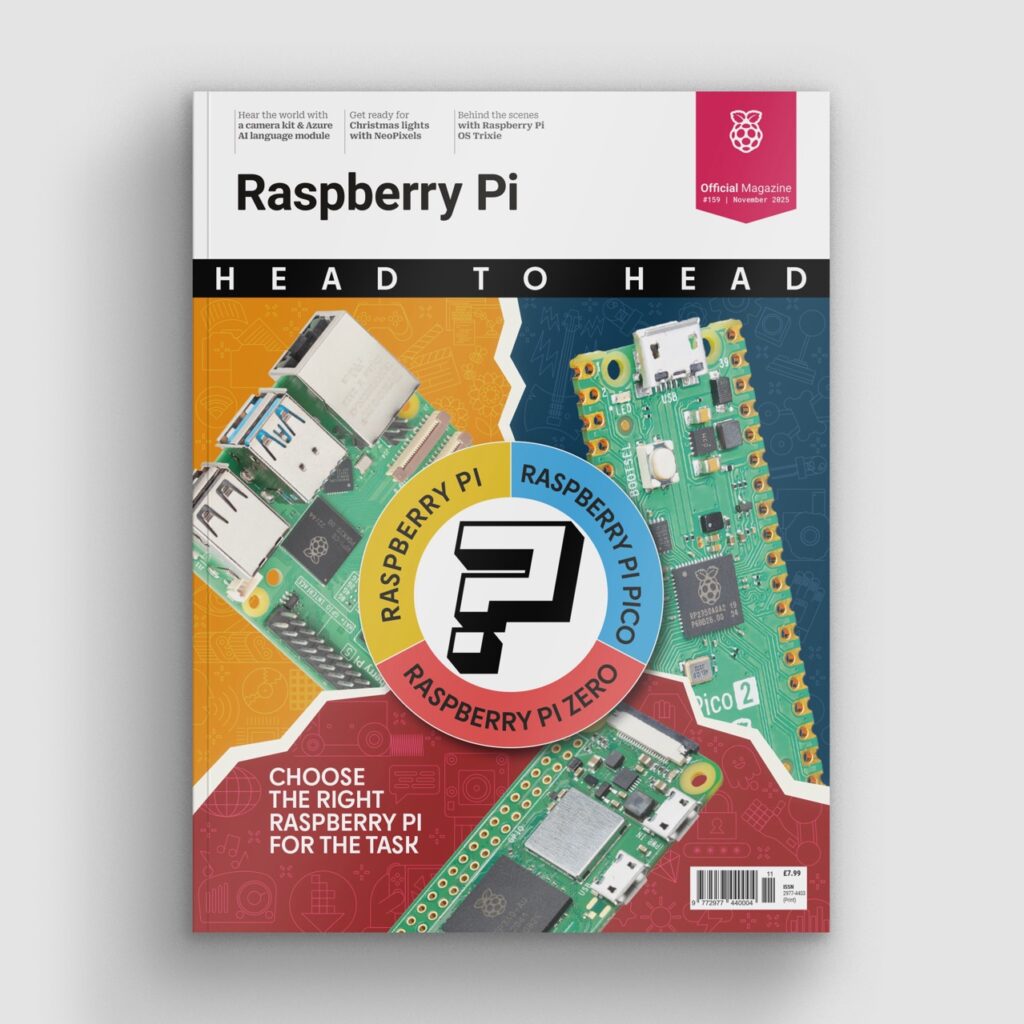
The latest issue of Raspberry Pi Official Magazine explores the differences between some of our most iconic boards and microcontrollers. Here, we share part of a multi-page feature that explains what Raspberry Pi Zero is capable of and the types of projects you can use it for.

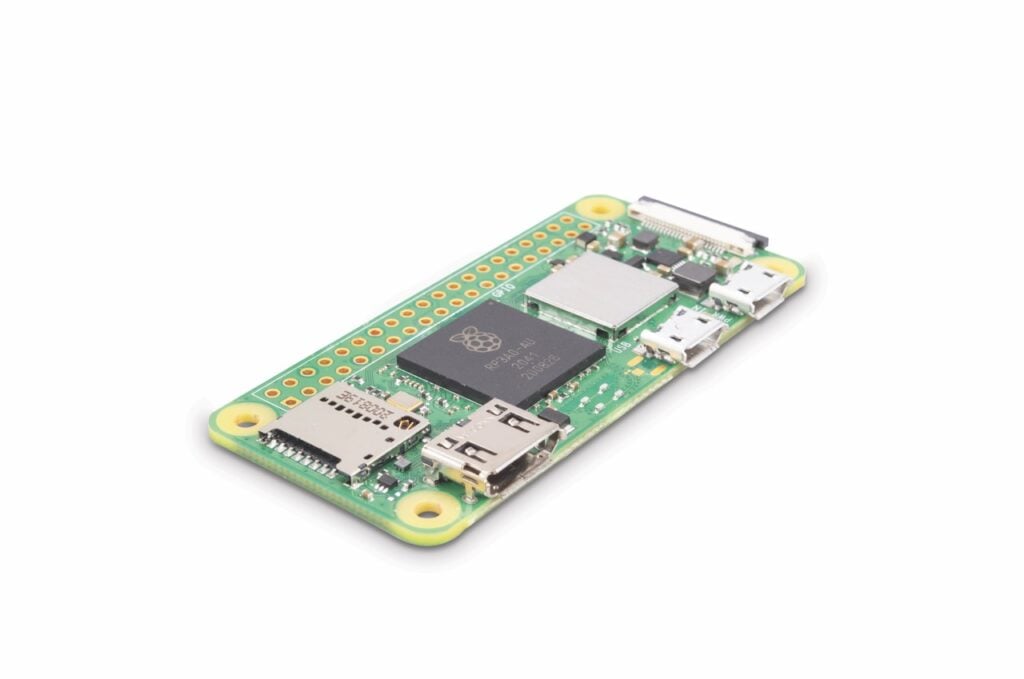
Launched with the aim of making computing even more affordable, the Raspberry Pi Zero range of computers also benefits from a smaller form factor — about the size of a stick of gum. This makes a Raspberry Pi Zero ideal for any projects where space is at a premium, such as in drones and smaller robots, or in handheld games devices.

While smaller, it still features the same 40-pin GPIO header as the flagship Model B devices (Raspberry Pi 5 and Raspberry Pi 4 Model B), so you can use it with the same range of HATs and other expansion boards, as well as connect your own electronic circuits to its pins.

Compared to the later models in the Model B range, Raspberry Pi Zero has less processing power and RAM. The standard Zero / Zero W features a single-core processor, but the quad-core Zero 2 W is roughly equivalent to a Raspberry Pi 3 Model B. So, anything you can do with that, you can do with a Zero 2 W.

All Zero models are fully functional computers that run an operating system, so you can install your favourite applications and tools as per usual. You can even connect it to a monitor from its mini HDMI port, although the single USB port means you’ll need a USB hub to connect a wired keyboard and mouse (or you can use Bluetooth instead).

However, Raspberry Pi Zero is typically used in a headless setup, with users connecting to it from a remote computer via SSH over Wi-Fi to issue terminal commands. Its lower power drain (as little as 100 milliwatts) makes it suitable for battery-powered projects in remote locations away from mains power outlets, such as weather stations or wildlife cameras (you can connect a Camera Module to its CSI camera port).

If you need a more compact Raspberry Pi with several orders more processing power than a Raspberry Pi Pico, as well as the ability to run an operating system, Raspberry Pi Zero fits the bill.

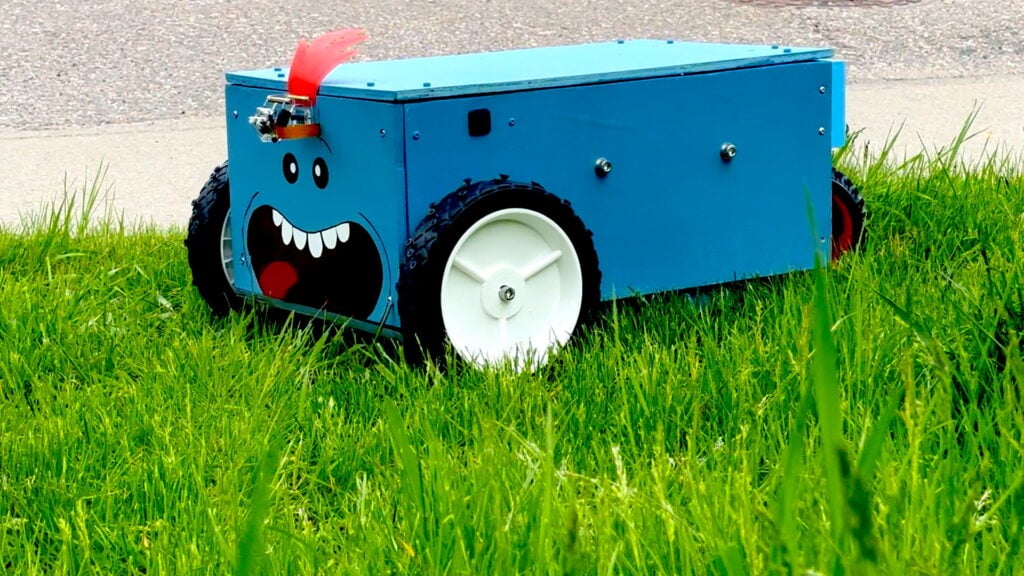
Lawny

This remote-control robot mower was originally built using a Raspberry Pi 5, but the maker has since switched it out for a Raspberry Pi Zero 2 W, demonstrating how the smaller and cheaper single-board computer is powerful enough to handle a sophisticated robotics project. A front-mounted Raspberry Pi Camera Module 3 gives the remote operator an as-it-mows, Lawny-eye view as they control the robot from a web interface on a smartphone or computer — thanks to Raspberry Pi Zero 2 W running a Node.js web server.

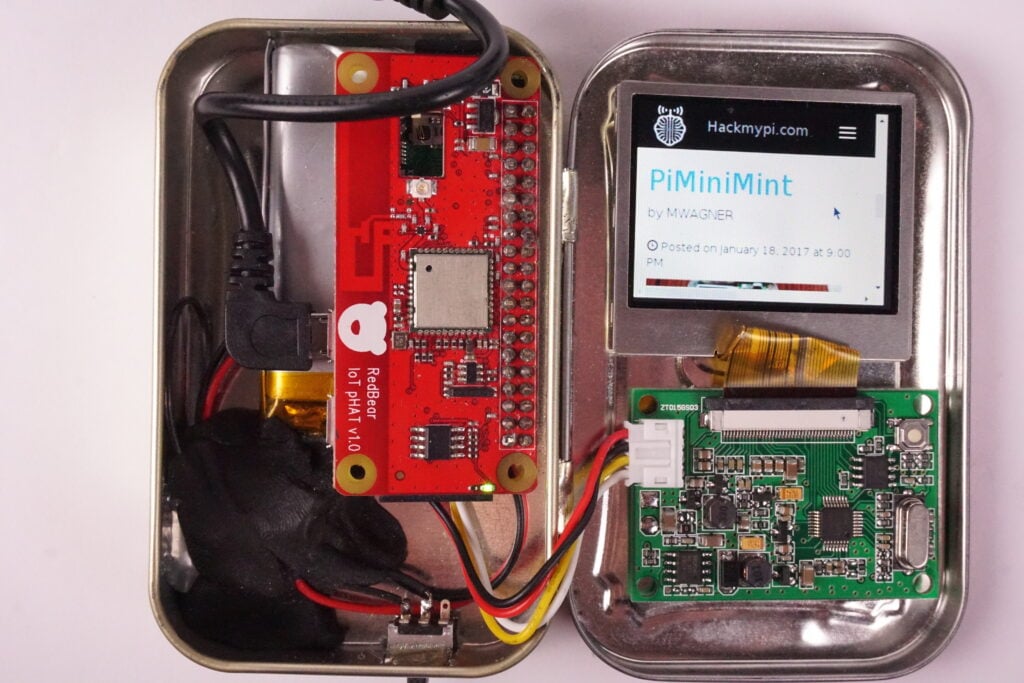
PiMiniMint

If you want to build a handheld games console, your best choice is a Raspberry Pi Zero model, whose smaller footprint enables it to fit into a compact case with a mini LCD for a display. The lower power drain means your battery pack will last longer, too. One of the first projects to demonstrate such possibilities, PiMiniMint crams a Raspberry Pi Zero into a 60 × 95mm Altoids tin. At the time, the maker used an IoT board to provide Wi-Fi and Bluetooth connectivity, but this isn’t needed with a wireless-equipped Raspberry Pi Zero W or Zero 2 W.

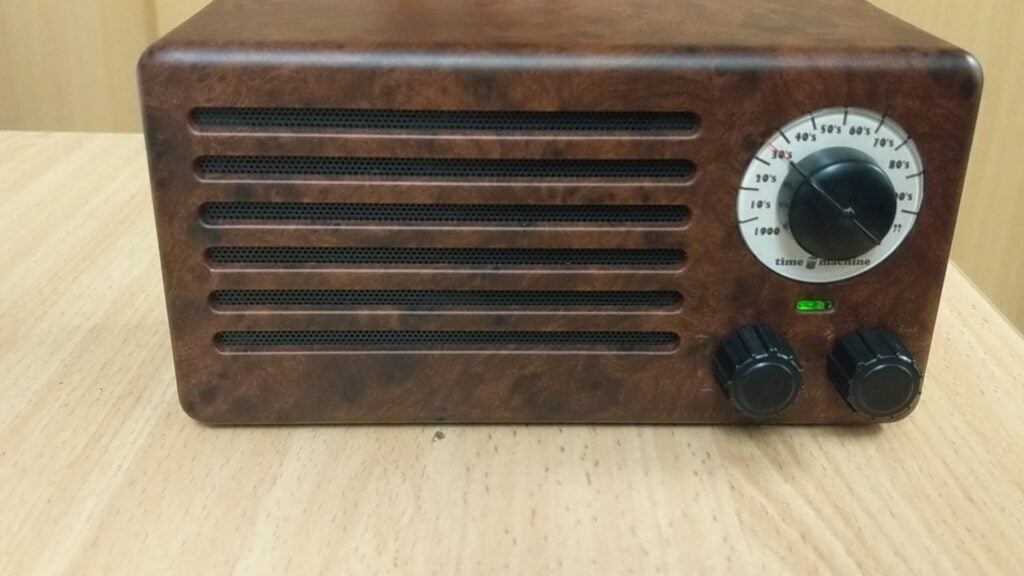
Time machine radio

Replacing the innards of an old radio to turn it into an internet radio is another very popular Raspberry Pi project. If you can’t find a genuine retro model, you can always get a vintage-effect replica, as used in this project. A Raspberry Pi Zero 2 W equipped with a Pimoroni Audio Amp SHIM provides analogue audio out to the speakers. Two potentiometer knobs are used for volume and tuning — or in this case, to play custom sound clips from different decades, as per the time-travelling theme.

The Oracle

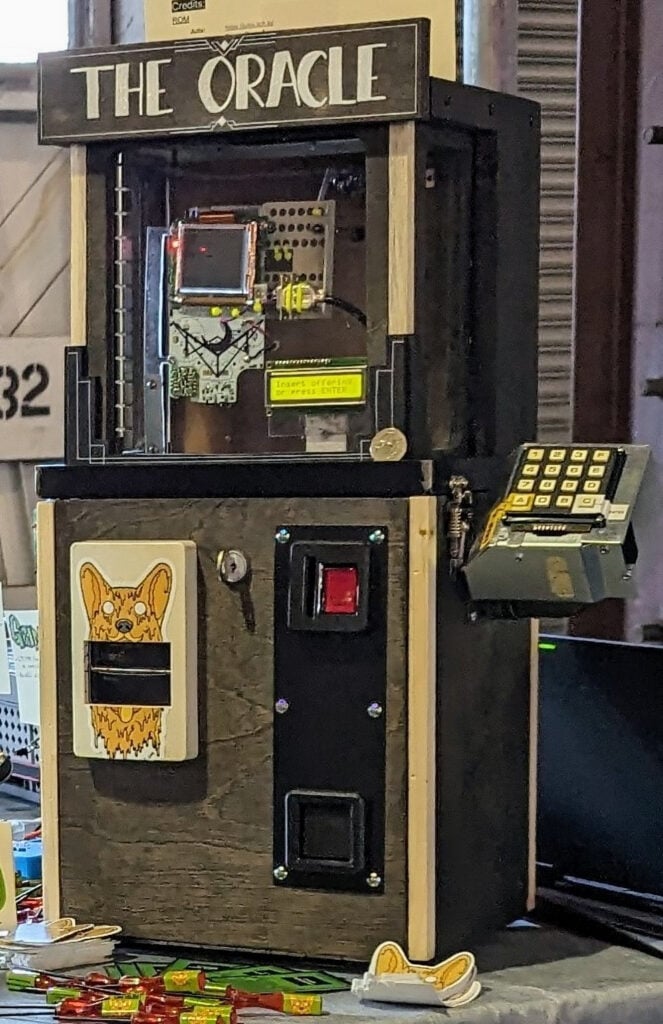
This miniature version of a Zoltar-style fortune-telling arcade machine is made using a stripped-back Nintendo Game Boy hooked up to a Raspberry Pi Zero W. The latter provides all the I/O necessary for interfacing the keypad, the coin mechanism, the LCD, and the relay modules. It also connects wirelessly to the ChatGPT API to generate horoscopes in the style of American writer HP Lovecraft or children’s author Dr Seuss, then outputs these on paper using a thermal printer.

Raspberry Pi Zero key specs

Dimensions: 65 × 30mm

Weight: 9g (Zero) / 12g (Zero 2 W)

Processor: 1GHz single-core 32-bit (Zero) / 1GHz quad-core 64-bit (Zero 2 W)

Memory: 512MB

Ports: 2 × micro USB*, mini HDMI video, CSI camera

Wireless2.4GHz single-band 802.11n Wi‑Fi, Bluetooth 4.0 or 4.2, BLE

*One for input power
W and WH models only

Models available

Raspberry Pi Zero, Zero W, Zero WH

Raspberry Pi Zero 2 W, Zero 2 WH

Ideal for:

  • Small robots
  • Drones
  • Remote cameras / sensors
  • Handheld gaming consoles
  • Internet radios / music streaming
  • Ad blockers / VPNs
  • Network monitors

To ensure ongoing support for our older models, we released a legacy version of Raspberry Pi OS. It provides a continuity option for users who require it, such as industrial users who’ve developed software to use particular library versions, or who value a stable, unchanging operating system. It’s available to download from our software page, and can also be found in Raspberry Pi Imager, our free OS installer for Windows, macOS, Ubuntu for x86, and Raspberry Pi OS.

As ever, the Raspberry Pi Forums are a great place to look for support, and there are already many threads about older versions of Raspberry Pi OS.

Read the full article in Raspberry Pi Official Magazine #159

You can grab this issue from Tesco, Sainsbury’s, Asda, WHSmith, and other newsagents, including the Raspberry Pi Store in Cambridge. It’s also available from our online store, which ships around the world. And you can get a digital version via our app on Android or iOS.

You can also subscribe to the print version of our magazine. Not only do we deliver worldwide, but people who sign up to the six- or twelve-month print subscription get a FREE Raspberry Pi Pico 2 W!

The post What can you build with Raspberry Pi Zero? appeared first on Raspberry Pi.


from News - Raspberry Pi https://ift.tt/SLQbJPo

Friday, November 14, 2025

Creating the most advanced event badge yet for the Biohacking Village at DEF CON

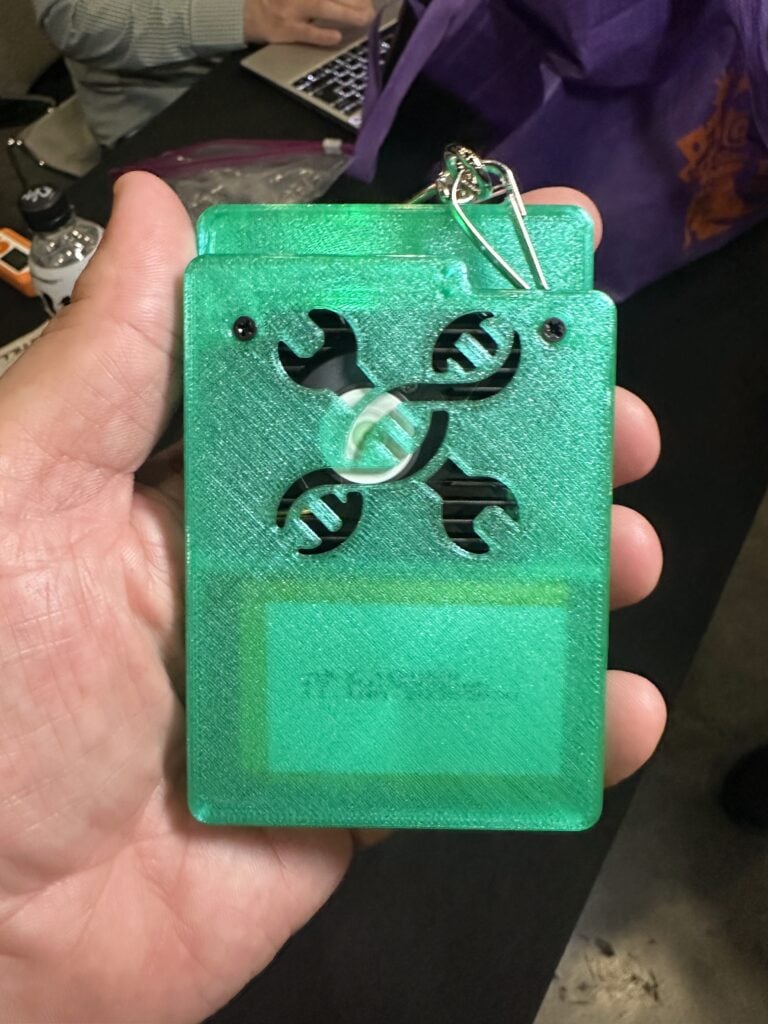
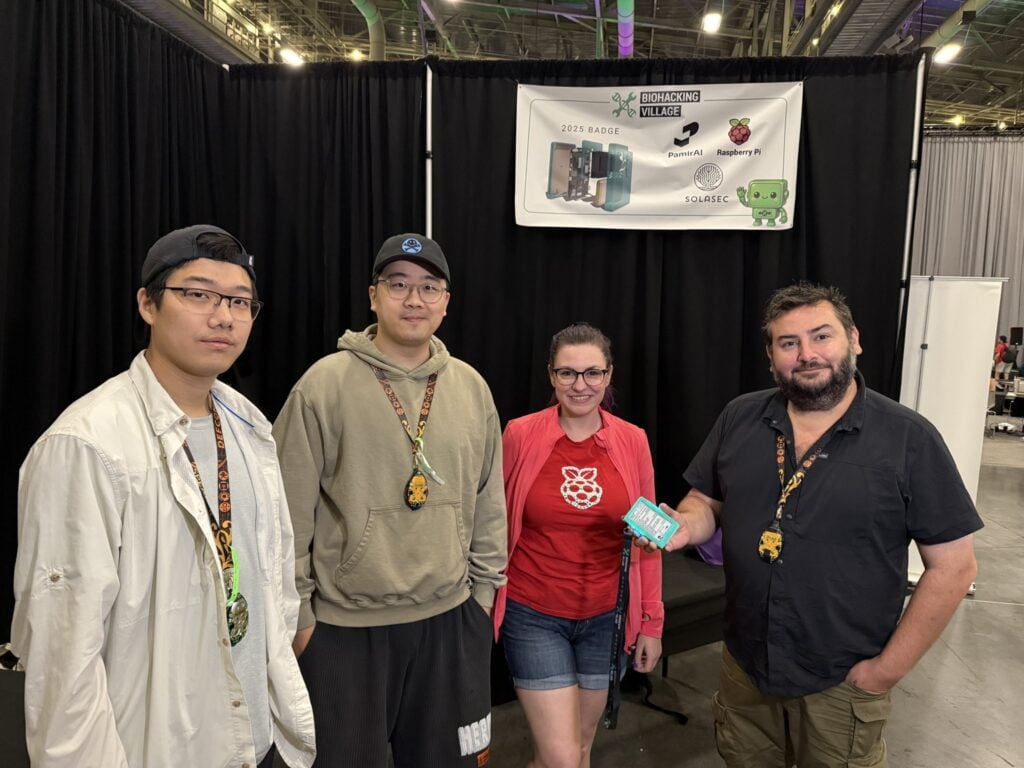
We’re big fans of the creative event badges we see at DEF CON (and not just because we feature in them sometimes). This year saw a CM5-based badge for the Biohacking Village, part of the event that exists to encourage collaboration for cybersecurity safety and innovation in healthcare. Two of the village’s MVPs, Nina Alli and Jennifer Agüero, told us about their collaboration with SolaSec and PamirAI, as well as the parental inspiration behind the most advanced badge they’ve ever worked on.

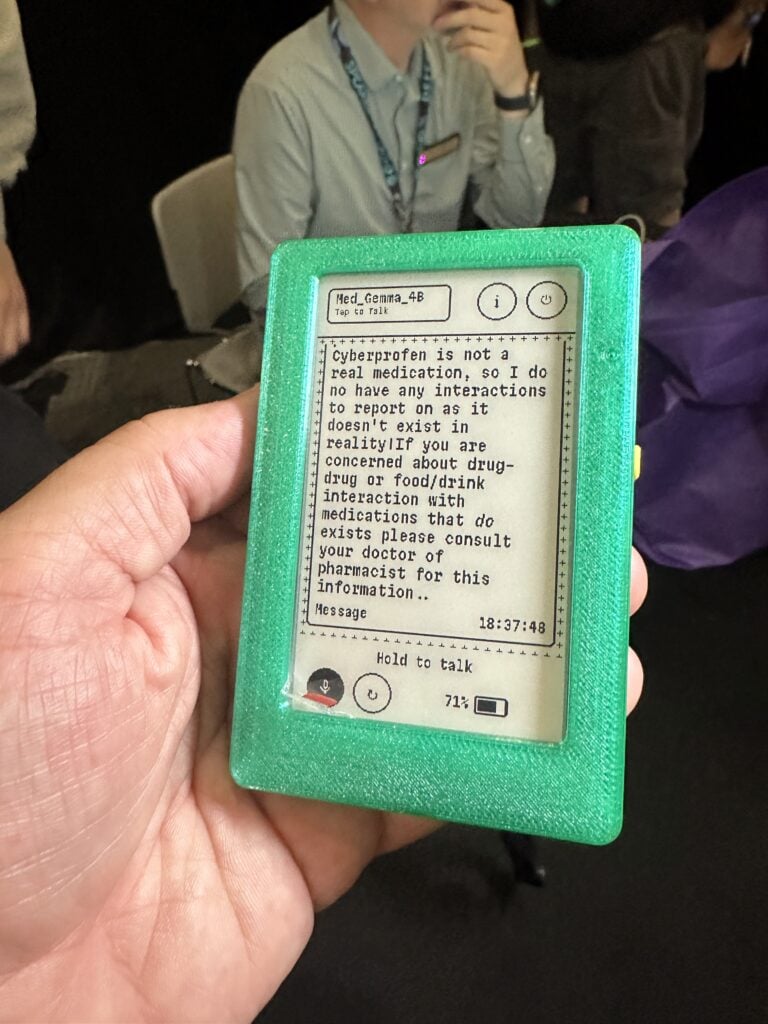
This year’s badge gave wearers their own pocket-sized medical chatbot, capable of listening and providing viable feedback. 

SolaSec meets PamirAI

SolaSec partnered with the Biohacking Village at DEF CON to deliver a next-generation badge that could showcase AI in the medical space. The goal was to create something local, private, and interactive — an AI experience powered entirely on the edge without any internet connection. Achieving this required more on-board processing power than a typical badge design.

To keep the badge approachable, SolaSec continued their philosophy of using widely available hardware that can be easily repaired or replicated. Having successfully used Raspberry Pi Zero in previous designs, they decided to stick with Raspberry Pi, choosing Compute Module 5 as the core of this year’s badge.

This is where the collaboration with PamirAI began. Their work in local AI aligned closely with SolaSec’s vision, and together they adapted Pamir’s Distiller design to support Compute Module 5. PamirAI provided the baseboard and the software stack, while SolaSec handled the physical design, the 3D-printed enclosures, and the final assembly.

Wearers ask their badge medical questions and it responds with treatment ideas

The result was the most powerful — not to mention the most power-hungry — badge they had ever produced. It combined accessible hardware, practical design, and cutting-edge AI to push the boundaries of what a Biohacking Village badge can be.

From cyborg skulls to homemade mead

The vision for the Biohacking Village badges is to create a piece of portable and stylised iconography. Each year’s badge is designed to be bio-based and technically challenging, incorporating a ‘capture the flag’ game. New and upcoming technologies rooted in reusable art and science keep the badges “fresh, tactile, and overall dope”. 

Raspberry Pi made some PamirAI friends at this year’s event

A few examples of the Biohacking Village’s most recent badges include: 

  • RFID readers for body implantables
  • Agar plates for growing yeast (some fabulous hacker mead was had as a result)
  • Open source watches (before the Apple Watch was made)
  • Cyborg operation game (with haptic feedback) by Badge Pirates
  • 3D-printed heart (with a heart monitor that biomimics your heartbeat) by SolaSec
  • Cyborg skull with piercings and implants by Lee Wilkins
  • Ambulance badge (with breathalyser) by SolaSec
  • AI chatbot (with three AI models) by PamirAI and SolaSec

These badges take about a year to make from ideation to finishing touches, with ideation beginning at one DEF CON event and the final touches happening at the next. The real goal is to expose people to different biomedical influences, hopefully providing a transformative moment that inspires folks to make cool new devices that may change lives. 

Touching inspiration

A couple of the most recent badges were inspired by Nina’s parents. They were quite ill, and she wanted to honour them in a tangible way, sharing a piece of them with the world. Nina’s dad was a paramedic captain for the Fire Department of New York, hence the ambulance badge, and her mum was a parent coordinator at the NYC Department of Education, which is where the research and reason focus comes from. Nina explained: “I am very proud of [my parents’] influence in my life, and the last two badges helped me ensure that they were immortalised in the Biohacking Village and DEF CON legacy.”

The post Creating the most advanced event badge yet for the Biohacking Village at DEF CON appeared first on Raspberry Pi.


from News - Raspberry Pi https://ift.tt/FfQi9Gn

Wednesday, November 12, 2025

Journey to Raspberry Pi — from CoderDojo volunteer to software engineer

Software engineer Matias Wang Silva has had an interesting journey to working at Raspberry Pi. His story reminds us why supporting the work of the Raspberry Pi Foundation encouraging young people to learn to code in the hopes of inspiring the next cohort of computing professionals — is so important.

There’s an old adage that the longest way round is the shortest way home. Going from a weekend CoderDojo “Ninja” to a chip designer at Raspberry Pi might sound like the kind of neat origin story that writes itself but, in reality, there were a few twists and turns along the way.

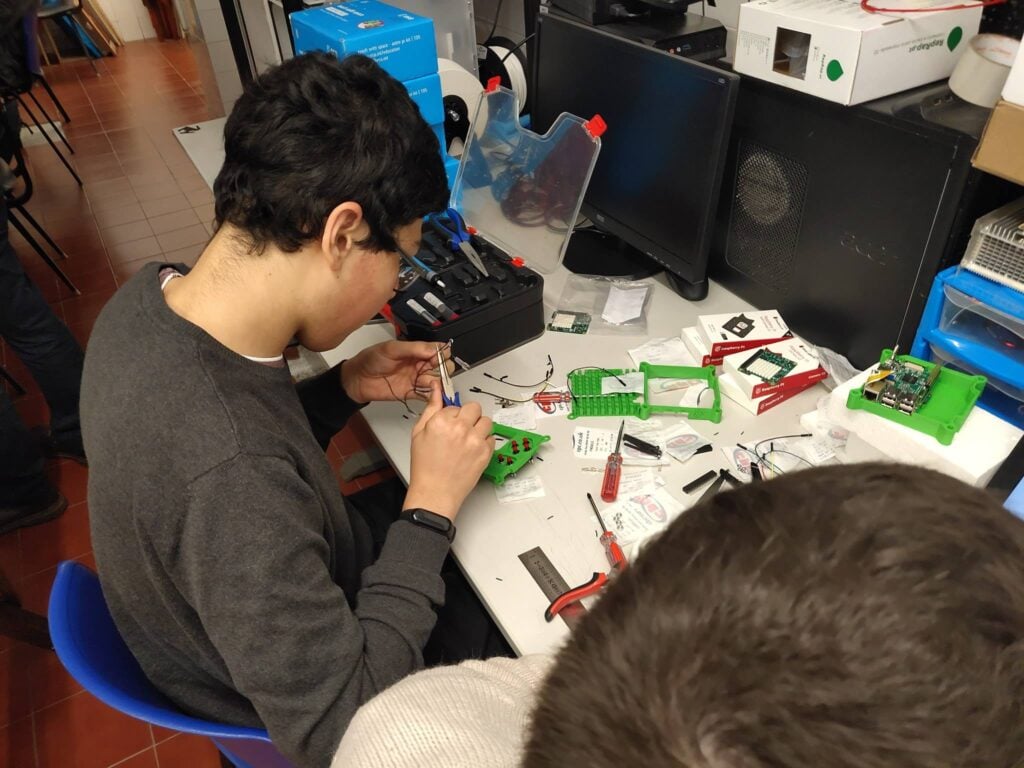
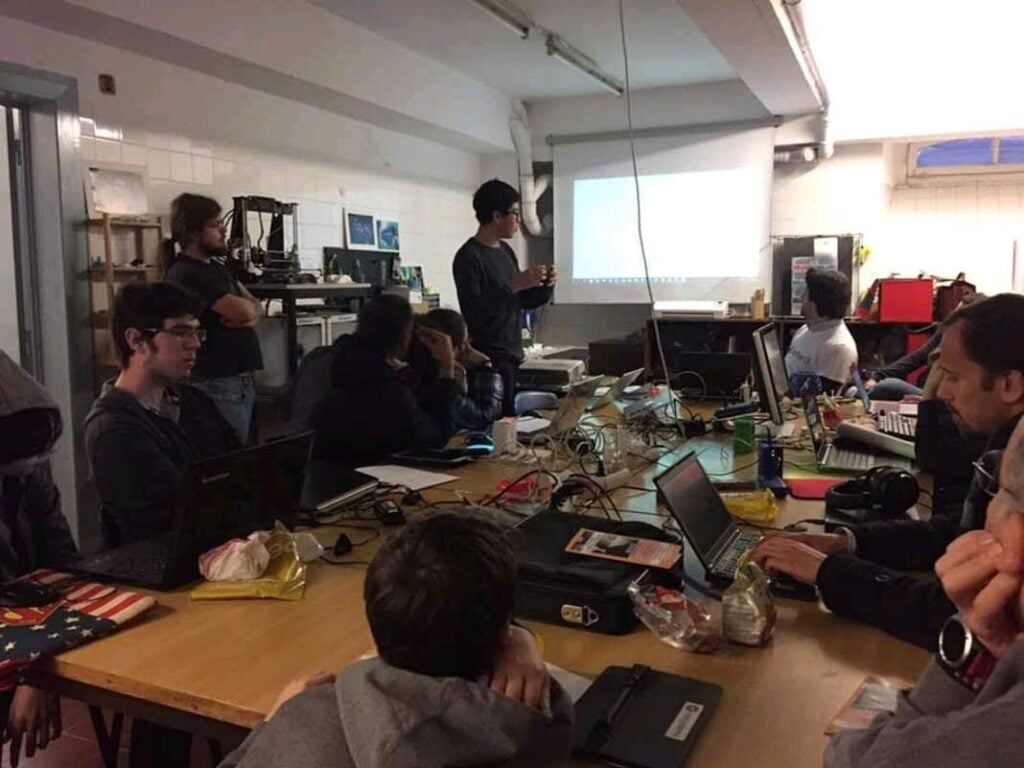
Matias getting hands-on at a Code Club session

Like many of those interested in electronics, I had my humble beginnings with the Atmel Atmega328P on the Arduino Uno — and a few (burnt) LEDs — before graduating to Raspberry Pi as the complexity of my projects evolved. It was around this time that I started attending Lisbon’s CoderDojo (part of the Raspberry Pi Foundation’s global Code Club community), tinkering around with Scratch, general-purpose programming, and some robotics. My background was in electronics, so I kept hardware at the centre of everything I did.

I was eleven years old back in 2012, and at the time it felt like a world of opportunities had just opened up. What made it more special, though, was the continuity. Growing up, I moved countries quite often — once every two to three years — and countries I lived in like Angola and Bangladesh didn’t have these sorts of places. What began as an activity to fill the long summer break at home in Portugal ended up becoming something I came back to every year. 

From coding Ninja to Mentor to Champion

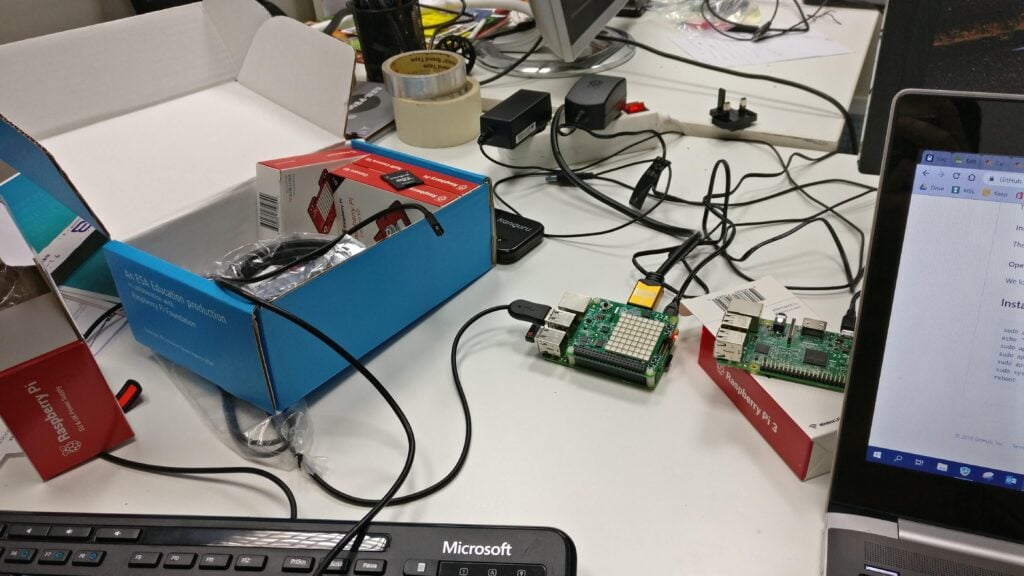
Over time, I progressed from Ninja to Mentor, and finally to Champion, as I took on a more active role in managing the club. I taught Python to younger students, explained electronics basics with a few HATs on Raspberry Pi 3, and led group projects like Astro Pi, where we sent code to run experiments on the International Space Station. I got the chance to work with a great team of university professors and geeky parents and built great things, including many software and hardware teaching projects.

A reassuringly chaotic table at a Code Club, featuring the Astro Pi kits the Raspberry Pi Foundation created with the European Space Agency

Around mid-2020, some people suddenly found themselves with a lot of spare time. It was a chance to learn new things and lean into curiosities that the chaos of everyday life prevents us from nurturing. I took the opportunity to deploy an open source video conferencing platform that I and a few others were building for our university, which allowed us to move teaching online. This kept the CoderDojo in Lisbon running all throughout and beyond the pandemic, amusingly with servers based in Cambridge, UK. It was a resounding success, and I look back on the positive impact we had fondly.

Making it to Pi Towers

Two summer internships and a university degree later, I began working at Raspberry Pi — the very organisation that introduced me to computing — as an engineer in the chip design team. Though spare time is hard to find as an adult, I make it a priority to continue my earlier engineering access work. I now organise university visits with institutions like CentraleSupélec and Cambridge’s Department of Engineering; I also represent Raspberry Pi at engineering outreach events and mentor our yearly interns. It’s important to me to keep existing pathways open for budding engineers and to play an active role in training the next generation.

Matias’ official mugshot for his Raspberry Pi staff ID card

Are you interested in joining a Code Club, starting your own, or getting your hands on some resources or training? Join the Raspberry Pi Foundation’s Code Club community.

The post Journey to Raspberry Pi — from CoderDojo volunteer to software engineer appeared first on Raspberry Pi.


from News - Raspberry Pi https://ift.tt/LHwPqeN

Monday, November 10, 2025

Azure Hear The World Project

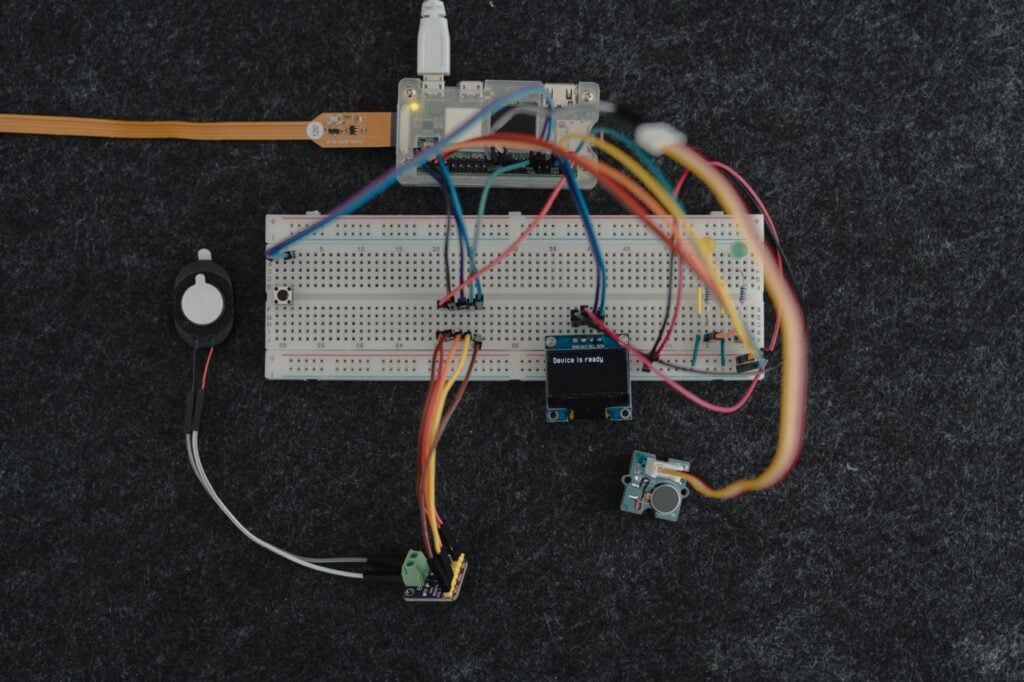
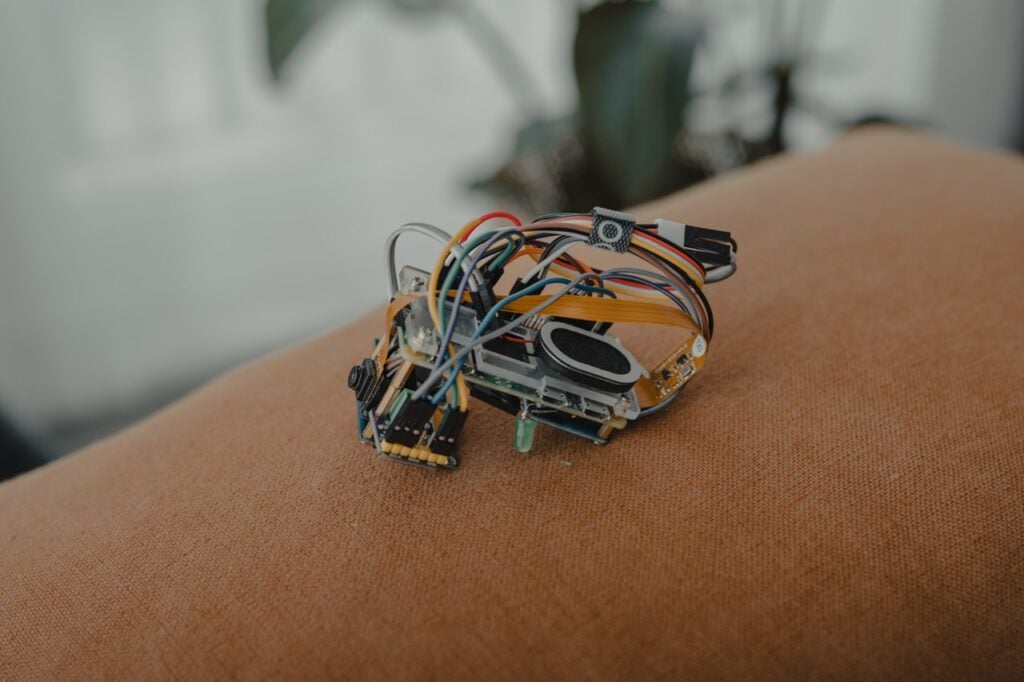
Swiss software engineer and cloud architecture specialist Marco Gerber enjoys getting hands-on with tech in his free time as well as at work. His expertise in machine learning led him to recognise the potential for a handheld AI device that could describe the surrounding environment and that could be particularly useful as an accessibility tool for people with hearing or visual impairments. His idea was to develop a “point and shoot” device that would provide an audio description of the user’s surroundings. The result was the Raspberry Pi Zero 2 W-based Hear The World device, which offers both text and spoken descriptions alongside haptic feedback.

Instant inspiration

Zurich-based Marco is a Microsoft MVP with a focus on AI and Azure, so cloud-based projects are second nature. He enjoys trying out new technologies, “Raspberry Pi and various sensors being some of my favourite ways to combine hands-on tinkering with learning”. His other passions are travel and photography. With a keen visual eye, Marco found himself experimenting with early multimodal AI models capable of analysing images. This led on to interpreting individual images from a webcam, sequences of frames and, eventually, a form of video analysis in which the AI processes information about its surroundings. “Later, I also explored audio models, creating small pipelines where an image could be transformed into text, and that text into audio – essentially image-to-text-to-audio.”

Having got this far, it struck Marco that Raspberry Pi could serve as the perfect platform for an image to text to audio project. “With its camera port and compact form factor, it opened the possibility of building a handheld device that could describe the surrounding environment – something particularly useful as an accessibility tool for people with hearing or visual impairments,” he says. Having a tangible use case in mind motivated him to push the idea further.

New territory

Marco was already an enthusiast of both Python and Raspberry Pi thanks to his AI work and “the countless great libraries” that he could use in his project. The compact dimensions of Raspberry Pi Zero 2 W seemed ideal for his portable project. However, most aspects of the project were new territory for him, “so it was very much a process of learning by doing”.

Getting the speaker working with Raspberry Pi required a DAC (digital-to-analogue converter), but also an amplifier to boost the resulting file enough to be audible. “Each component had its own quirks – different libraries, different formats, and unique requirements – which added complexity but also made the project exciting.”

Overall, Marco is pleased with his foray into assistive technology, completed as and when over a couple of months in his free time. “It could be adapted to transcribe spoken words and display them for hearing-impaired people, or even serve as an interpreter to translate sign language into spoken language,” he suggests.

Read more articles like this in Raspberry Pi Official Magazine #159

You can grab this issue from Tesco, Sainsbury’s, Asda, WHSmith, and other newsagents, including the Raspberry Pi Store in Cambridge. It’s also available from our online store, which ships around the world. And you can get a digital version via our app on Android or iOS.

You can also subscribe to the print version of our magazine. Not only do we deliver worldwide, but people who sign up to the six- or twelve-month print subscription get a FREE Raspberry Pi Pico 2 W!

The post Azure Hear The World Project appeared first on Raspberry Pi.


from News - Raspberry Pi https://ift.tt/qT9GY8b

Friday, November 7, 2025

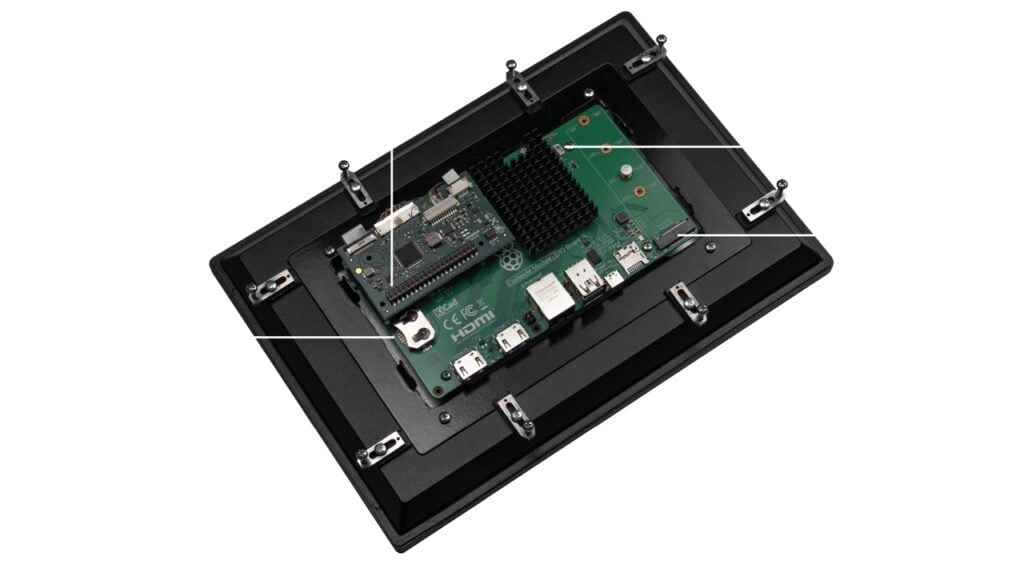
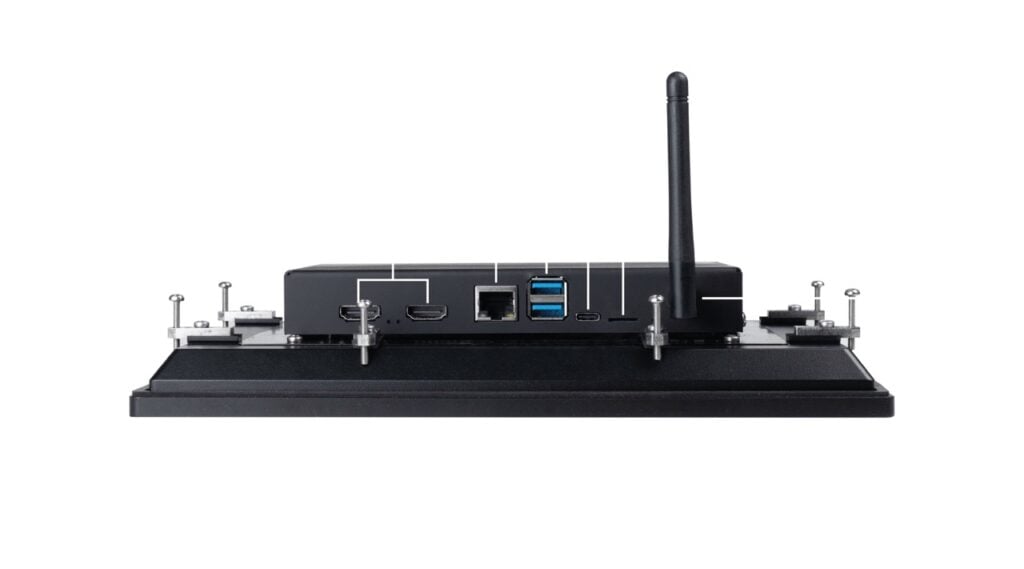
Raspberry Pi power meets industrial smarts: SECO Pi Vision 10.1 CM5

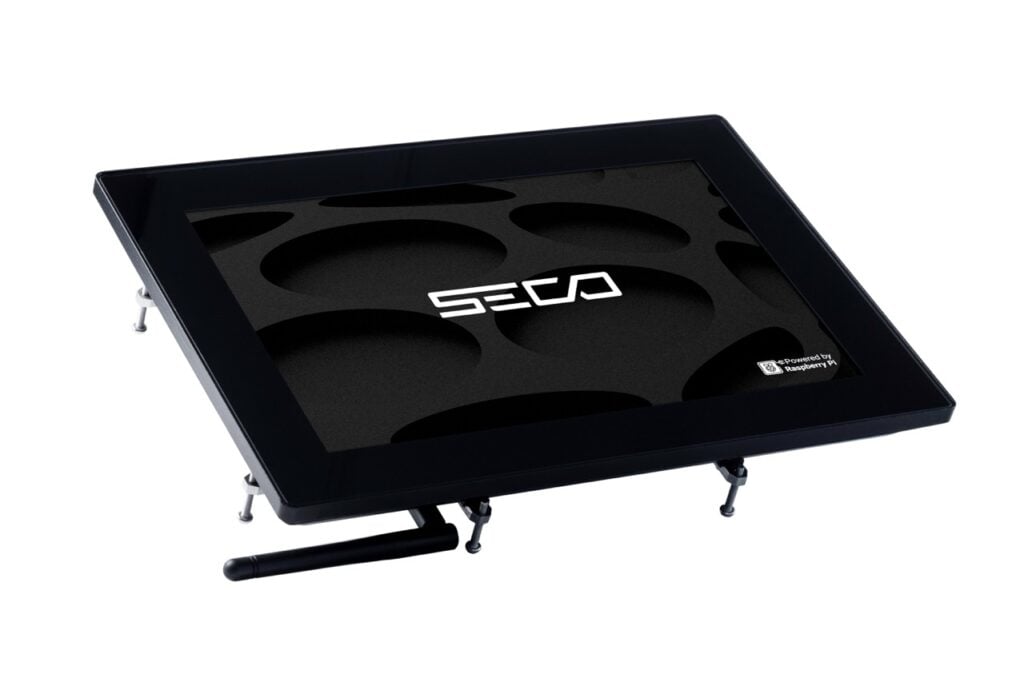
If you’ve ever wished your Raspberry Pi could level up into a full-blown industrial human–machine interface (HMI), SECO just made it happen. Meet the Pi Vision 10.1 CM5 — a rugged, ready-to-roll platform built around Raspberry Pi Compute Module 5 (CM5). It’s tailor-made for IoT developers and system integrators who want to move fast.

Out-of-the-box brilliance

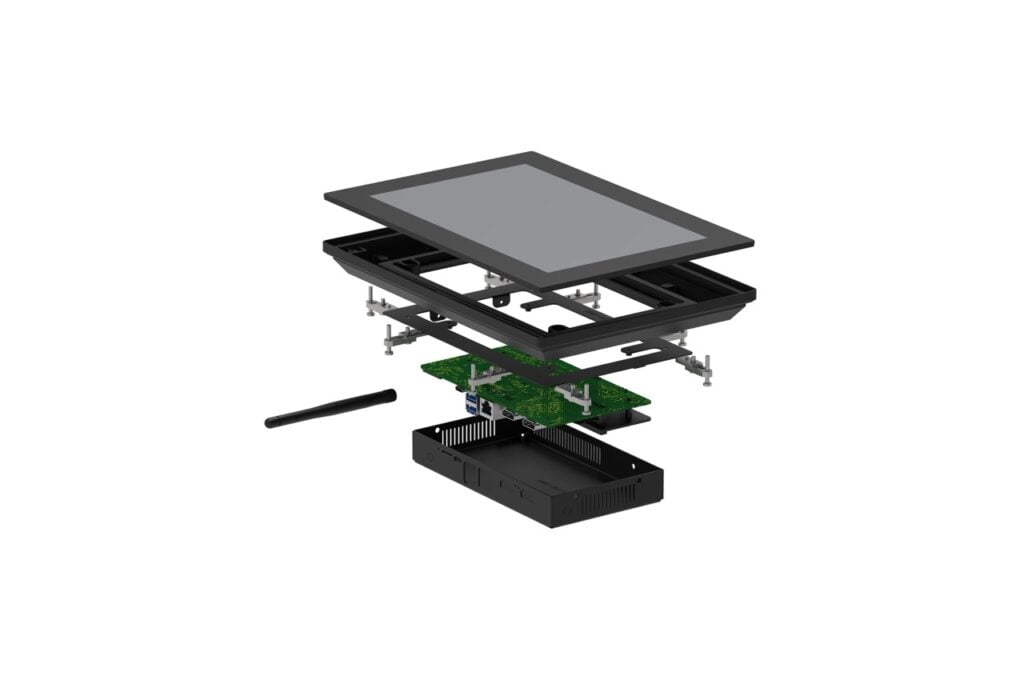
The Pi Vision takes the established and well-supported Raspberry Pi ecosystem and wraps it in serious industrial muscle:

  • 10.1-inch multi-touch display with a tough aluminium housing and IP66 protection
  • Broadcom BCM2712 quad-core Arm Cortex-A76 CPU clocked at 2.4GHz
  • Up to 8GB ECC RAM, Wi-Fi®, Gigabit Ethernet, and USB 3.0
  • Fanless, maintenance-free design that’s built to last

Right from boot, you’re greeted by Raspberry Pi OS (or SECO’s industrial Clea OS), preloaded with all the good stuff — Docker, Node-RED, TensorFlow Lite, and Edge Impulse. In other words, it’s a Raspberry Pi that’s ready for serious business.

A playground for web devs and IoT builders

Because it’s a Raspberry Pi at heart, you can plug in sensors, build dashboards, and deploy AI models without diving deep into embedded engineering. Using Node-RED and MQTT, developers can build smart systems that stream data from sensors, visualise it in real time, and even trigger alerts or AI-driven actions when things go sideways (like a sudden CO₂ spike or a production line failure).

With Docker, every app runs neatly in its own container, meaning there are no dependency nightmares and no “but it works on my Raspberry Pi” headaches. And if you need to deploy your solution across multiple buildings or client sites, you can just clone your setup and go.

Smart building, meet smart platform

SECO’s Clea OS and Edgehog tools make remote management and over-the-air updates simple. Whether it’s rolling out new Node-RED flows or updating ML models, everything can be done securely from anywhere, giving you industrial-level innovation on the go.

From prototype to production — all on Raspberry Pi

The Pi Vision 10.1 CM5 turns the flexible, maker-friendly Raspberry Pi platform into a professional-grade edge computing powerhouse. It bridges the gap between enthusiast innovation and industrial reliability, empowering teams to design, deploy, and scale smart IoT systems fast.

This isn’t just any old HMI. It’s a Raspberry Pi gone pro.

Register now to access exclusive launch pricing for SECO’s Pi Vision 10.1 CM5!

The post Raspberry Pi power meets industrial smarts: SECO Pi Vision 10.1 CM5 appeared first on Raspberry Pi.


from News - Raspberry Pi https://ift.tt/tv8wjoB

Wednesday, November 5, 2025

Casio FX9000P RAM replacement

Maker Andrew Menadue works with embedded firmware by day and resurrects and recreates vintage calculators and computers for fun. In the latest issue of Raspberry Pi Official Magazine, David Crookes learns how a broken vintage computer has been brought back to life thanks to RP2040. 

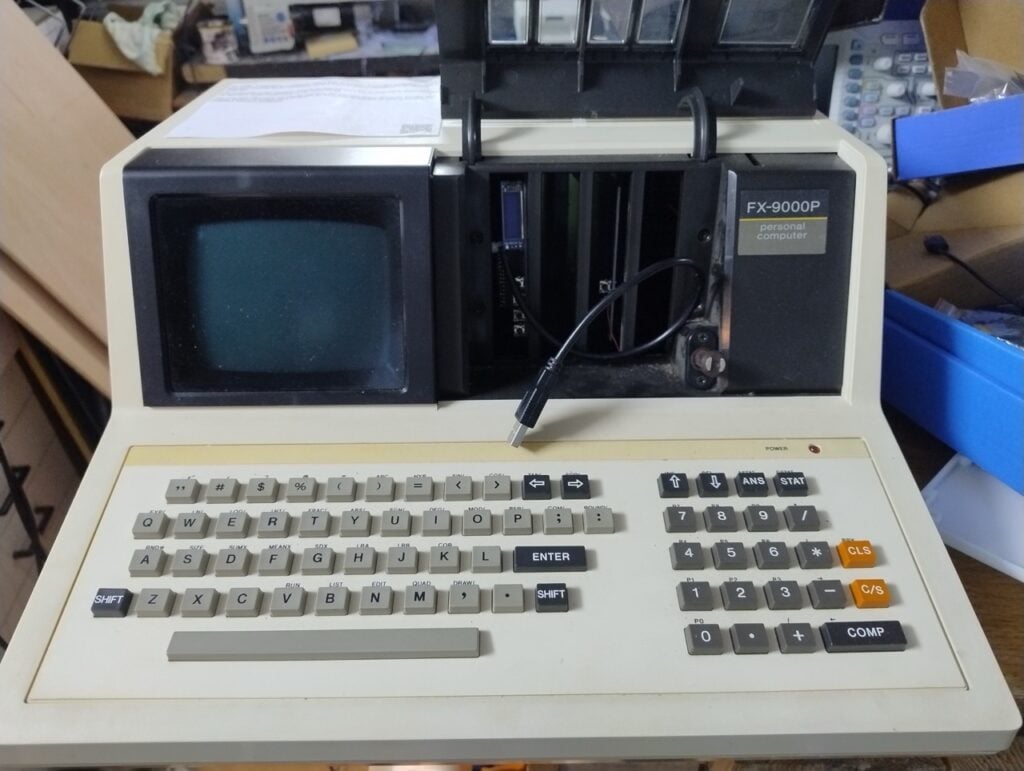
When most people think of Casio, calculators and watches usually spring to mind. But over nearly 80 years, this Japanese electronics company has developed many other devices, including computers such as the Casio FX9000P. Powered by a Z80 processor and coming with built-in BASIC, the FX90009P is highly sought after, despite fetching high prices at auction. Many surviving units, however, require careful restoration.

The Casio FX9000P computer has the characteristics of Casio’s calculators and BASIC programmables

This didn’t deter Andrew Menadue. “Being a big Casio fan, I decided to buy one, partly to see what it was like and partly to add to my collection,” he says. “I knew from the auction photos that vertical lines were appearing on the screen, but I was fairly sure that video RAM would be the problem and I was confident about a repair.”

Chips are down

When the machine arrived, two video RAM chips were indeed broken. “The simplest way to fix them would be to replace the faulty ICs, but new ICs aren’t available, so replacements — costing about £20 each — would be old and probably close to failure themselves.” Andrew decided to look at the RP2040 microcontroller chip as a possible alternative.

“I’d used the RP2040 before, in Pico form, in other projects and had bought a supply of RP2040 ICs for embedding on PCBs,” he recalls. “I contemplated building a replacement using a RAM chip, but the problem with that is the size of the original ICs. There just wasn’t room. RP2040 is small and would just about fit on a PCB that sat in the footprint of the original RAM chip.”

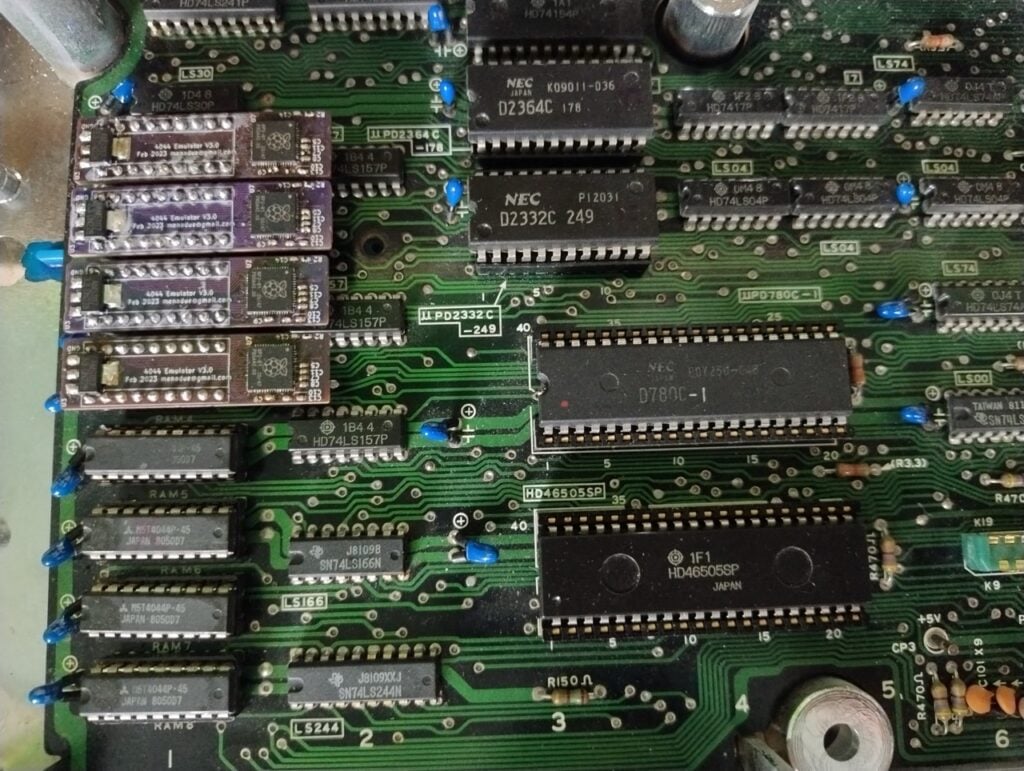
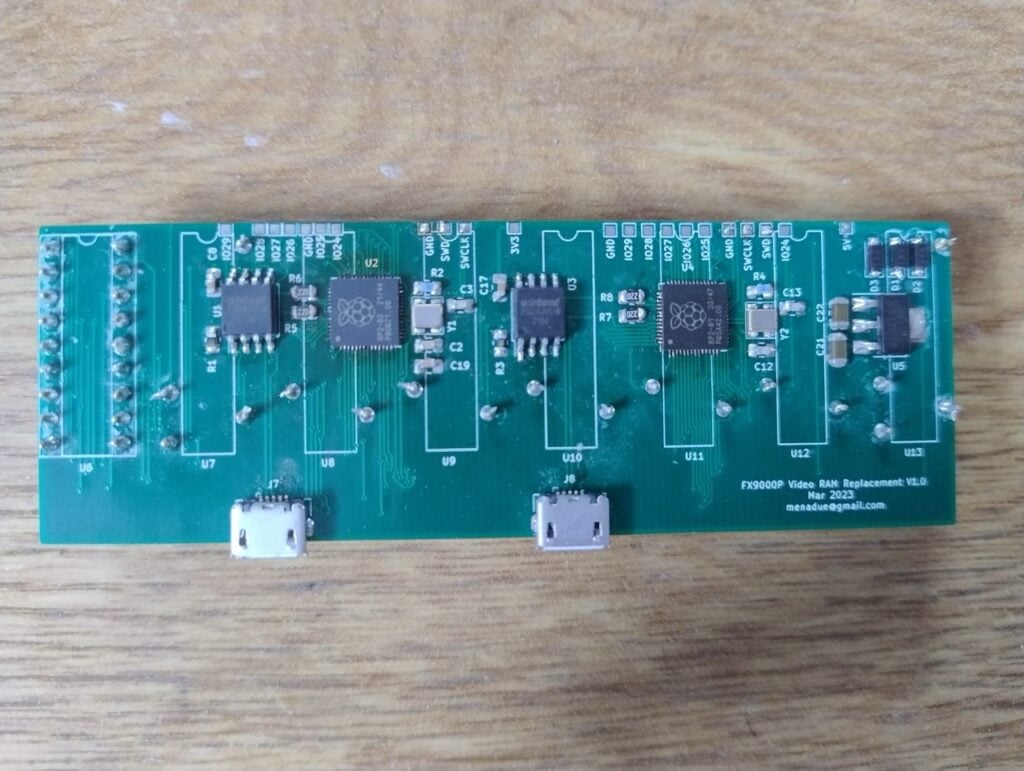
This PCB is used to replace the FX9000P’s video RAM in its entirety — it plugs into all of the RAM sockets

Andrew made a couple of prototype RAM replacements using Raspberry Pi Pico microcontroller boards connected with wires. “I used these to write the code and verify everything would work,” he says. “One problem was that the RP2040 is a 3V3 IC and the FX9000P uses standard TTL logic running at 5V. Luckily, the FX9000P seems to run its 5V supply a bit low, which I have seen on other vintage machines, and I decided not to fit level shifters.” 

Technology for life

The code, written with the C/C++ SDK, proved straightforward enough. “The program is quite small and is basically a loop,” Andrew reveals. “The address lines are sampled on chip select and data is presented on the data lines. Data is stored in the RP2040 RAM and plenty is available for this task.”

Once everything was working, Andrew designed a small PCB to fit the footprint of a FX9000P RAM chip. “I then removed all the video RAM and put sockets in, then ran the system with two RP2040 replacements and six original RAM chips,” he says.

The video RAM replacement PCBs were designed by Andrew;
each one is placed on the FX9000P board and contains an RP2040 microcontroller chip

Later, as more video RAM ICs failed, Andrew decided to ditch the small PCBs in favour of a larger one that fits over all of the ICs and replaces the whole video RAM. “This was made with two RP2040 ICs and runs similar code to the small PCB, but each RP2040 provides four bits of data instead of just one.”

This also provided an additional benefit. “The ‘all-in-one’ video RAM PCB should be able to provide the FX9000P with an alternative way to screenshot the video RAM and also, perhaps, send the video data to a second display,” he says. This could be used to replace the CRT with an LCD if and when the tube fails, which means this project is not only helping to preserve old tech but future-proof it too.

Raspberry Pi Official Magazine #159

You can grab the latest issue from Tesco, Sainsbury’s, Asda, WHSmith, and other newsagents, including the Raspberry Pi Store in Cambridge. It’s also available from our online store, which ships around the world. And you can get a digital version via our app on Android or iOS.

You can also subscribe to the print version of our magazine. Not only do we deliver worldwide, but people who sign up to the six- or twelve-month print subscription get a FREE Raspberry Pi Pico 2 W!

The post Casio FX9000P RAM replacement appeared first on Raspberry Pi.


from News - Raspberry Pi https://ift.tt/NswOTkE