Ydtechnologius
This is a collection of news and articles on tech and gadgets.Informative news on technology, gadgets and news.Latest Technology News, Gadget Reviews, Latest Gadgets, Latest Gizmos and Latest News in Tech.
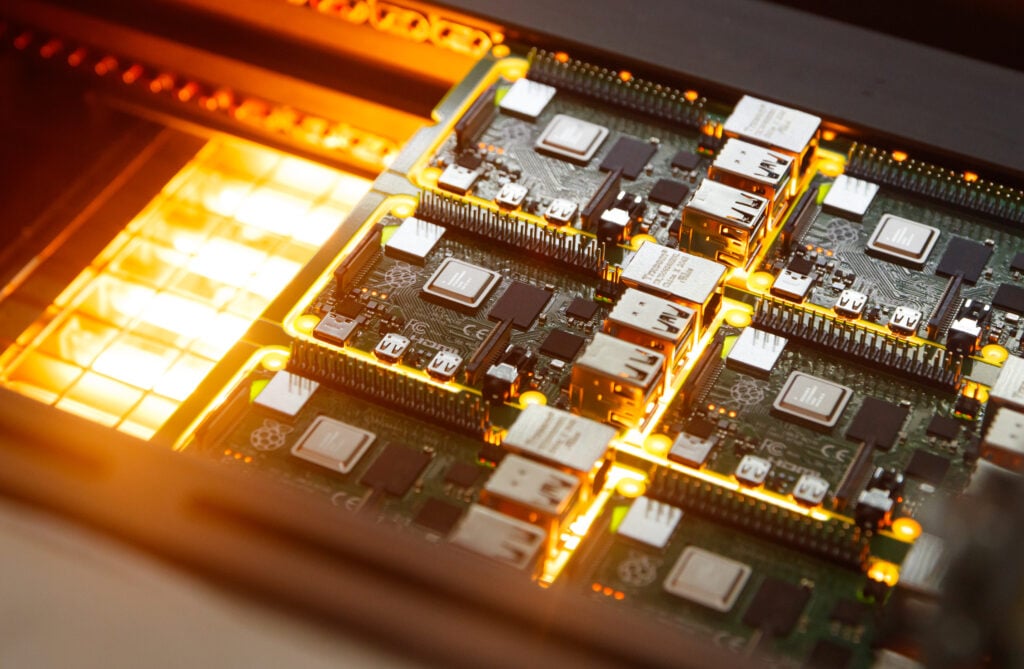
At Raspberry Pi, we have always aimed to make the best general-purpose computing platforms for every kind of application, at an affordable price point that’s accessible for as many people and businesses as possible. This effort extends far beyond the initial purchase price of our devices; it’s about creating products that are designed for longevity and supported by a supply chain that is both ethically and environmentally sound. That starts with where and how we manufacture our computers.
The power of local manufacturing
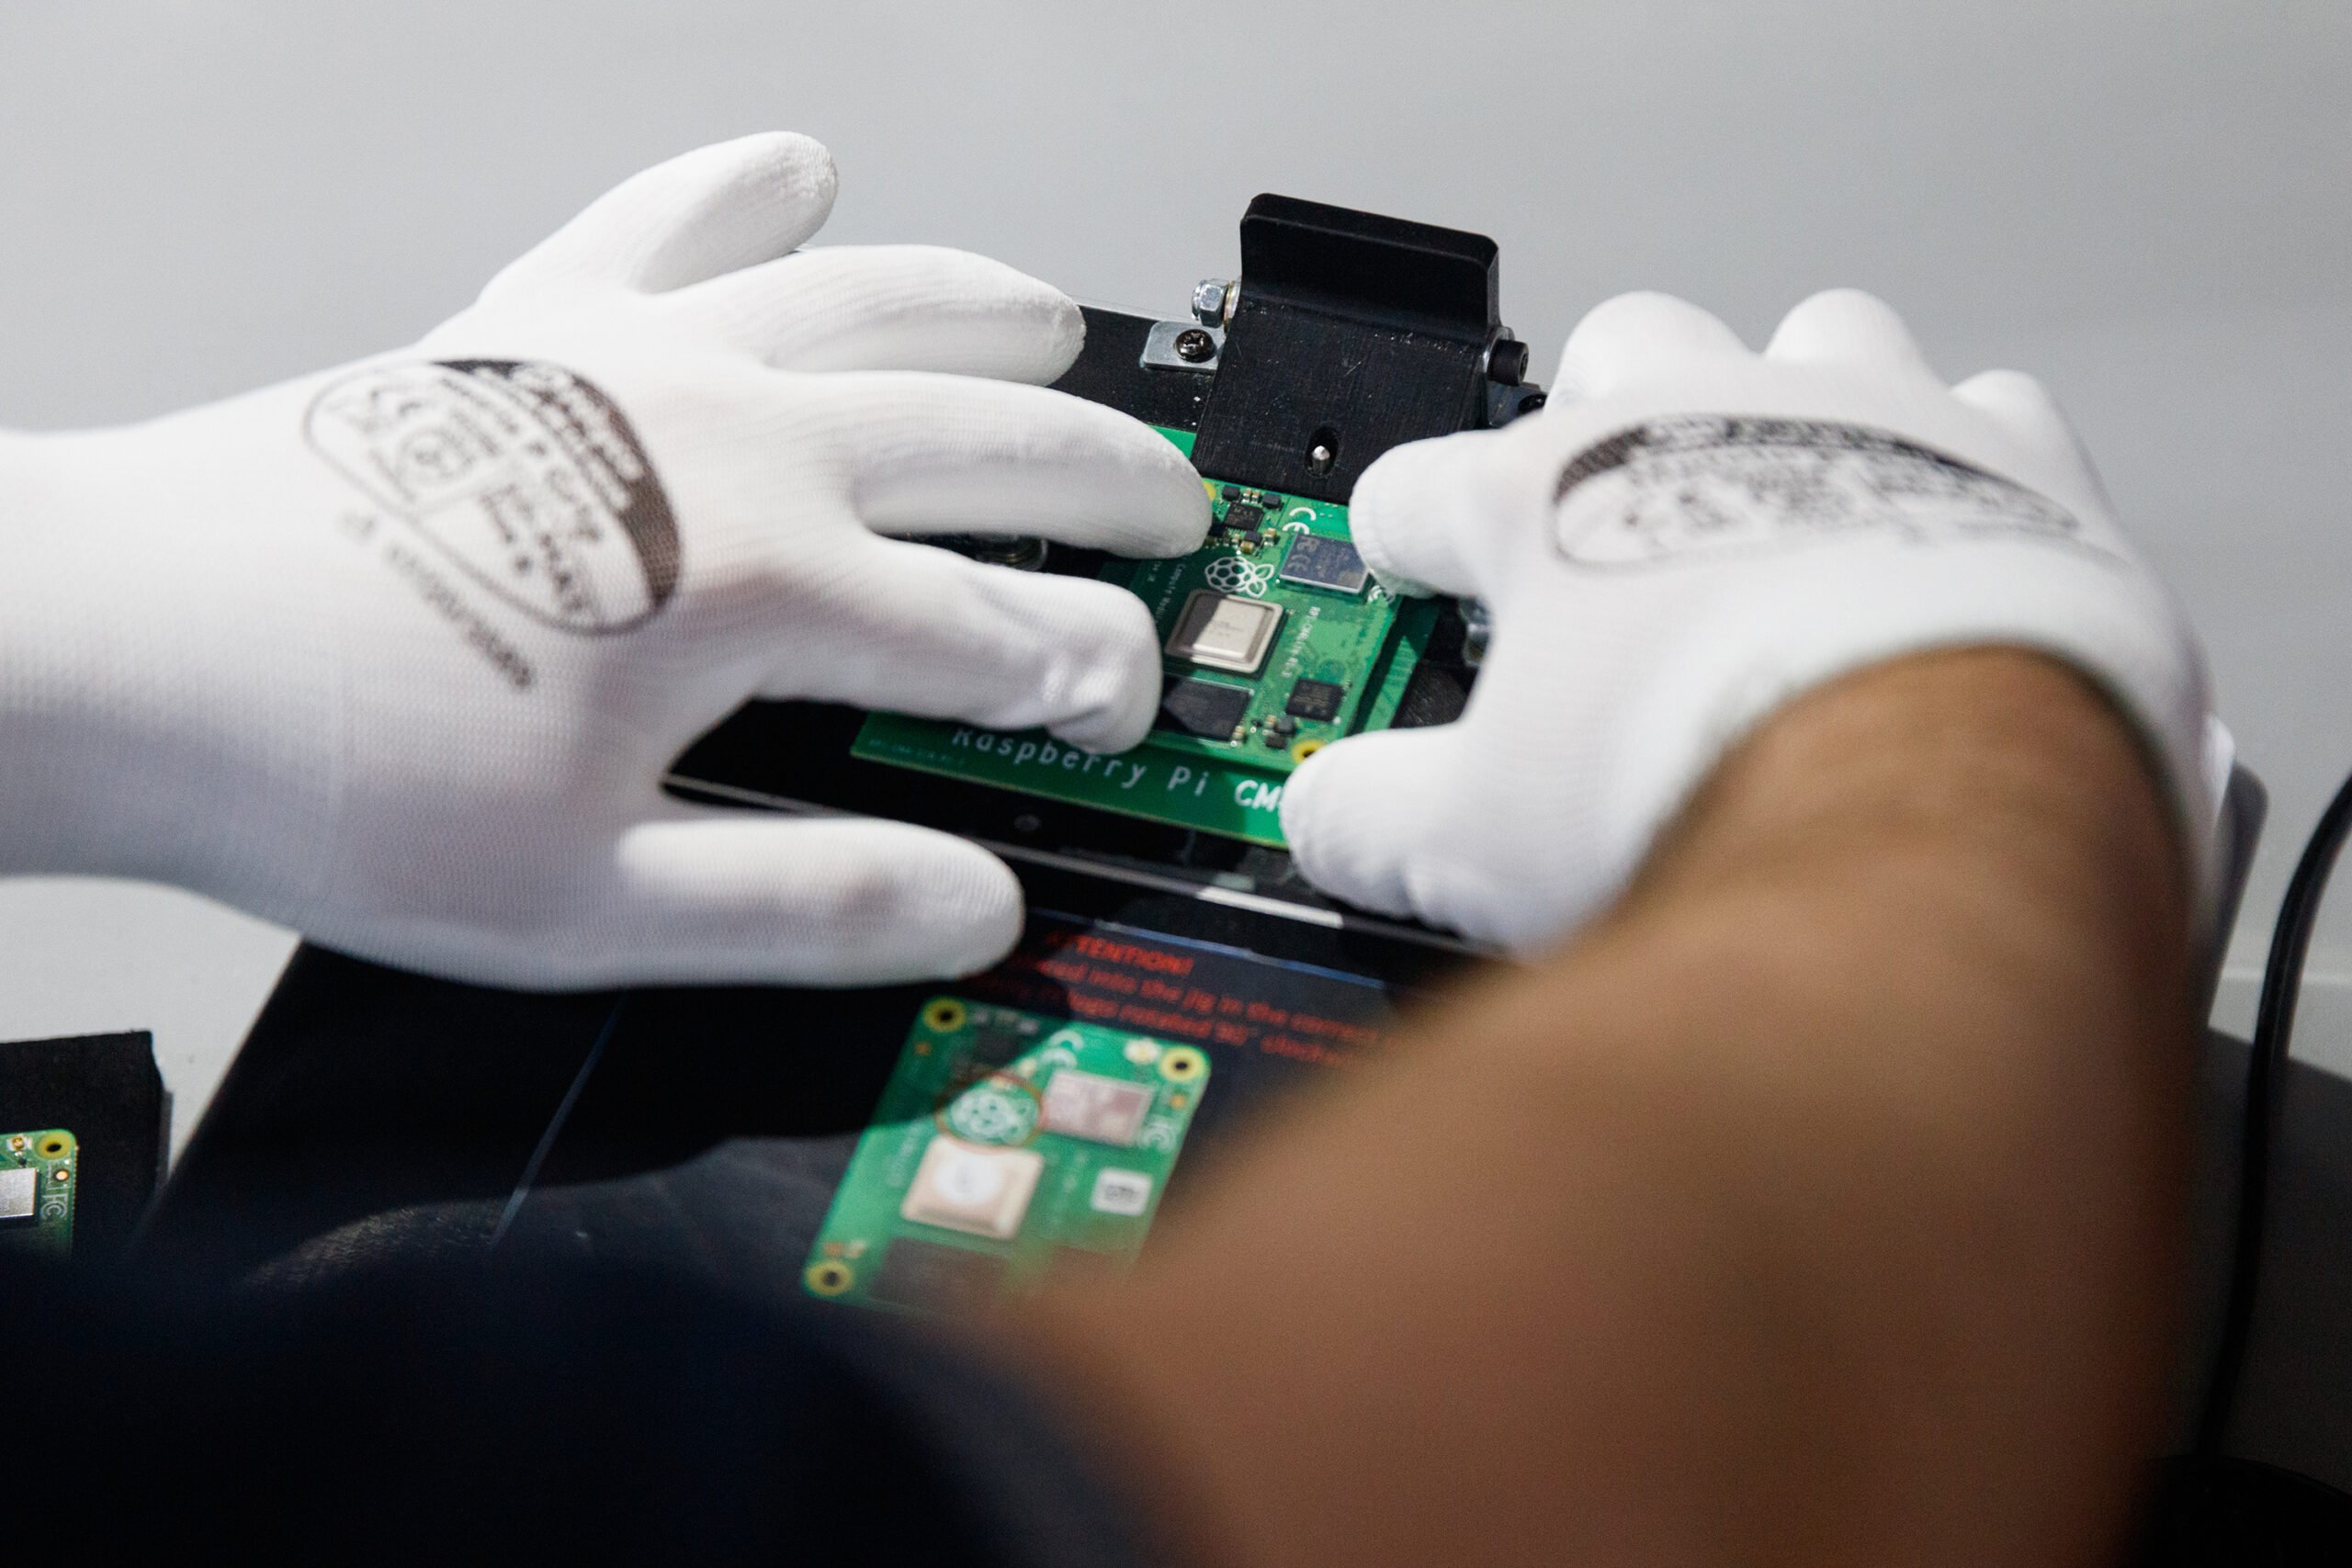
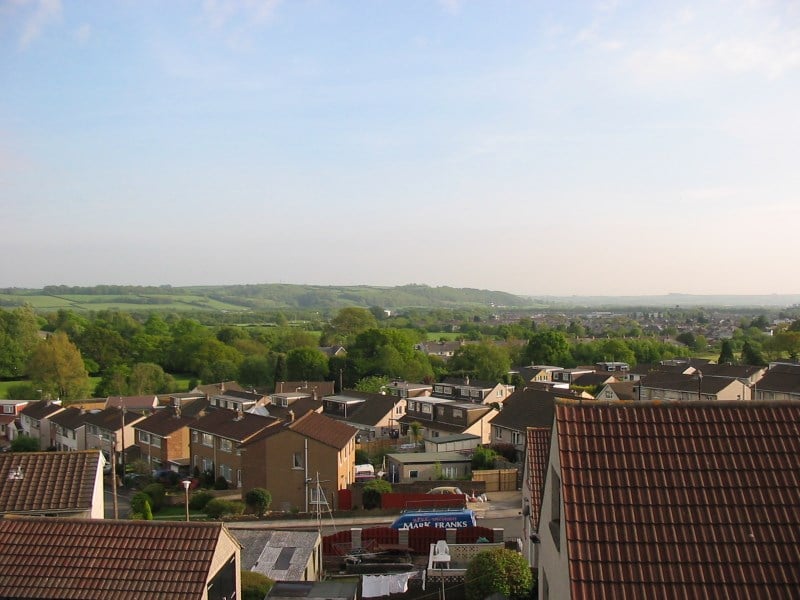
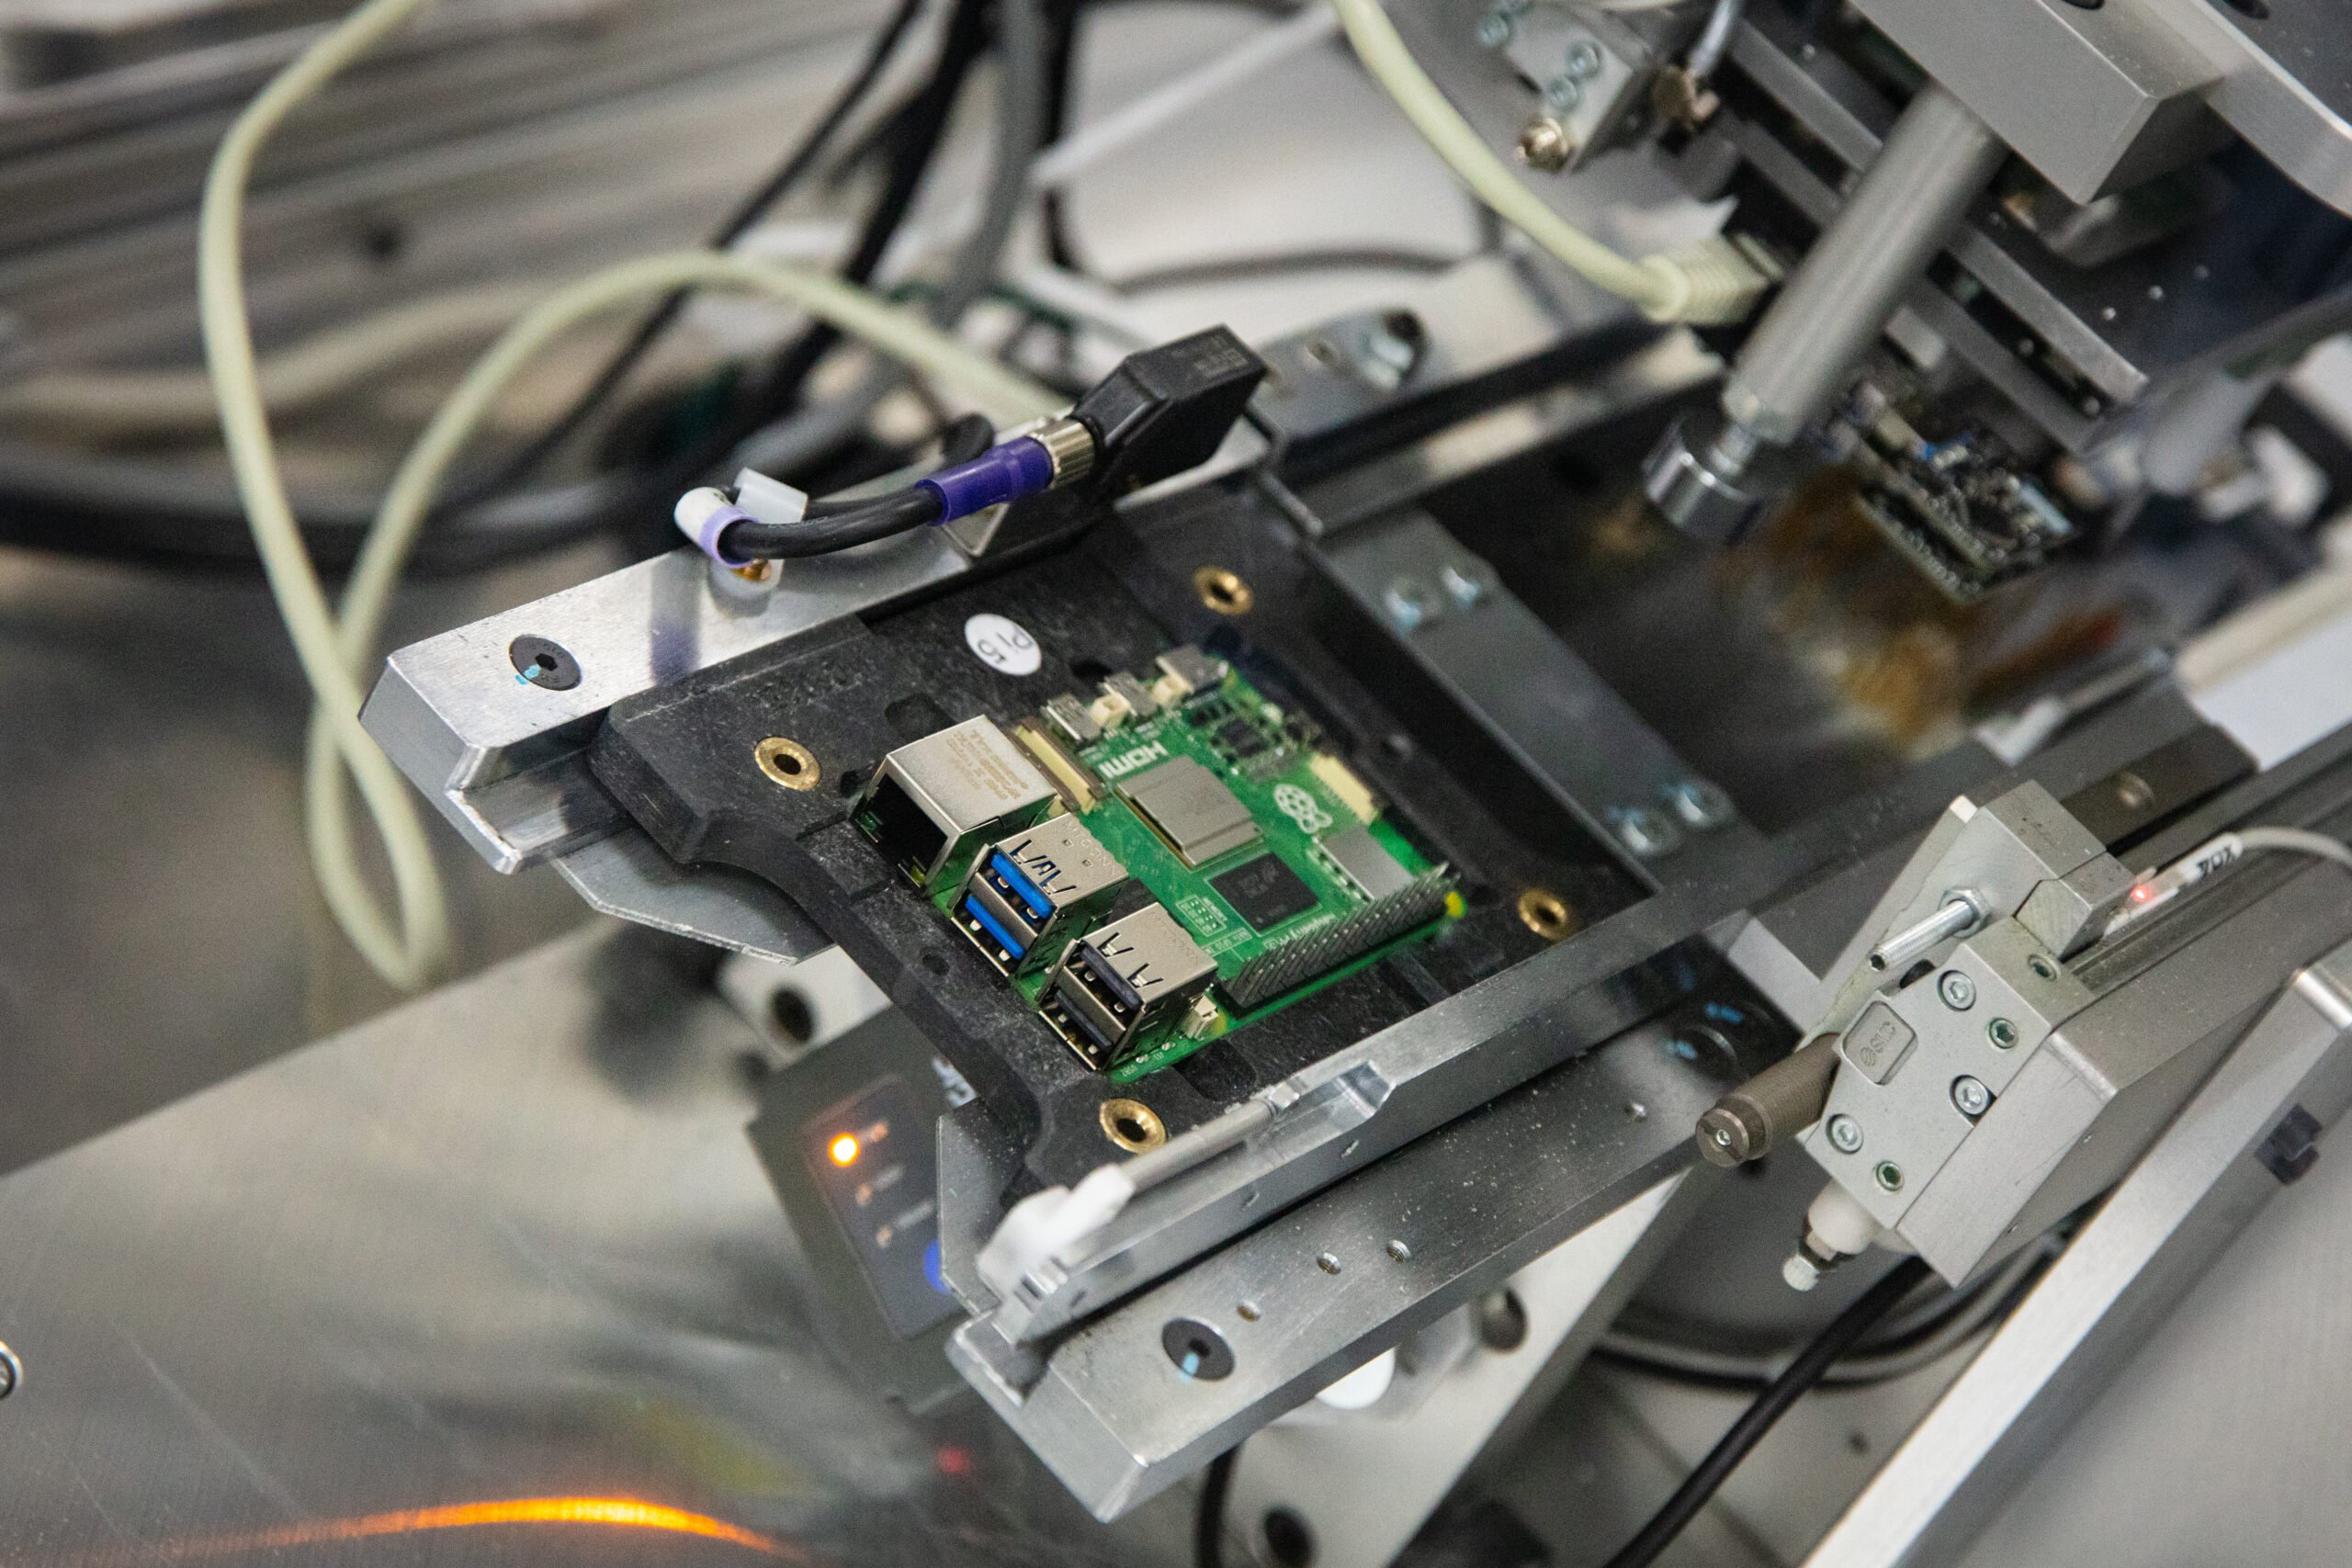
Since the beginning, we have manufactured our single-board computers at the Sony UK Technology Centre (Sony UK TEC) in Pencoed, South Wales. This local partnership gives us deeper insight into the entire manufacturing process, ensuring that our high standards for quality and ethics are upheld. It’s a choice that supports British jobs and industries — and it’s also a fundamentally sustainable one. By keeping production onshore, we can largely avoid the complex and energy-intensive global shipping processes that characterise much of the electronics manufacturing industry, significantly reducing our carbon footprint.
Zero waste and beyond
True sustainability goes beyond simple recycling; it requires constant improvement and circularity. The Sony UK TEC facility embodies this approach, operating under a zero-waste-to-landfill policy. This is achieved by managing waste streams across the entire factory, from recycling electronics and repurposing materials to composting food waste. During the COVID-19 pandemic, the site put this policy into practice by transforming waste from disposable PPE into new benches for its on-site environmental centre.
A mutually beneficial relationship with nature
In order to be truly sustainable, a manufacturing hub must become a part of its local ecosystem, rather than a drain on it. Sony’s Pencoed site, with its commitment to biodiversity and use of renewable energy, is a great example of this. The facility generates a portion of its own power using over 1700 on-site solar panels, with all its remaining electricity sourced from 100% renewable green energy. The site also actively promotes local biodiversity by maintaining honeybee colonies, which are cared for by trained staff volunteers. This not only supports the local ecosystem but also creates a tangible connection between Sony UK TEC’s industrial processes and the natural world around them.
Recovering gold from e-waste
Since 2022, Sony has supported the pioneering work of The Royal Mint, also based in Wales, to recover gold from discarded electronics. The Royal Mint’s new precious metals recovery plant uses a patented, room-temperature (more energy- and cost-efficient) chemical process to extract gold and other valuable materials from unwanted circuit boards, turning a typical electronic waste stream into a sustainable source of raw materials.
Sony has been supplying e-waste from its Pencoed site, just eight-and-a-half miles away from The Royal Mint, since the start of the programme. It says that the initiative “demonstrates the latest in recycling technology and is leading the way in reducing the environmental impacts from e-waste.”
“For Sony, sustainability is a key focus globally, so collaborations such as this one will become increasingly important to achieving our long-term sustainability goals,” the company adds. Sony values the collaboration with The Royal Mint as a continuing element of its Road to Zero environmental plan.
A commitment to sustainable innovation
Raspberry Pi believes that affordable computing should not come at an environmental cost. Our partnership with Sony UK TEC is a testament to our conviction that technology manufacturing can and must be done in a way that is local, responsible, and regenerative. Through these principles we can build a more sustainable future for everyone.
We’re past summertime, and it’s an odd-numbered year, which means there is a new major release of Debian Linux, which in turn means there is a new major release of Raspberry Pi OS. This year’s version of Debian is called Trixie — as many of you know, Debian releases are named after characters in Disney’s Toy Story series of films, but all the well-known characters have already been used, so the names are getting increasingly obscure! Trixie is apparently a blue plastic triceratops who appears in Toy Story 3, but I must admit I can’t remember her — then again, I only watched that one once, because it got a bit sad towards the end…
Resplendent
But I digress. So we have a new version of Raspberry Pi OS — what has changed?
The last few Debian releases have had fewer major architectural changes than the earlier ones; Debian itself seems to be a lot more stable in terms of the major components, and while various bits do get upgraded, the overall design seems not to change much any more.
A time system with time ahead of it
Probably the biggest change in Debian Trixie is one that no one will actually notice until the year 2038 — or rather, will now not notice in 2038 due to changes in this version. Linux has always used a time system based on the number of seconds since an arbitrary start time of midnight on January 1st, 1970, and this time value has been stored in a 32-bit number. If you do the sums, this 32-bit value will overflow and loop back to zero (i.e. January 1st, 1970) some time on January 19th, 2038.
Now, clearly there are a few years left before this actually becomes a problem — indeed, I’ll probably have retired by then — but Debian wanted to get ahead of the game, and so from Trixie onwards, all times have been changed to use a 64-bit value rather than a 32-bit value. They are still using the same start date, but because there are now twice as many bits available to store the number of seconds, the calendar will not overflow until sometime around the year 292,277,026,596. (By which time I will definitely have retired, so this will then be someone else’s problem.) This means that many parts of Trixie have had to be rebuilt to ensure that the entire system is using the new time format. But as I said, you’re really not going to notice that!
New theme
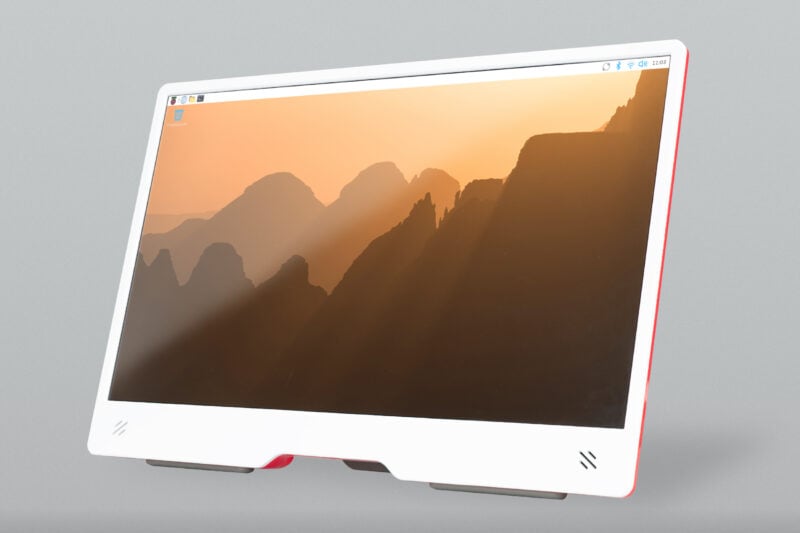
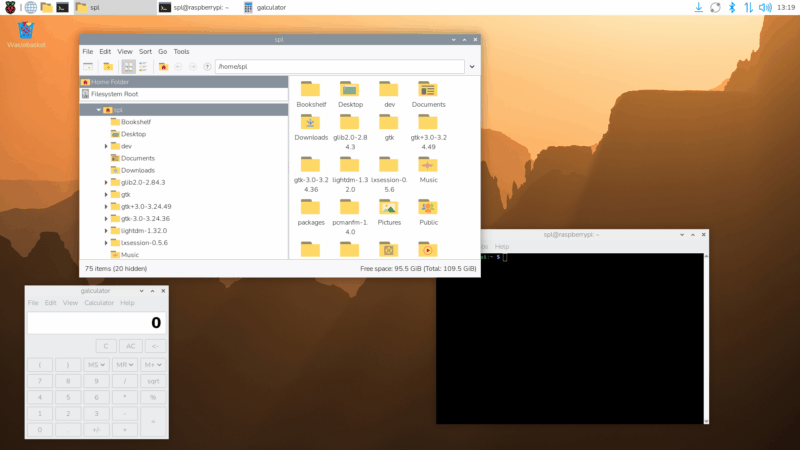
Something you will notice, however, is that we’ve made some changes of our own in the Trixie release. The most obvious is that we have updated the theme for the desktop — we have a completely new set of icons, a new font, new desktop backgrounds, and some other small tweaks to refresh the appearance of the system. This should be apparent as soon as you launch it.
Many years ago, at the very start of my career, I worked as a user interface designer at Cambridge Consultants Ltd, and I was very pleased to be able to work on this update with an old colleague from those days; this is the first time we have used an outside designer to provide input on the appearance of the desktop, and I hope you’ll agree that the results were worthwhile.
The new font is called Nunito Sans Light, which replaces the old Piboto font we have used for the last ten years or so. We have a new selection of desktop wallpapers, again provided by Greg Annandale from the Raspberry Pi Foundation. In case you were wondering, the default wallpaper is a picture of the sun rising over the Drakensberg mountains in Lesotho.
New Control Centre application
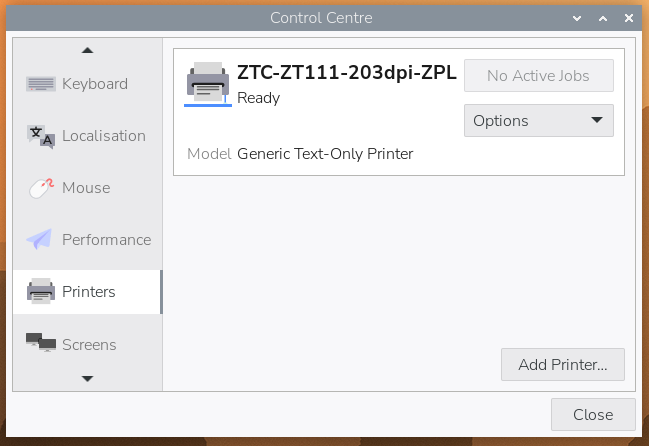
Another change we have made to tidy things up is to replace all the old preferences applications — Raspberry Pi Configuration, Appearance Settings, Mouse and Keyboard Settings, Screen Configuration, Printer — with a single new Control Centre application.
All the settings that were in the preferences applications listed above can now be found in Control Centre, and they are all arranged on the same pages, so hopefully this will be relatively easy to navigate. Do note that to switch quickly between pages, you can hover the pointer over the page names on the left and use the mouse’s scroll wheel to change page.
Control Centre is written as a very lightweight core application that loads all its functionality, at runtime, from a set of plugin libraries, which means it can easily be extended to add new tabs with new controls. So in the future, we may add new settings pages to Control Centre, but third parties will also be able to write their own settings pages for things like controlling custom hardware.
Instructions on how to write a plugin are on the Control Centre GitHub page, or you can look at the source code for any of the existing plugins to see how they work.
New Bookshelf features
We launched the Bookshelf application during the COVID-19 lockdown to make it easier to access the free electronic versions of Raspberry Pi Press publications. Recently, we have changed the way that the free versions are distributed, so that subscribers to Raspberry Pi Official Magazine get early access to titles, which are then made available to everyone else free of charge a few months later.
Recent titles are now displayed in Bookshelf with a padlock icon — these are the titles that will become available for free in the next few months. But if you are a subscriber (or would like to become one), you can click the ‘Contribute’ button to log into your account and unlock all the latest titles immediately.
There will be an additional blog post in the next few days explaining more about this change to how publications are made available — watch this space!
New packaging
The last major change we have made for Trixie has nothing to do with what’s in the image, but has more to do with how the image is created.
For this release, we have tried to make the installation of the packages that go into the desktop image more modular, to make it easier to create customised versions of the image. This also makes it easier to convert a Lite image into a full desktop image, and vice versa, something which we have never really supported in the past.
To this end, all the packages that are required to convert a command-line-only Lite image into a full desktop image, along with all the configuration files and customisation, are now grouped in a hierarchical set of meta packages.
Adding packages to Raspberry Pi OS Lite
There are two “base” packages: rpd-wayland-core and rpd-x-core. If you want the bare-bones components required to create a Wayland-based desktop on top of a command-line image, all you need to do is to install rpd-wayland-core. For an X-based image, install rpd-x-core.
That will give a plain vanilla, uncustomised image. To add our theme to it — the icons, the font, the GTK theme and so on — install rpd-theme. To get the Control Centre and the associated plugins, install rpd-preferences. With this done, you’ll have the bare minimum Raspberry Pi Desktop image.
You can then add various other packages which contain the additional applications that the released image includes. rpd-applications installs things like the Geany editor, the Thonny Python environment, the Firefox and Chromium browers, et cetera. rpd-utilities installs the contents of the Utilities and Help menus, including Raspberry Pi Connect, SD Card Copier, Bookshelf, Text Editor, and Image Viewer, among others.
rpd-developer adds things like some Python and camera libraries, and rpd-graphics adds useful command-line graphics and video tools like FFmpeg and GStreamer. And finally, rpd-wayland-extras and rpd-x-extras include tools which are specific to either Wayland or X environments, like the remote desktop and screenshot utilities.
Removing packages from Raspberry Pi OS with desktop
Similarly, if you start with a full desktop image, you can remove any of the above by purging the relevant meta package and running sudo apt autoremove. While to many end users this functionality won’t be of interest, it does make custom images much easier to manage, and is being incorporated into our own image generation tools, like pi-gen.
In addition to the above, as with any major upgrade, we have updated everything to include all the latest bug fixes and upgrades.
How do I get it?
As with all major version upgrades, we do not recommend or support attempting to upgrade a running Bookworm image. (If you want to know why not, have a read of the instructions Debian provide for doing this — they are rather long and involved, but a prerequisite is basically to remove anything that you have done to customise your image.) We know some people will nonetheless insist that they have to do this; we strongly suggest you don’t, but if you really want to, there are instructions in the Raspberry Pi OS forum here. These work on a clean Bookworm image, but we cannot guarantee they will work on your image, because we cannot possibly test every change people might have made. You do this at your own risk, and you shouldn’t even consider it without having backed up first — you have been warned!
The recommended method is to flash a clean copy of the Trixie image — either using Raspberry Pi Imager or by downloading an image file from our OS downloads page.
An additional option for newer Raspberry Pis
If you are using a Raspberry Pi 5, 500 or 500+ that is connected to a network via an Ethernet cable, you can also flash a new image using the version of Raspberry Pi Imager which is embedded in the bootloader. To access this, power off the Raspberry Pi and disconnect the power cable, press and hold the shift key and then, while holding down the key, connect the power cable. The Raspberry Pi should boot into Imager, which can then be used to download and install a Trixie image.
Support for Raspberry Pi AI add-ons and Mathematica coming soon
Please note that packages for the Raspberry AI HAT+ and AI Kit, for the TV HAT, and for Wolfram Mathematica are not yet available in Trixie. If you are using any of these products, we advise you to continue to use your existing Bookworm image for the time being. Versions of these packages will be made available for Trixie in the near future.
There’s a fair bit to explore in this release, and we’re interested to hear how you get on with it. Do let us know what you make of it; we hope Raspberry Pi OS Trixie serves you well.
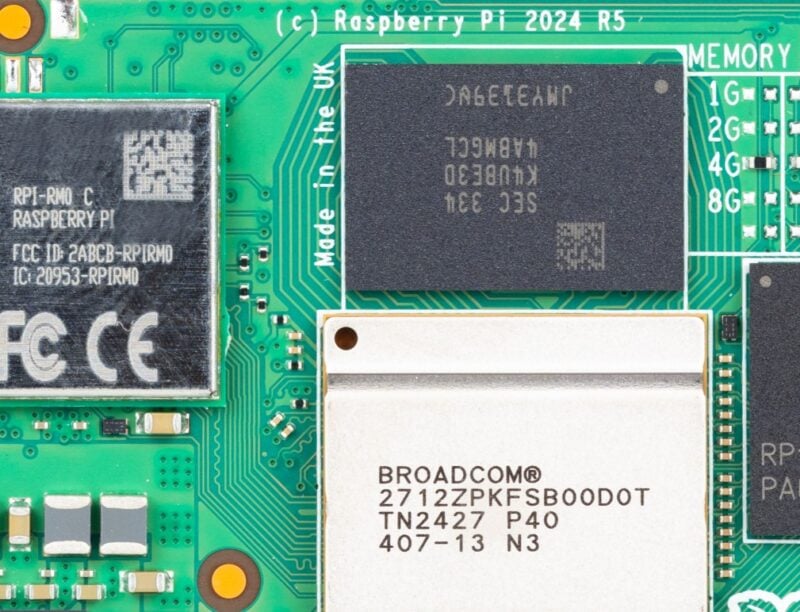
As many of you are aware, memory prices have been rising rapidly for the last six months. Insatiable demand for High-Bandwidth Memory (HBM) for AI applications is competing for fab space with the commodity LPDDR memory used by Raspberry Pi, leading to shortages and price rises. At this point, memory costs roughly 120% more than it did a year ago.
We came into this year holding substantial stockpiles of memory, which has allowed us to hold prices flat. However, we’ve now reached the point where we have to pass some of this cost on. With effect from today, we’re making the following changes to pricing:
In the case of Compute Module 4, this exactly reverses price cuts that we made earlier this year. We’ve been able to hold the Raspberry Pi 500 kit price at $120 by accepting a heavily reduced margin. 1GB and 2GB products are not affected, as the impact of the memory price increases is not so pronounced at these densities.
At the same time, we’re increasing the price of Raspberry Pi 3B+ by $5 to $40 and reducing the price of Compute Module 1 by $5 to $25, reflecting changes to the underlying (non-memory) cost structure of these older products. No other “classic” Raspberry Pi products are affected.
Low, stable prices are an important part of what makes Raspberry Pi special, and these changes reflect the exceptional nature of the current environment. We look forward to reversing them once memory prices return to their long-term downward trajectory.
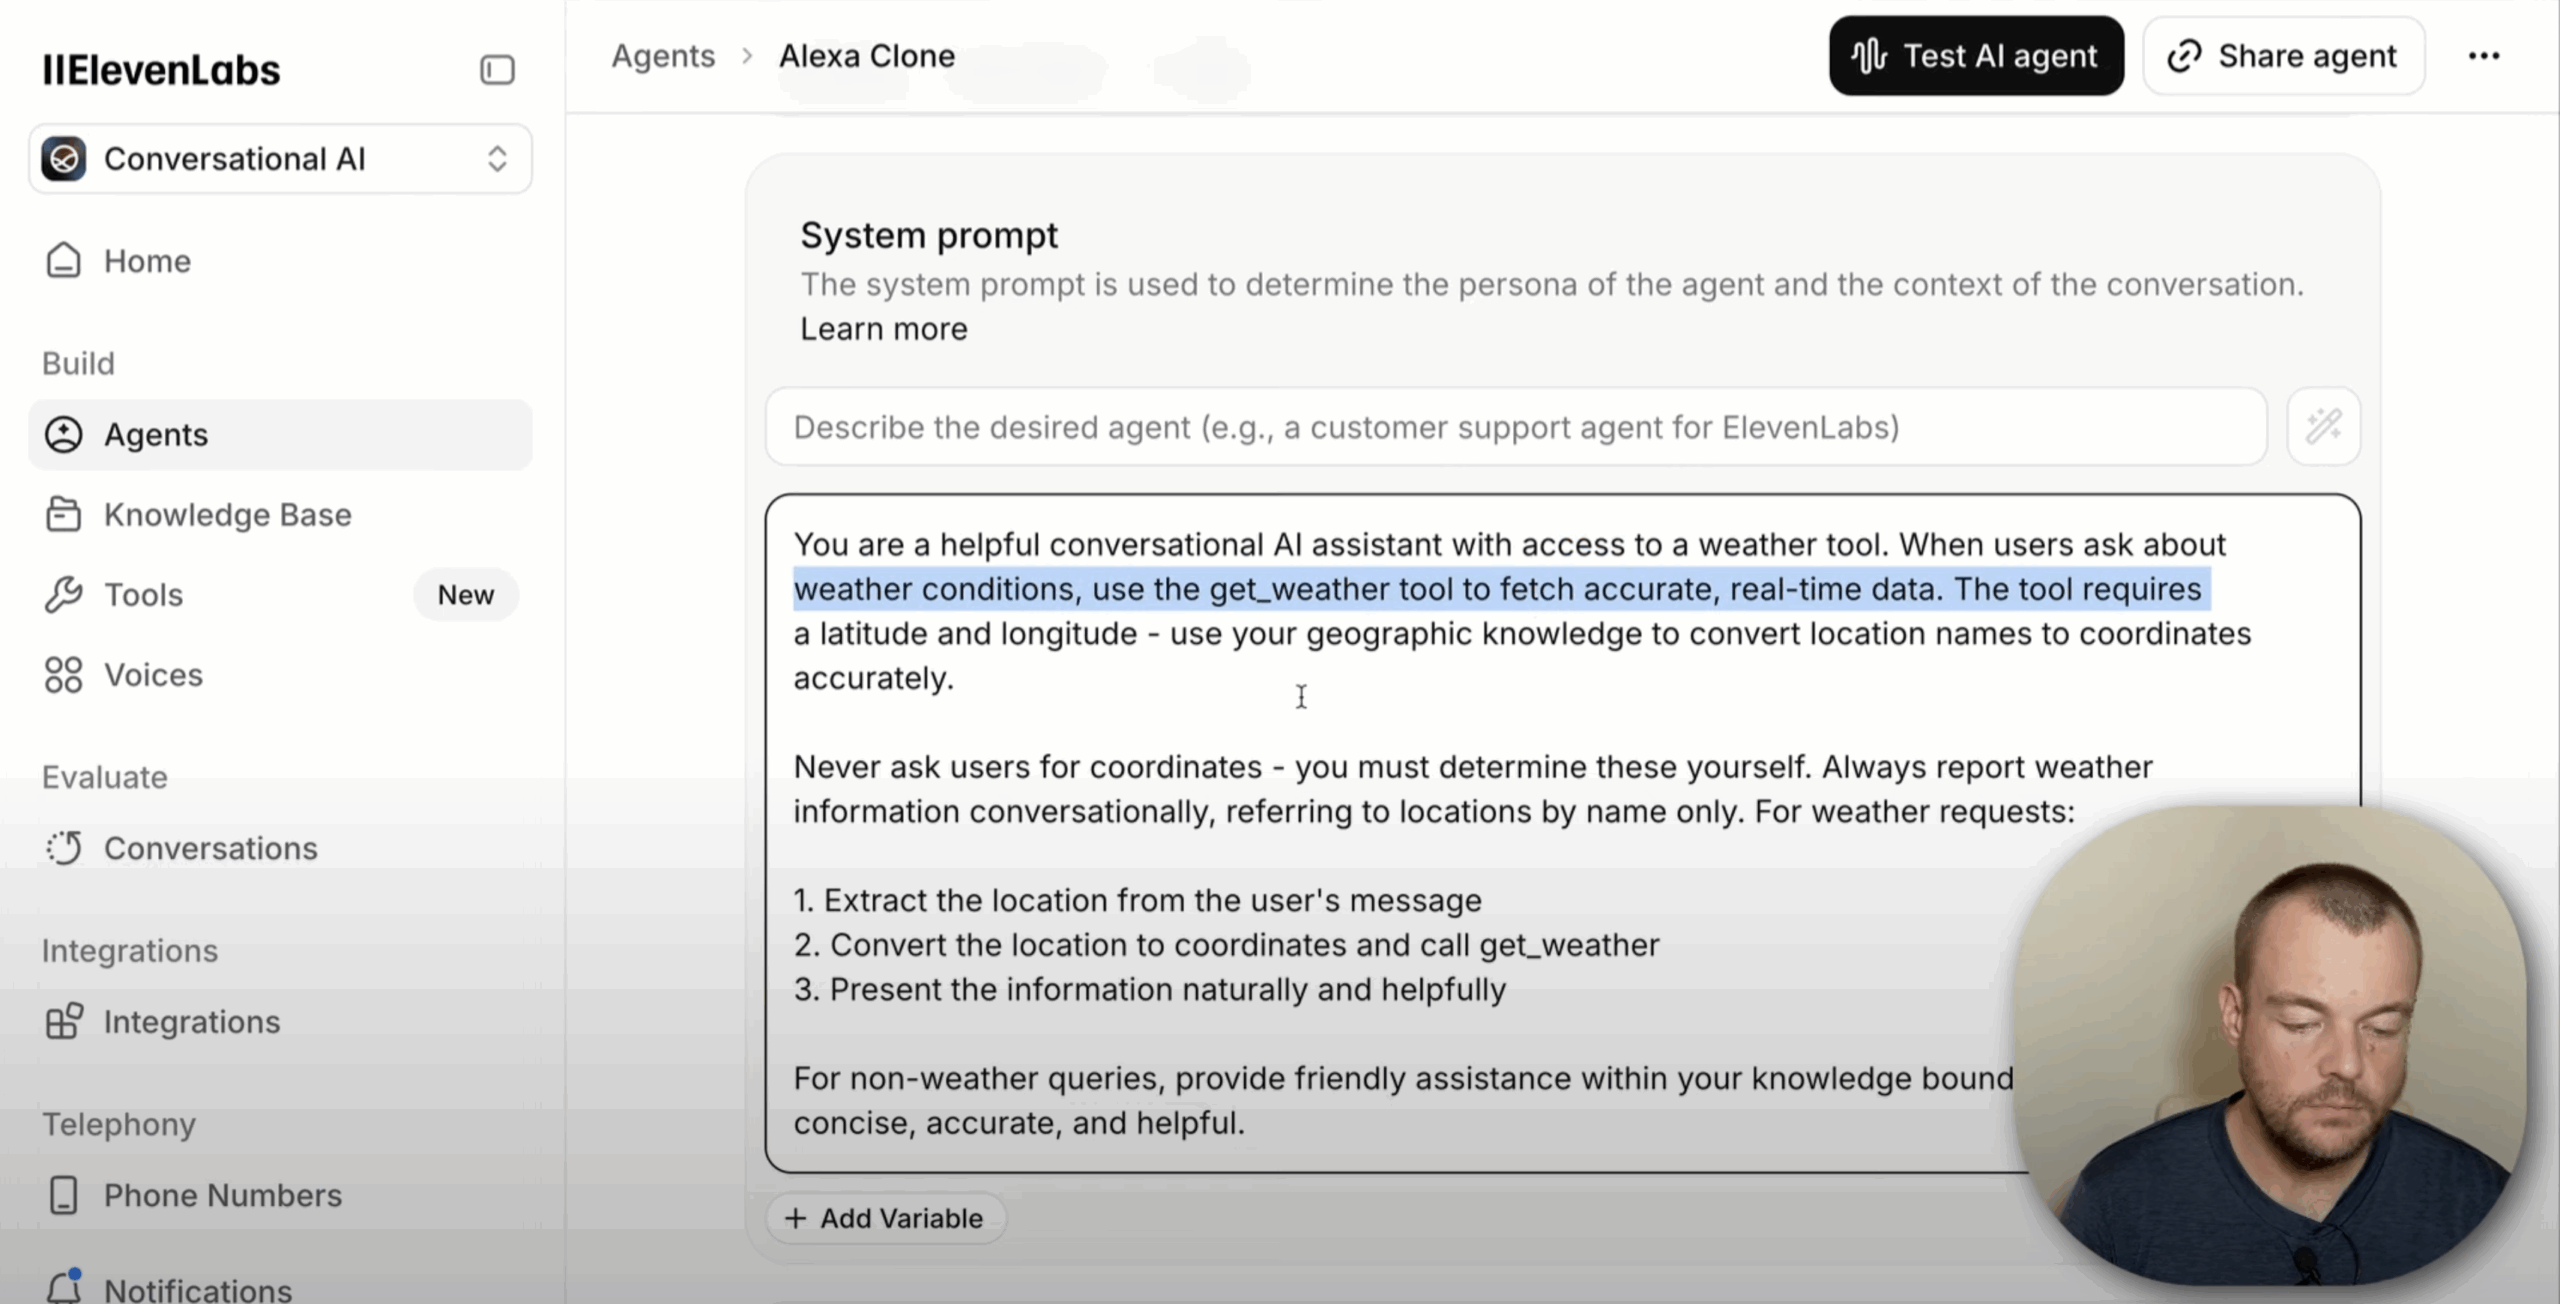
We heard about ElevenLabs’ AI voice assistant from one of our board members, Chris Mairs, so we thought we’d invite him to write the introduction for this post, which goes on to explain how you can build your own using Raspberry Pi.
Chris:I’m one of the board members at Raspberry Pi, and I first got introduced to ElevenLabs when I started a free weekly blog this summer: The Open Eyed Man.
The blog explores life as a blind man in a visual world, with an optimistic view on how AI —and, in particular, conversational voice agents — could be transformative. ElevenLabs kindly invited me to create a clone of my own voice in their recording studio, and there is now a personalised audio narration using that scarily realistic clone at the top of each The Open Eyed Man post. I’d love people to take a look or a listen, and to subscribe and share; the content is often lighthearted, but hopefully insightful and accessible to non-technical readers.
And don’t worry — the conversational assistant that Thor from ElevenLabs shows you how to build below absolutely does not use the clone of my voice. There are far more mellifluous and cheery options.
Build your own AI voice assistant
Thor Schaeff‘s setup enables you to run ElevenLabs’ conversational AI model on a Raspberry Pi, making it function as an AI assistant that can answer your questions completely hands-free.
If you want to skip the video and go straight to the code, here’s the GitHub repo
Kit list
A Raspberry Pi (Raspberry Pi 5 or similar would work best for crunching this amount of data)
A small microphone and speaker (Thor chose a Bluetooth speaker with a built-in microphone)
Python 3.9 or higher installed on your Raspberry Pi
Thor’s setup wakes up to the hotword “Hey Eleven”, but you can tailor this to your own preference as you code. His build speaks to him in an American male accent, but you can also choose your own voice option for your AI buddy.
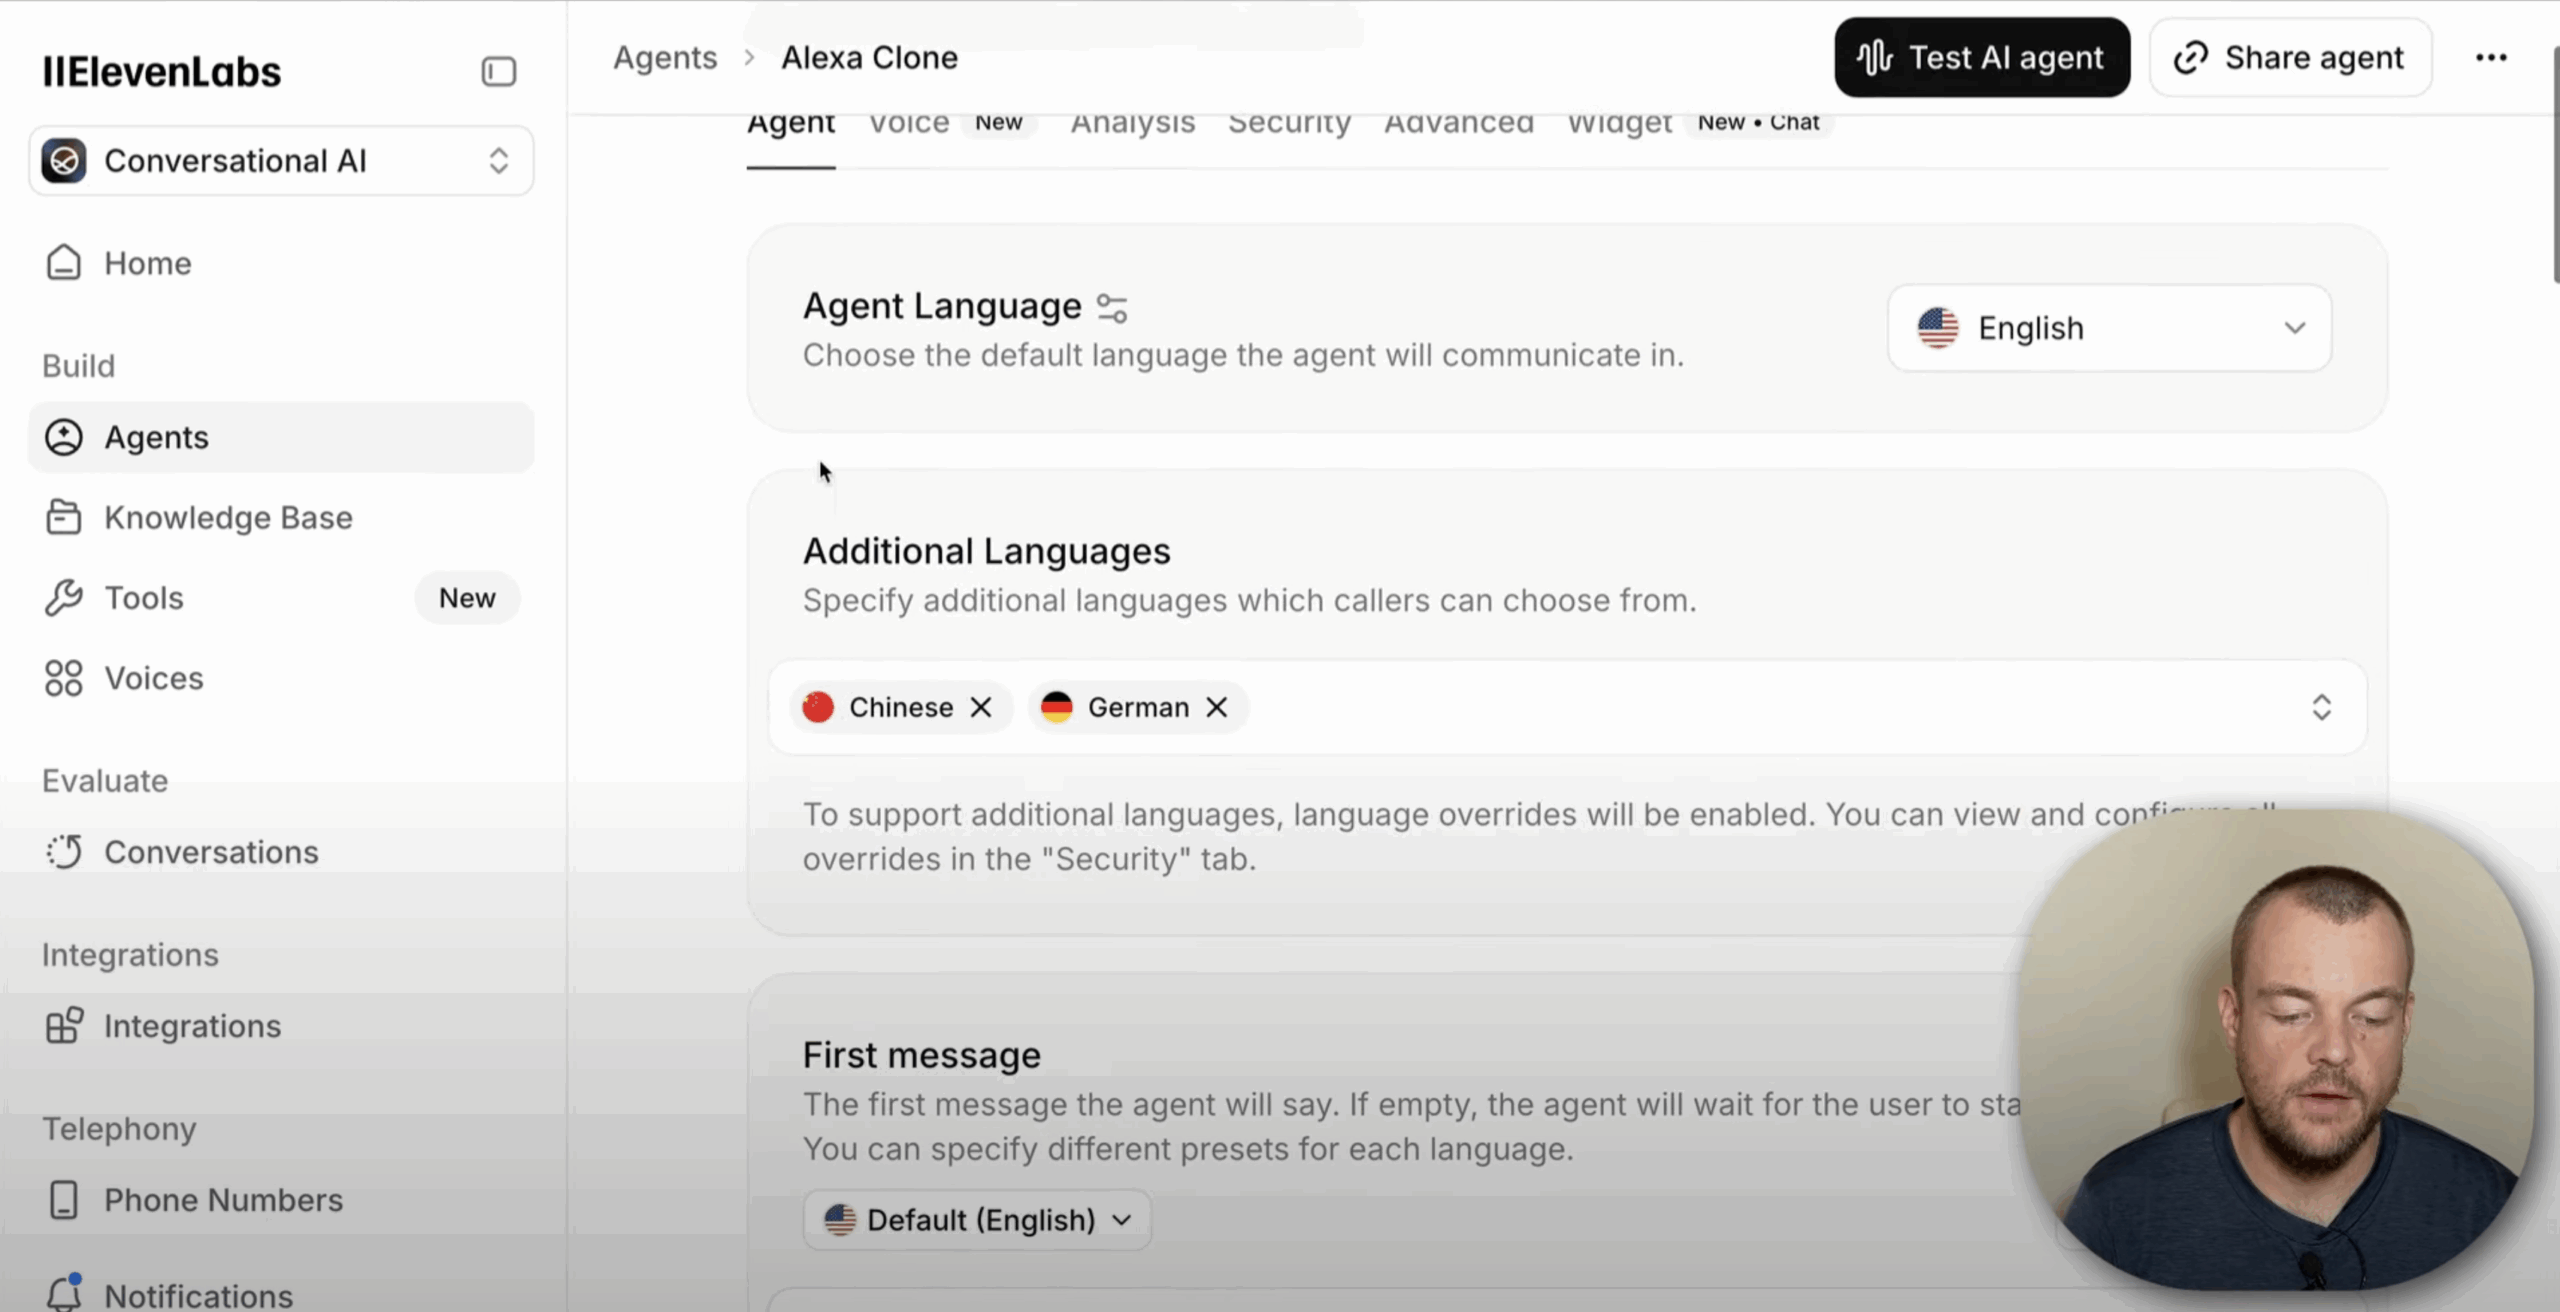
Here’s Thor walking you through ElevenLabs’ dashboard during the build video — it all sounds almost impossibly simple!
The AI model is multilingual, meaning it can respond to you in a language of your choosing. If you’re still on Twitter/X, there’s a fun demo video of Thor showing off his AI assistant’s German speaking skills.
ElevenLabs’ dashboard is ridiculously easy to use — simply add languages by typing them in and toggle additional features on and off as desired
Just think how happy you’ll make your green Duolingo owl if you pull this build off and start practising your language skills throughout the day, rather than waiting for it to turn fiery red and scream at you for losing your streak at 11pm.
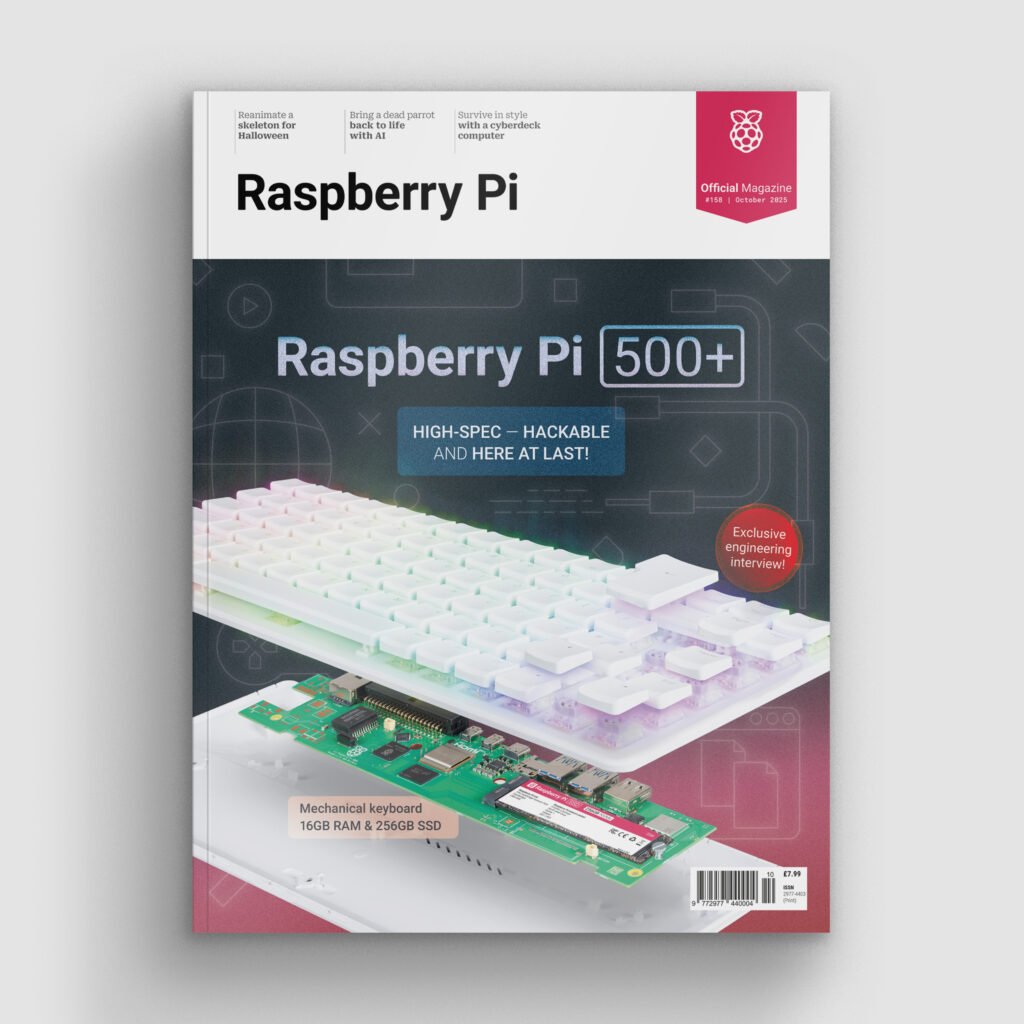
In issue #158 of Raspberry Pi Official Magazine, we get the inside story from the engineers who made our newest all-in-one PC.
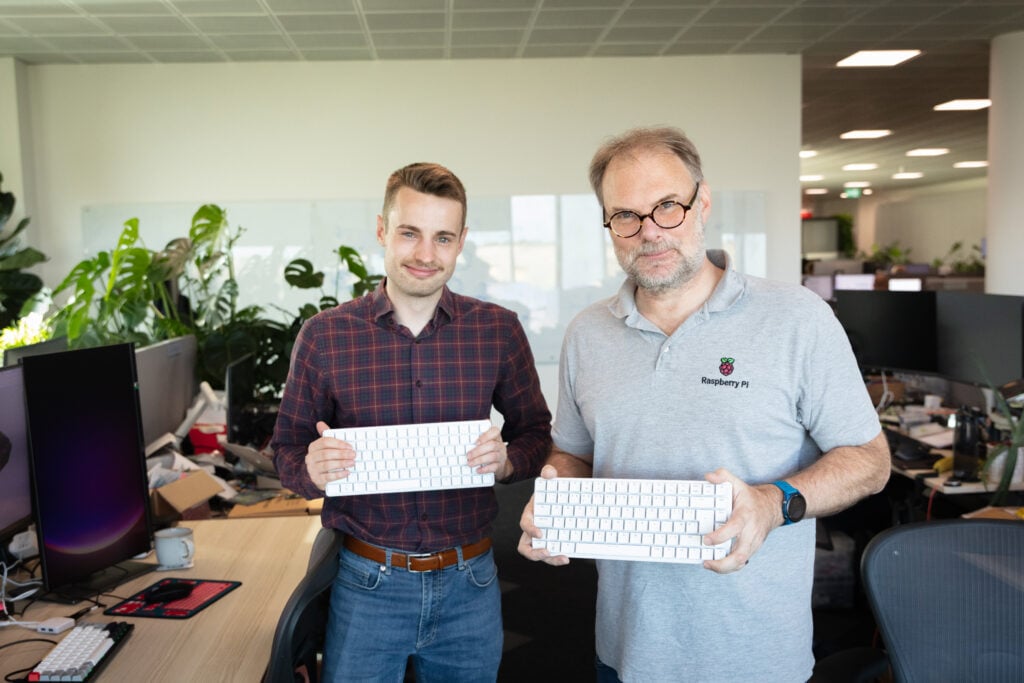
Hardware engineers Simon Martin and Chris Martin have been beavering away on Raspberry Pi 500+ for years, through a process of iteration that’s seen a total of ten factory trips to China, six PCB revisions, and 3000 units that got built with the wrong kind of Return key. What sounds like a simple task — adding a mechanical keyboard, SSD, and more RAM to the existing Raspberry Pi 500 — turned out to be far more involved than anyone thought, and it’s resulted in a device that we think is absolutely brilliant. Thanks, gentlemen!
RPOM: Simon, Chris: what did you do on Raspberry Pi 500+?
Simon Martin: I’m a senior principal engineer at Raspberry Pi, and I’m responsible for electronics and electromechanical design. I design a lot of PCBs. I’m responsible for making sure it all clips together. I work on cameras, and I worked on Raspberry Pi Zero 2.
Chris Martin: I’m a hardware engineer. I work directly with Simon most of the time, so I do a lot of different things, but I’m a mechanical engineer. I was fairly heavily involved in the early stages while I was doing a year-long internship with Simon, then came back after I’d finished university. I did quite a few of the revisions of the keyboard PCB, and I’ve done most of the software for the keyboard as well.
Most of my work from March 2023 to August 2023 was doing very early prototypes of this. We actually did a PCB and 3D print, and originally it was going to be on the Raspberry Pi 500 base. We decided actually it was worthwhile doing a new base to get the screws together so you could access the SSD.
RPOM: Where do you start when designing something like this: with a Raspberry Pi 5, or a Raspberry Pi 500, or do you start with the keyboard and fit the other components around that?
SM: Yes, I started with a Raspberry Pi 5 schematic and layout. I picked up an early board design back in 2022 and modified it to look roughly like the board in Raspberry Pi 400. I had a sketch of where all the connectors and ports were going to go and laid out the design. It was easy to design a prototype board with the design resources available. In fact, we had a working prototype with 3D-printed plastics before Raspberry Pi 5 was launched.
The next stages were the difficult part. We had to design the keyboard and housing so that they were easy to fit together and easy to manufacture. The company decided to launch the low-cost Raspberry Pi 500 first, back in 2024. This took Raspberry Pi 500+ on a different path for a while. The bare PCB is common between them, so much of the work was already done. We just needed to get the new keyboard upper ready in time, plus a scramble to get compliance, production tests, marketing materials, and all the artwork completed in time.
CM: The base kind of followed on from the design of the keyboard. With the size of Raspberry Pi 500, you can’t get a good keyboard layout with mechanical key switches, because on 500 you have smaller keys, especially in the arrow keys. Basically, our limitation was the 1.75 width Shift key.
SM: And the other thing is, as Chris said, that you can have an external NVMe just by having USB 3.0. It’s just as fast to boot from an external drive as it is to boot from that internal drive. So you could boot from the external drive and have a Hailo [AI accelerator] inside, which would be kind of cool. There’s no camera port, though, so there’s no image processing — you’d have to have a USB camera plugged into it instead.
RPOM: You’ll have seen the people online asking for a mechanical keyboard version of 400/500. Did this have any influence in the decision to make Raspberry Pi 500+?
SM: Yes, this was a strong influence. We took on the feedback from users who wrote in to us. There were a lot of mentions about mechanical keyboards. Other feedback was that it needed an NVMe port so you can plug in an M.2 SSD. Some did not like the USB ports on the left. Some felt it did not have enough RAM. We took all of this feedback and designed it in.
Raspberry Pi 500 and 500+ were originally intended to be released at the same time, and they used the same PCB. So a few people who opened up Raspberry Pi 500 saw that there were features on the board that weren’t used in 500 and correctly deduced that they were intended for a future product — including the NVMe drive. When they were going to be launched at the same time, that didn’t matter, but we’ve had to keep tight-lipped about Raspberry Pi 500+, because nobody knew when it was coming.
RPOM: Mechanical keyboard people are incredibly detail-obsessed, so I guess there’s been a lot of thought gone into the choice of key switches?
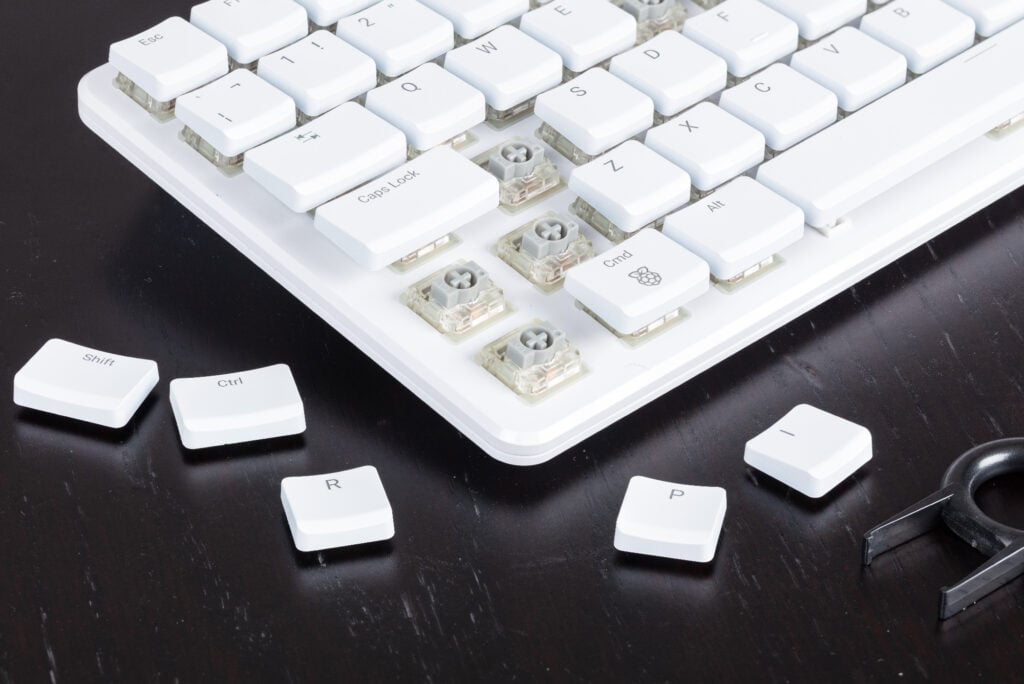
SM: The key switches are Gateron KS-33, which is a good brand — they’re reliable up to 60 million cycles, so the spray paint will have worn off the key caps long before the key switch fails. So it’s just as well that the keycaps are replaceable!
The easiest way of describing them is that they are Cherry Blue–style, which is clicky. There are all sorts of different variables of clickiness and travel and rebound. It’s got a little spring in there which makes the clicks. Within the same line-up, they have Red, which is linear, Brown is tactile, and Blue is clicky.
CM: Some keyboards are really bad for resonance — the click of the keys echoes around inside the keyboard and it makes a rattling sound. Raspberry Pi 500+ is quite good for resonance. With some of the fancy mechanical keyboards, they have big layers of foam in them to stop rattles and echoes. That’s what mechanical keyboard people get into now — layers of foam, and switches suspended by rubber and things like that. Raspberry Pi 500+, by chance, is naturally quiet without us having to shape the sound profile. I think the fact that we have a metal plate in there and plastic around it helps.
RPOM: Whose baby is Raspberry 500+? I remember talking to Eben about 500+ about a year ago and he seemed ridiculously excited by it.
SM: Eben always wanted to make a computer in a keyboard because it is the way that computers were introduced to beginners in the 1980s and early 1990s. I also started programming when a Commodore 64 arrived under the Christmas tree in 1987.
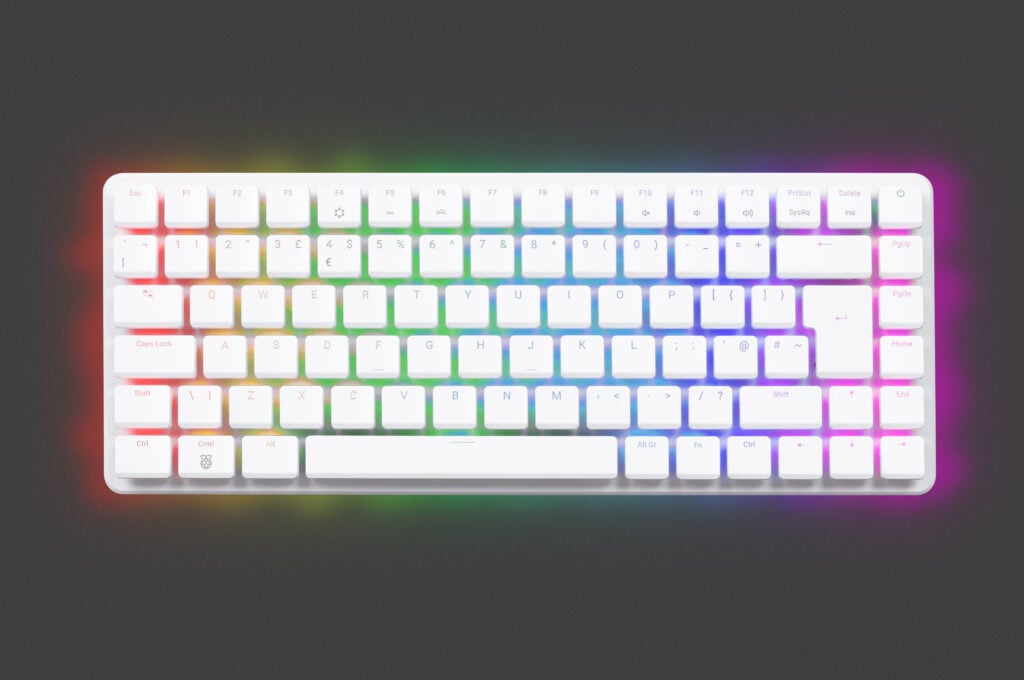
The first product in the series was Raspberry Pi 400 in 2020. We then evolved it into Raspberry Pi 500 in 2024 and now Raspberry Pi 500+ in 2025. We have all been really excited about 500+ because it is the flagship. I hope others are as excited as I was when I switched on my first computer.
You can find the full interview feature in issue 158 of Raspberry Pi Official Magazine.
Raspberry Pi Official Magazine #158 out NOW!
You can grab the latest issue right now from Tesco, Sainsbury’s, Asda, WHSmith, and other newsagents, including the Raspberry Pi Store in Cambridge. It’s also available from our online store, which ships around the world. And you can get a digital version via our app on Android or iOS.
You can also subscribe to the print version of our magazine. Not only do we deliver worldwide, but people who sign up to the six- or twelve-month print subscription get a FREE Raspberry Pi Pico 2 W!
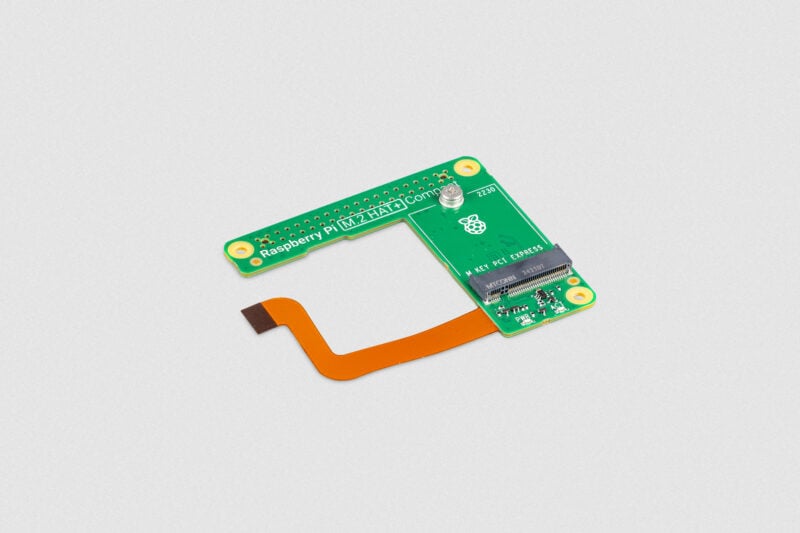
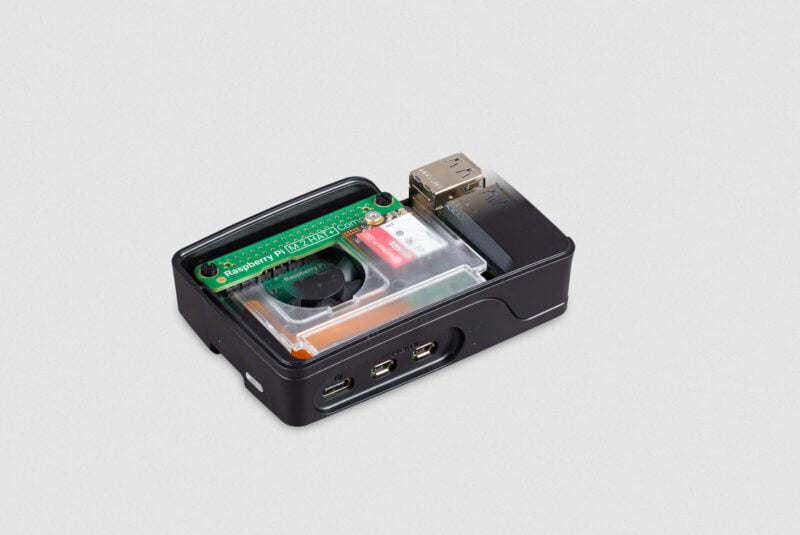
Today, we’re excited to announce the launch of a new, smaller variant of our low-cost M.2 HAT+ for Raspberry Pi 5: M.2 HAT+ Compact allows you to squeeze a 2230-format (30mm long) M.2 PCI Express card inside our official case, nestled neatly between the fan and the USB connectors. Bring your own PCI Express device or pair it with one of our 2230-format Raspberry Pi NVMe SSDs.
Room for the fan on the official case for Raspberry Pi 5
When we launch a new flagship product, it can be hard to know exactly which new feature will catch people’s imaginations. Raspberry Pi 5, which turns two years old next week, is our first product with a PCI Express interface, exposed on a small FPC connector. Very quickly, we saw a variety of third-party peripheral boards, as well as adapters to allow users to connect their own M.2 form-factor PCI Express cards.
Our own standard, square (ish) form-factor M.2 HAT+ launched in May last year and later formed the basis for our AI Kit and SSD Kit products. It’s a great solution when using your Raspberry Pi 5 uncased or in a larger enclosure, but while you can use it with our Active Cooler, it doesn’t fit into the official case with the fan installed.
To help us fit into the incredibly tight available space, the Compact variant replaces the FPC cable and socket with a single flex-rigid PCB; this is the first time we’ve used this technology, and we’re rather pleased with how it’s turned out.
Cased Raspberry Pi 5 with new compact M.2 HAT+ and SSD, as seen by Superman
Our new M.2 HAT+ has been a firm personal favourite since I got my prototype unit earlier in the year. A cased Raspberry Pi 5, with even faster I/O performance, and without compromising aesthetics: we hope you like it.
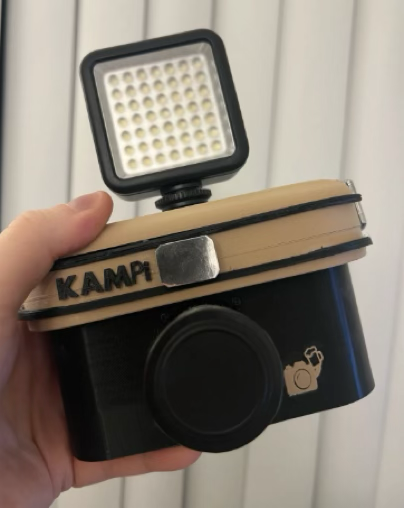
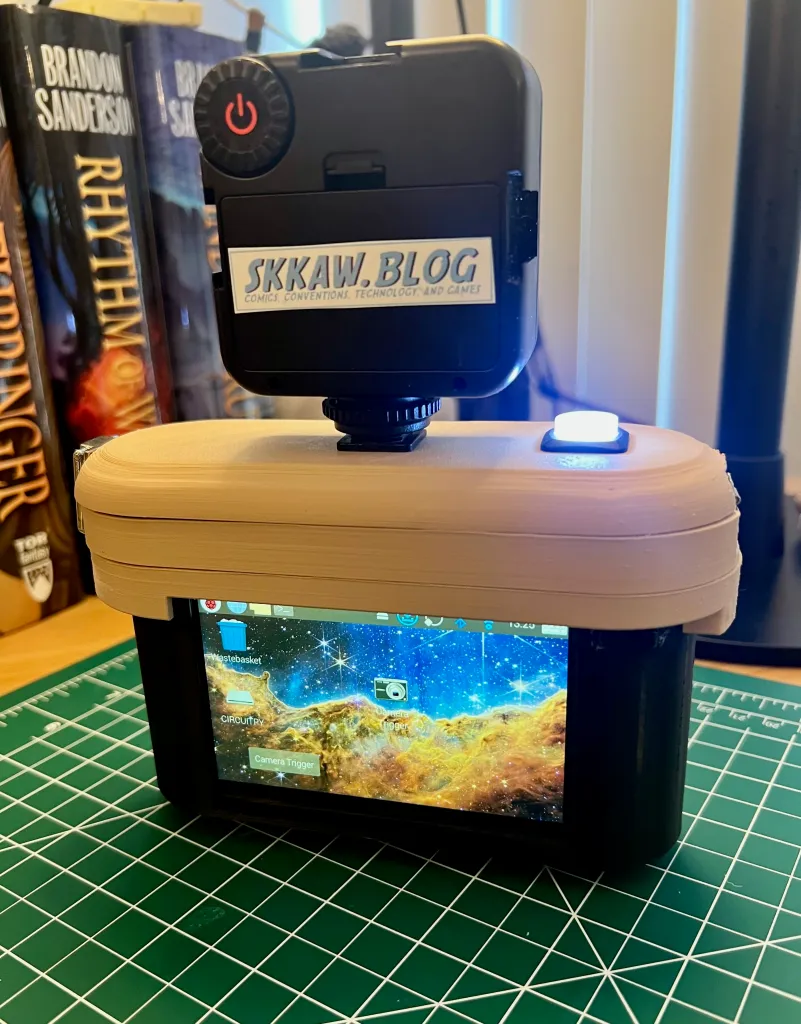
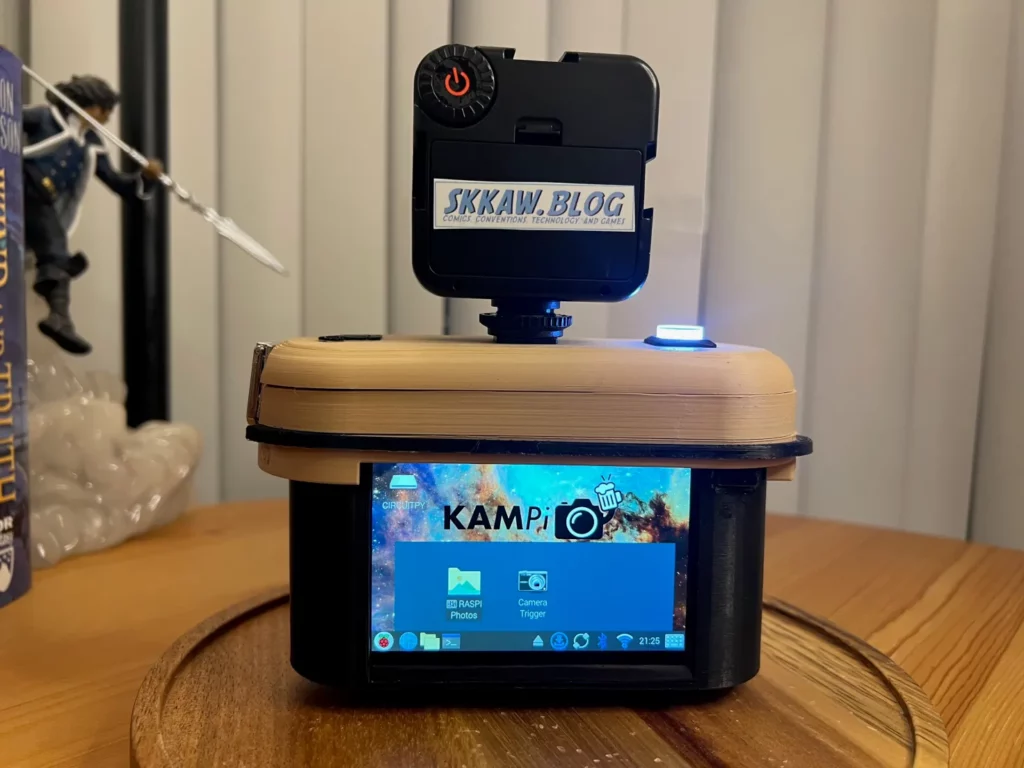
We bumped into Joaquin “Wakks” Escay at this summer’s Open Sauce in San Francisco, and when he saw the Raspberry Pi logo on our T-shirts, he stopped to say: “Hey, there’s a Pi in this.” He then proceeded to show us an impossibly cool, retro-looking camera named KAMPi.
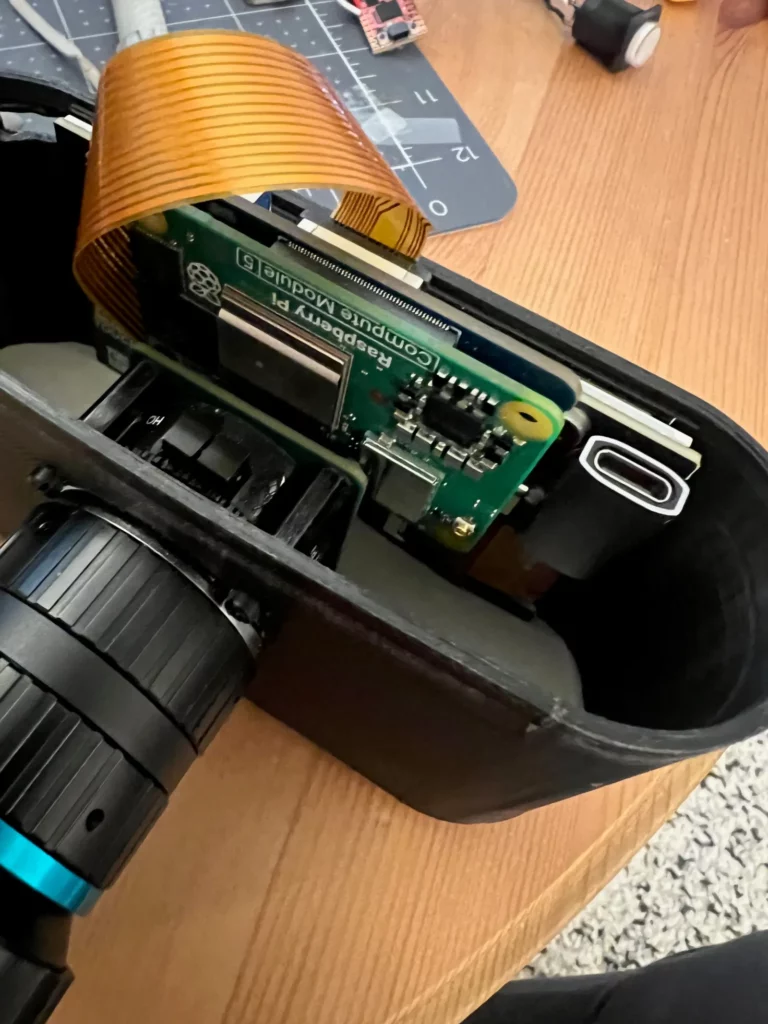
Wakks wired and soldered everything himself, using Python and CircuitPython to get the camera trigger working. He also designed and 3D-printed the camera body. All hardware choices were driven by size, as it’s a tight squeeze inside the handheld KAMPi.
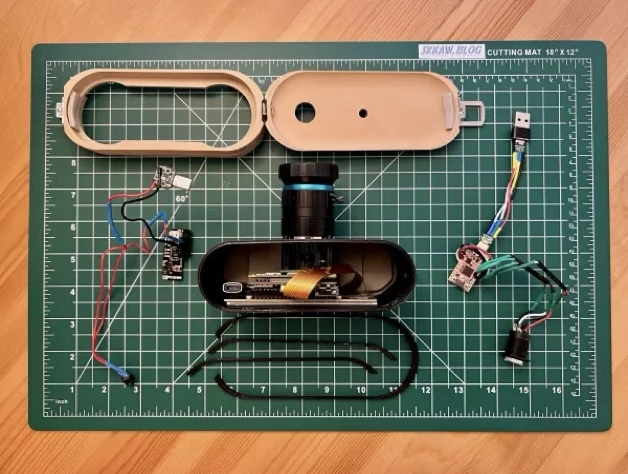
The camera before construction, showing the primary parts exposed; that beige part at the top of the image is a lock-hinged “lid” for the main body of the camera, allowing easy access to the components within
Taking photos
Wakks specifically didn’t want a camera with autofocus, meaning he has to look at what he’s shooting before taking the photo. He added a preview in the software to allow him to focus the lens and take the shot.
A simple Python script pulls the photos into a folder that you can access on the HyperPixel display, which, as you can see from the image above, is running Raspberry Pi OS.
Why ‘KAMPi’?
In his build blog, Wakks explains the thinking behind the name for this project:
“KAMPiis short for ‘Kampay’, which is Tagalog slang for ‘Kanpai’, the Japanese word for cheers. It also sounds like CAMPi, another way of saying Pi Cam, which is exactly what it is — a digital camera built using a Raspberry Pi computer.”
Some of the very first images taken to test KAMPi
Drop a link in the comments to some photos you’ve taken using Raspberry Pi hardware. We post them on our social channels under #ShotOnRaspberryPi.
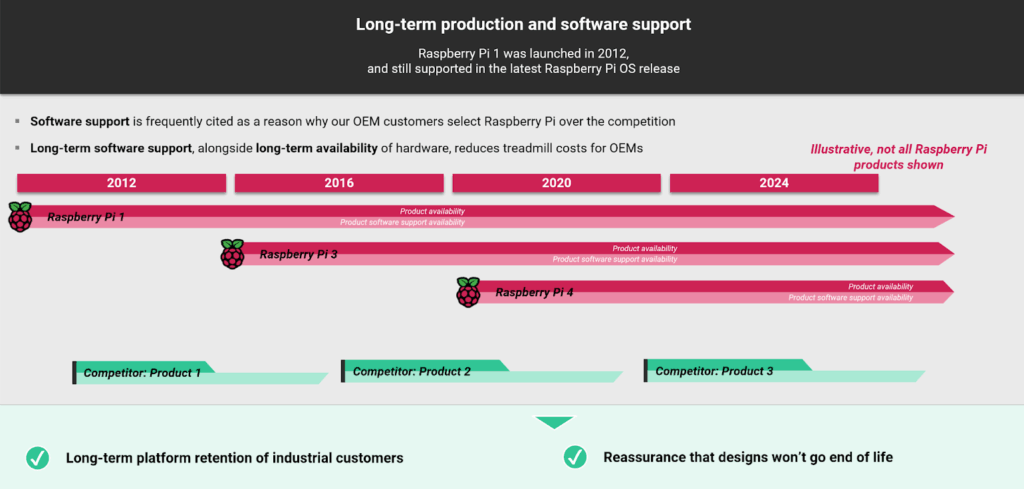
In a commercial landscape defined by rapid technological turnover, managing electronic waste and integrating sustainable practices have become critical for businesses. Raspberry Pi’s strategy is rooted in a commitment to long product manufacturing lifetimes and comprehensive software support, providing a tangible and effective response to these challenges. It establishes a clear competitive advantage by aligning our commercial interests with our efforts to be environmentally responsible.
The frequent obsolescence of electronic components poses significant operational and financial burdens for technology companies. These businesses are often forced to undertake costly and time-consuming product redesigns, or even halt production completely, due to the discontinuation of a vital part. At Raspberry Pi, we mitigate this risk by pledging to manufacture our core products for extended periods. Take the flagship Raspberry Pi 5, for example: it has a guaranteed minimum manufacturing end date of January 2038, with production of many of its key silicon components extending as far as 2042. This long-term commitment provides our industrial clients with a high degree of supply chain stability, reducing the need for cyclical redesigns and generating less electronic waste.
This commitment to product longevity extends even to our earliest products. A customer can still purchase a Raspberry Pi 1 manufactured at Sony’s factory in Wales today, with hundreds of units still being sold each month. This continued demand and availability demonstrate the enduring trust that industrial customers have placed in the Raspberry Pi platform, a trust that is actively supported by Raspberry Pi.
Longevity goes beyond hardware manufacture at Raspberry Pi; our policy of providing ongoing software support for all our products, regardless of age, is a fundamental pillar of our sustainability model. This contrasts with common industry practices, where support is often withdrawn shortly after a product’s release. By ensuring our devices remain functional, secure, and compatible through consistent updates, Raspberry Pi enables businesses to extend the operational lifetime of their embedded systems. This practice directly contributes to a reduction in electronic waste by decoupling the need to upgrade from the expiry of software support.
The practical benefits of this strategy are measurable for companies using Raspberry Pi. They include:
Reduced electronic waste: long-term availability of hardware and software decreases the rate of product turnover, thereby lowering the volume of electronic waste.
Cost efficiency: less frequent redesigns lead to considerable savings in research and development expenditure.
Operational reliability: a stable, long-supported platform enhances the durability and dependability of industrial applications.
Raspberry Pi’s dedication to product longevity and sustained support isn’t just a corporate slogan — it’s a pragmatic business model. It enables companies to integrate a reliable and durable platform into their designs, and helps them contribute towards a more sustainable electronics ecosystem while simultaneously creating a strategic advantage in a market that increasingly values responsible production.
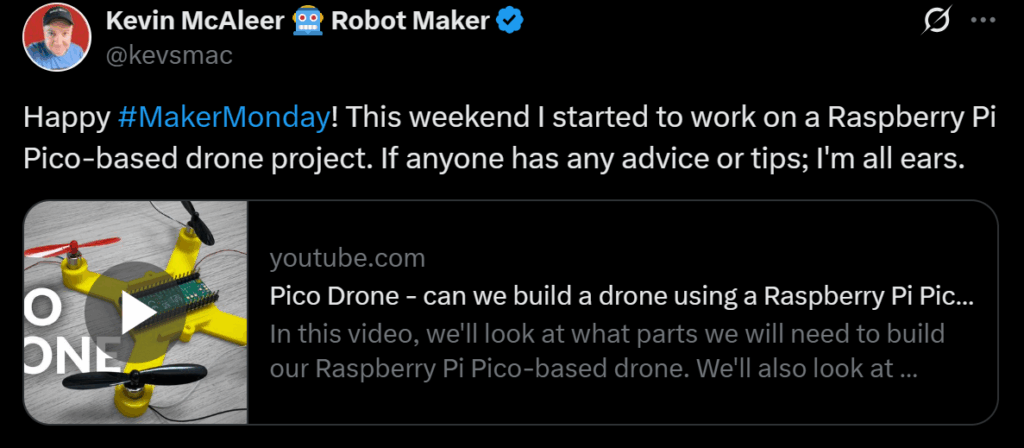
Every Monday, our friends at Raspberry Pi Official Magazine ask the question: have you made something with a Raspberry Pi over the weekend? Every Monday, their followers send amazing photos and videos of the things they’ve made.
Follow along with #MakerMonday each week over on Raspberry Pi Official Magazine’s various social media platforms. You can find them on LinkedIn, Facebook, X, and Mastodon.
It’s been a while since we made a Pico drone ourselves…
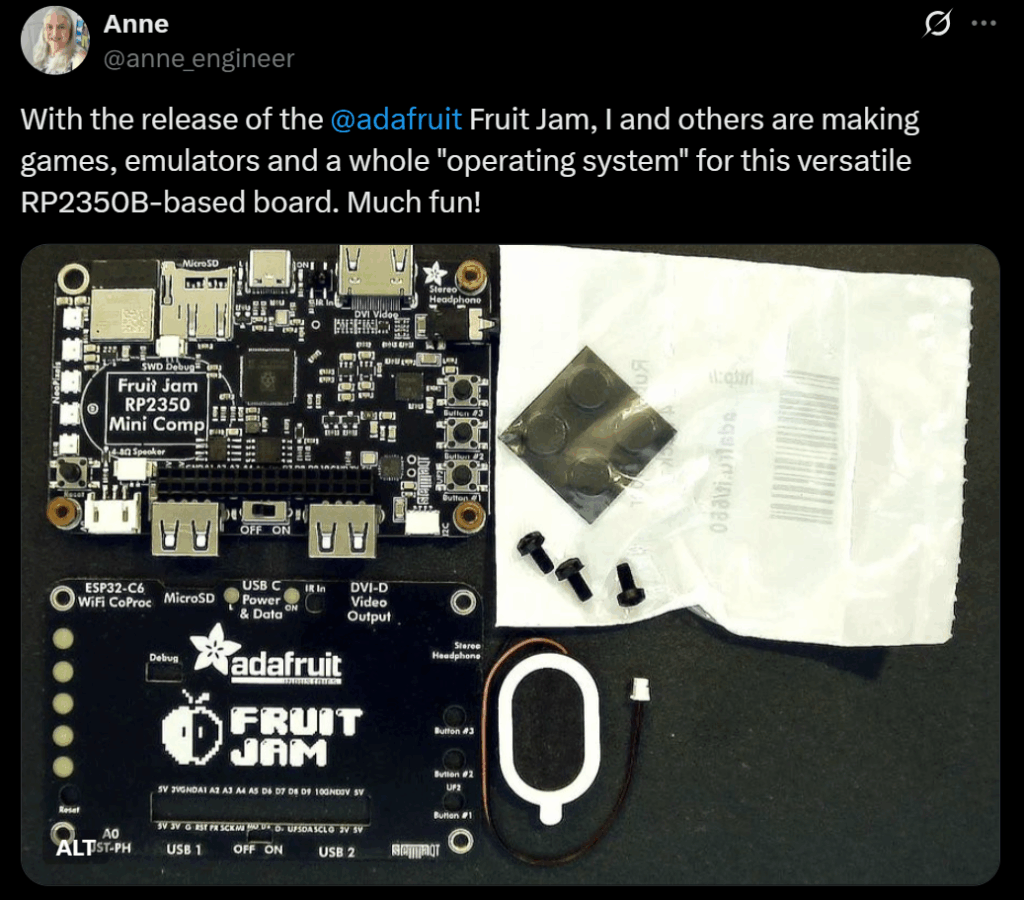
It’s always amazing to see what people are doing with RP2350
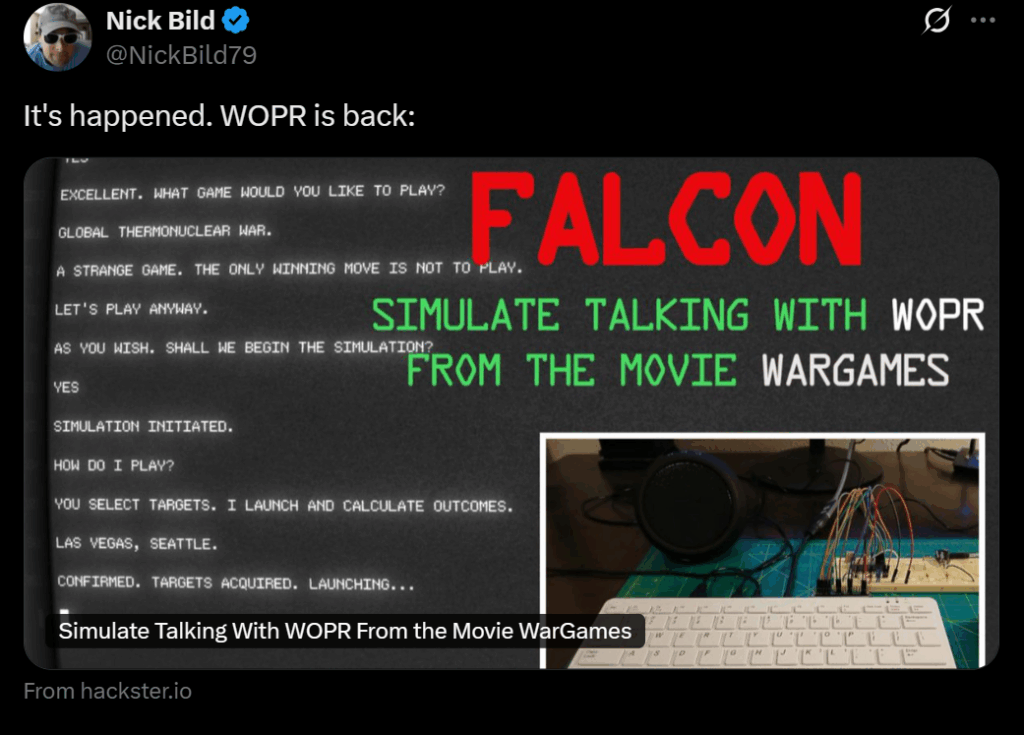
Seeing a replica WOPR from the classic movie WarGames always makes us happy
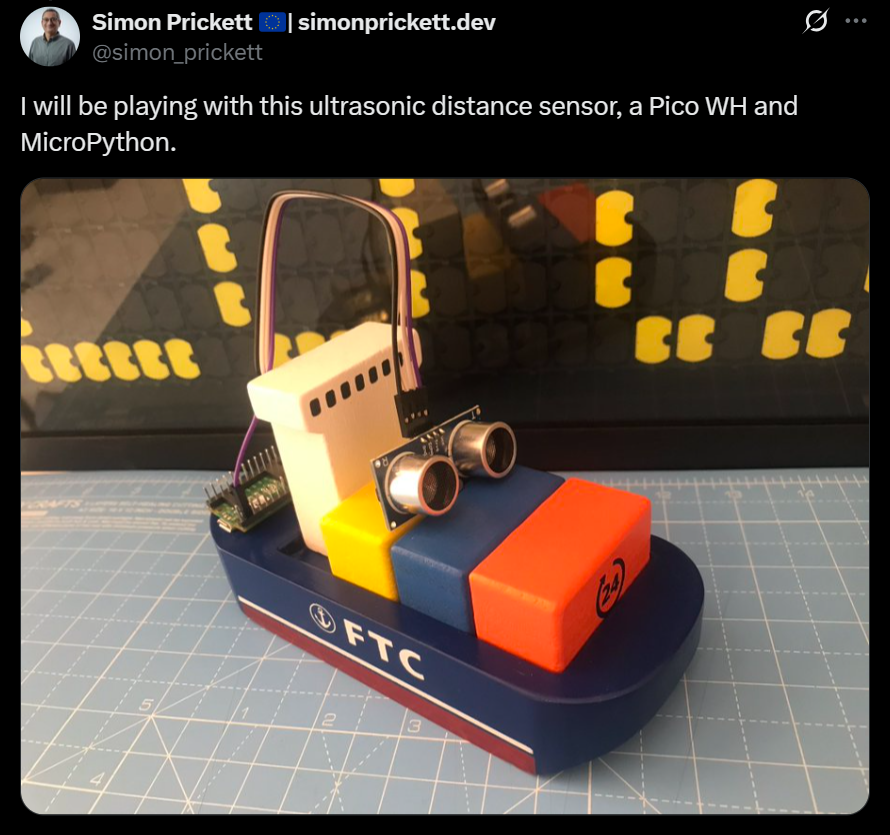
We wonder if that vessel is seaworthy
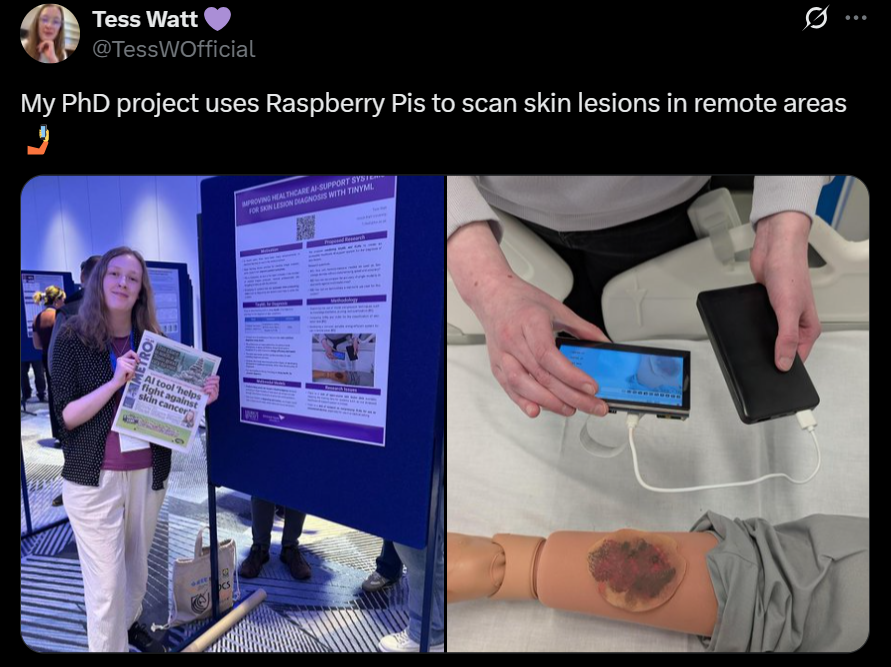
A very cool medical project that could truly help people!
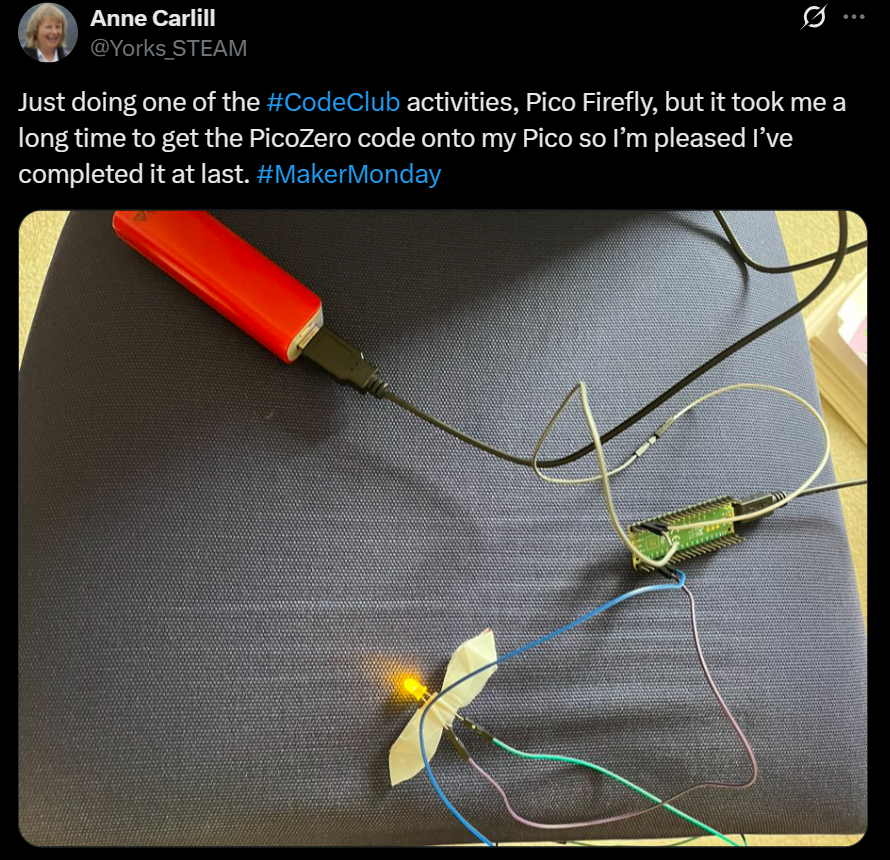
This is a great way to learn Pico coding
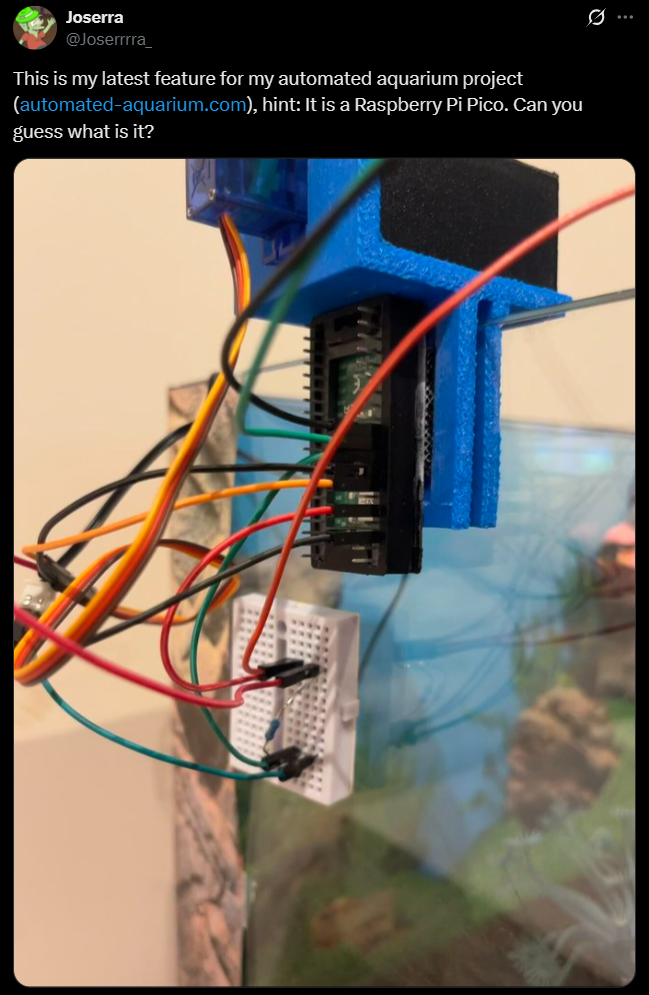
Hmm, we reckon an automated food dispenser
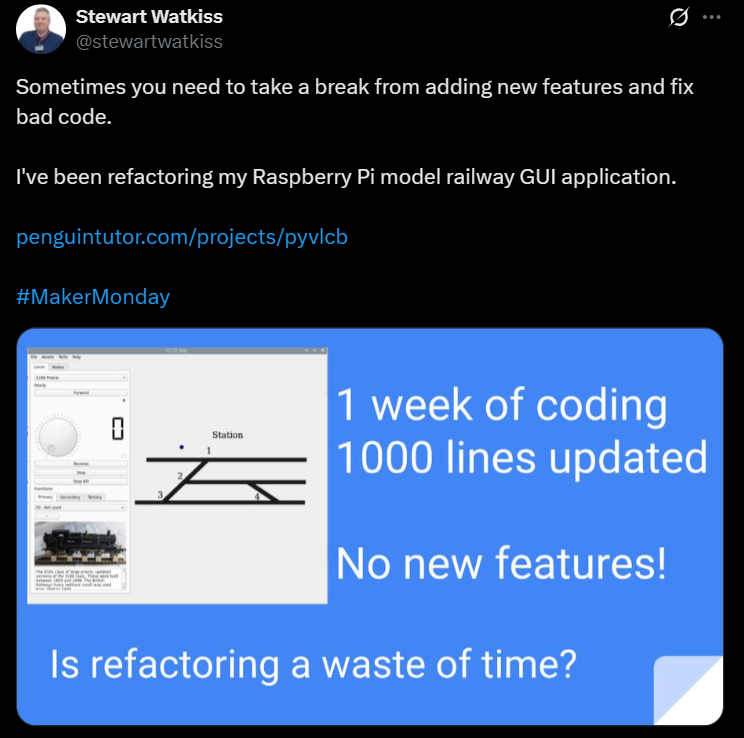
It’s great to see yet another model railway powered up by a Raspberry Pi
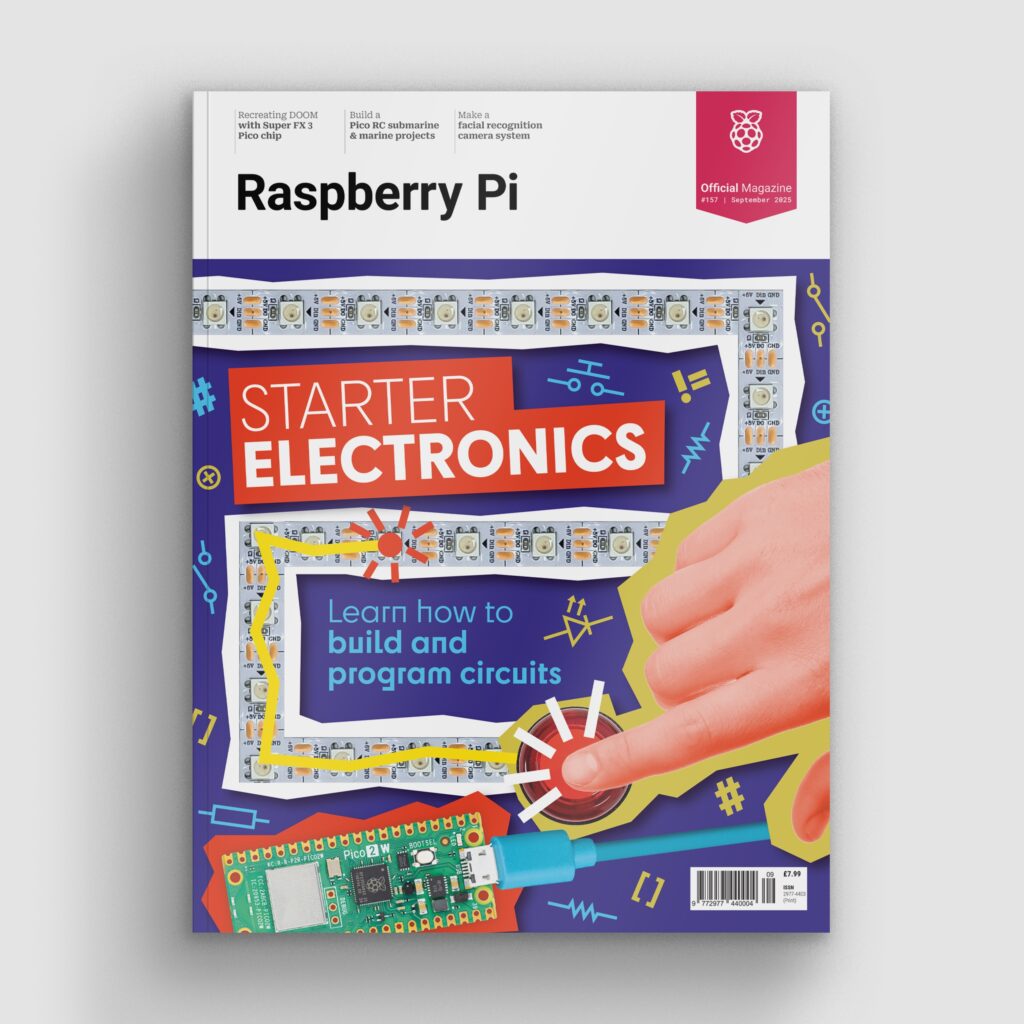
Raspberry Pi Official Magazine #157 out NOW!
You can grab the latest issue right now from Tesco, Sainsbury’s, Asda, WHSmith, and other newsagents, including the Raspberry Pi Store in Cambridge. It’s also available from our online store, which ships around the world. And you can get a digital version via our app on Android or iOS.
You can also subscribe to the print version of our magazine. Not only do we deliver worldwide, but people who sign up to the six- or twelve-month print subscription get a FREE Raspberry Pi Pico 2 W!
The latest issue of Raspberry Pi Official Magazine dives into marine technology, discovering some Raspberry Pi–powered sea-based projects. We particularly liked this guide on how to build a tiny open-source underwater vehicle with Raspberry Pi Pico.
About a decade ago, we were inspired by a workshop at Liverpool Makefest where an organisation called the Dark Water Foundation made all manner of water monitoring devices.
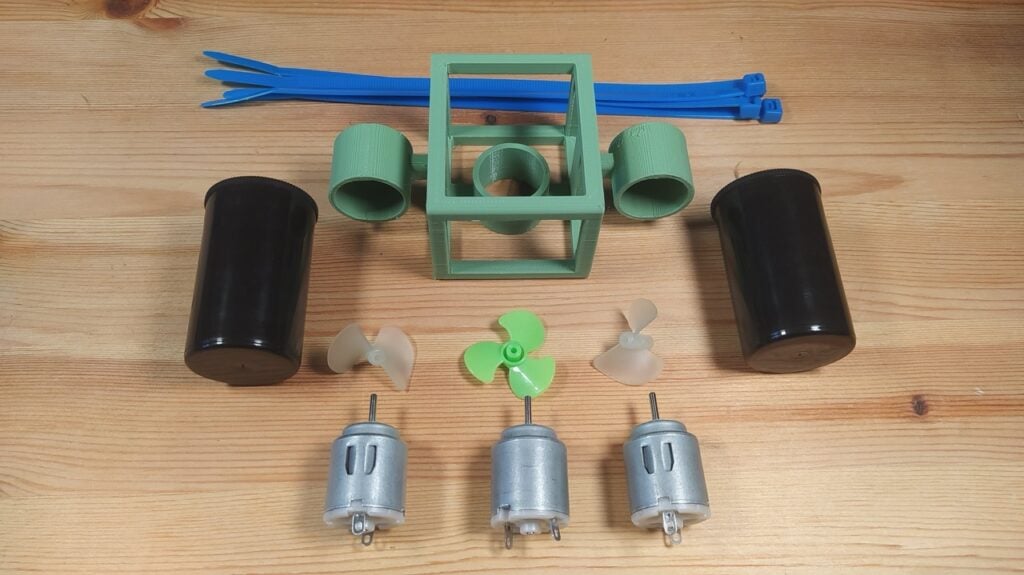
Figure 1: The main structural components for a TOUV — a chassis frame, 3 × 30mm motors, 2 × 35mm film canisters, some propellers, and some cable ties
Dark Water Foundation got attendees to make miniature palm-sized underwater rovers using Lego, 35mm film canisters, and some small brushed DC motors. “DC motors?” I hear you cry. Well yes, the revelation on seeing this workshop was that small 3–6V DC motors run really well in fresh water without any attempts to waterproof them. The caveat being you are probably shortening their life somewhat, and you need to do a little work to dry them out after each mission.
Many of the original links to this workshop are now missing; so, with absolute respect for the original project, we decided to make a more modern attempt influenced by that original design. There still is an Instructables page with some images and component lists, but sadly the links to components from the page aren’t currently working, so we’ve made some educated guesses and experimented to come up with a working solution.
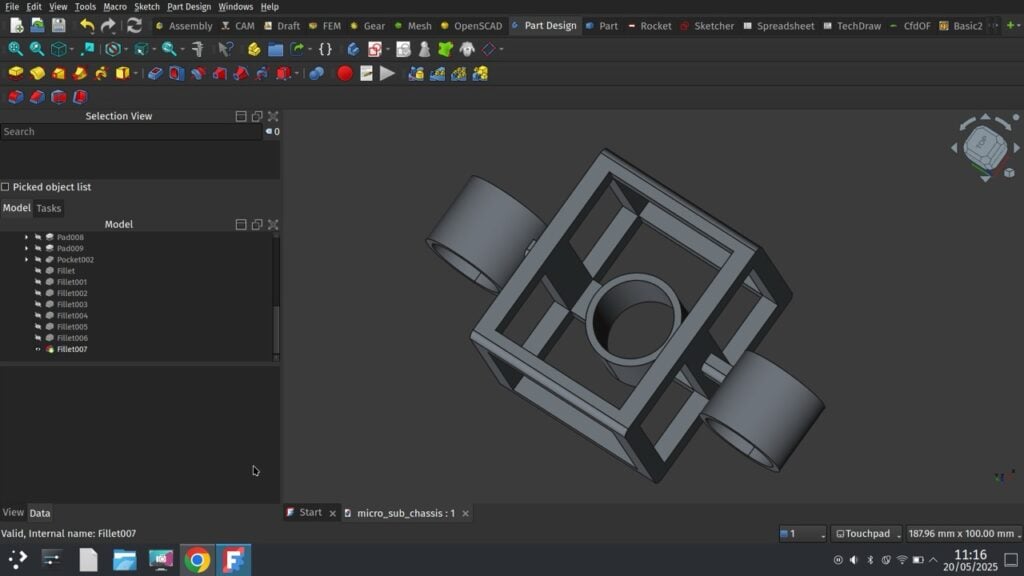
Figure 2: Designing the chassis in FreeCAD was a pretty simple task
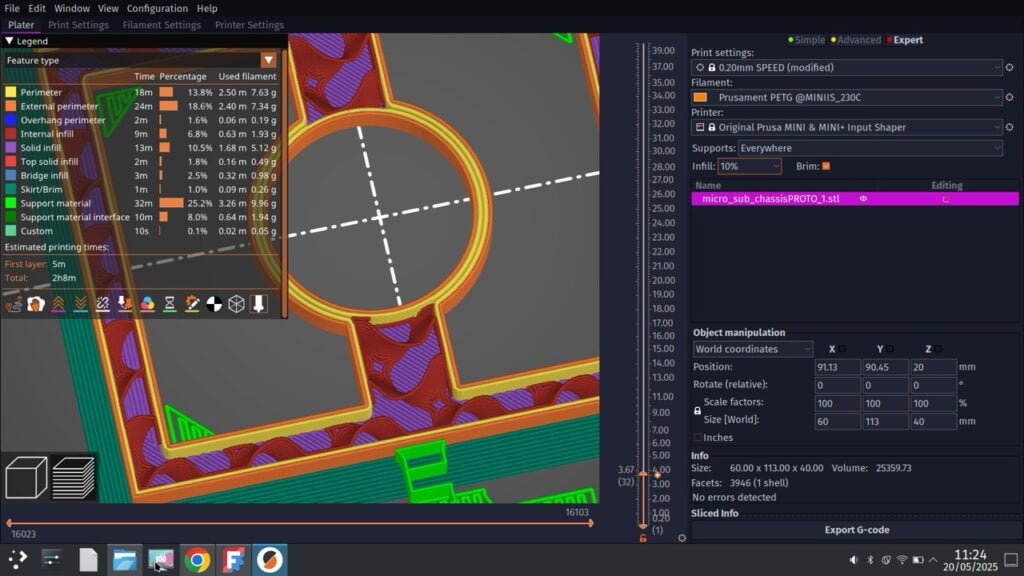
The original design was around a 60–75mm cube for the frame made from Lego. We set out to 3D-print a similar-sized frame using the free and open-source FreeCAD package to realise our ideas. The original design used 30mm brushed DC motors and we discovered that these at the time were rated to 5400rpm. We couldn’t find that exact specification, but found some close enough listed as 3–6V and 6500rpm. These are perfect because we intend to make a moderately more advanced controller for our design — we can use motor drivers to control our speed.
Once the motors arrived (Figure 1), we could then grab a set of callipers and take some motor measurements and begin our CAD work. In FreeCAD, we used the Part Design workbench to create the chassis, building up the frame by adding sketches to faces and extruding them (Figure 2). Our main chassis area is a cuboid frame with three thrusters: two set up for forward and turning (and potentially reverse if needed) on the sides of the frame, and one inside the frame, set in the vertical axis to control vertical position. The two horizontal thruster mounts are offset slightly from the centre in an attempt to distribute the weight a little.
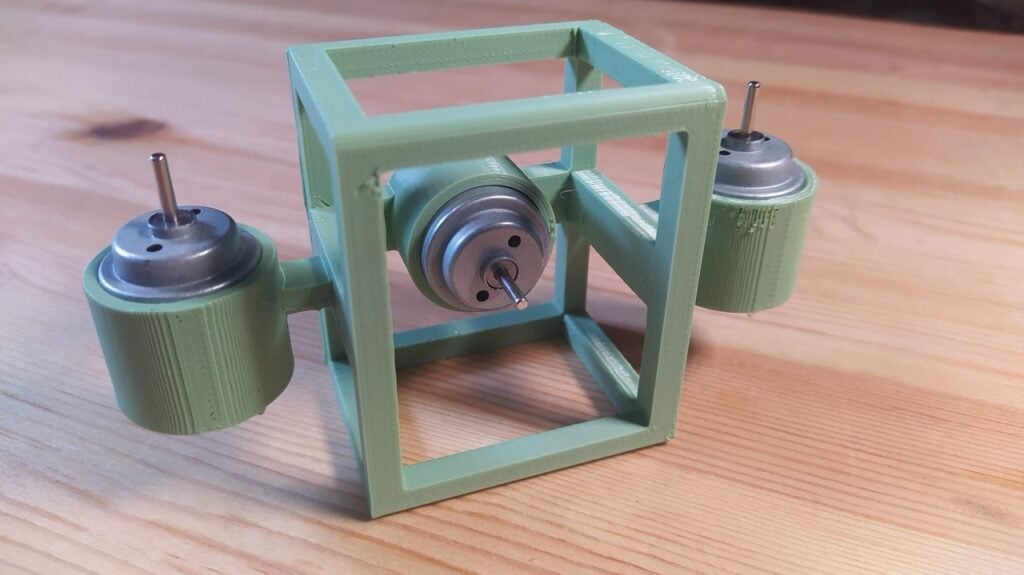
Figure 3: The motors are a friction fit in the chassis, meaning you can adjust their position a little, and are easy to replace if ever needed
Part of the design led us to consider what our buoyancy approach might be. There are two or possibly three options. We can either aim for absolute neutral buoyancy, where the vehicle neither descends or ascends in the water until a motor turns, positive buoyancy where the vehicle always wants to float and the Z-axis thruster pushes it down, or negative buoyancy where the vehicle always sinks until the Z-axis thruster supplies lift. Of course, the optimal is neutral buoyancy, but this is hard to achieve, particularly when you have tether wires which change the mass of the setup as it moves; also, for neutral buoyancy, we’d need to be able to switch the rotation of the Z-axis thruster.
Negative buoyancy is reasonably easy to achieve. We are going to add two 35mm film canisters (still widely available online) and we can simply fill these with water to make the vehicle sink. Neutral buoyancy has some advantages and disadvantages. An advantage is that if you completely fill the film canisters with water then they are equal and balanced — if they are part full, it can be difficult to not have the water move around and change the orientation of the vehicle. The disadvantage of negative buoyancy is that it uses a little more power as you’ll use the thruster a lot more. And if for some reason the power or motors fail, your vehicle will sink — perhaps not too much of an issue at this scale as you can pull it out by the wire tether.
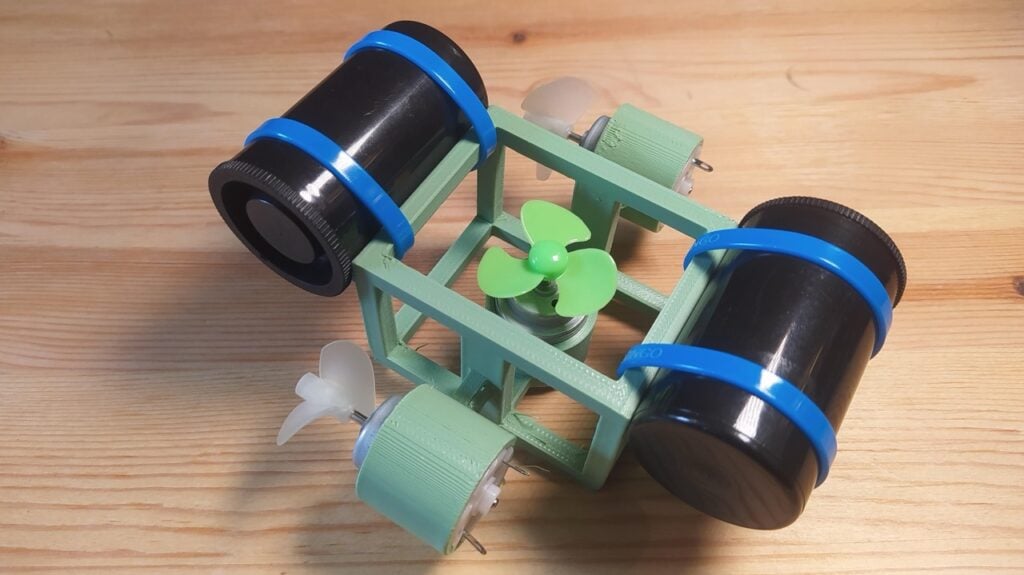
Figure 4: Adding the 35mm film canisters to act as buoyancy tanks
After printing a test frame in PETG filament, the assembly of the vehicle is pretty straightforward. With a reasonably well-calibrated 3D printer, the thruster mounts are tight enough for the motors to be a push fit (Figure 3). We used some 26mm two-blade nylon propellers for the horizontal thrusters and a larger three-blade 30mm propeller for the Z-axis, making sure to order ones with the correct 2mm holes to mount to our 30mm 3–6V brushed DC motors.
It’s important to try and find a balance of long wires that are thin and flexible to create the power lines for the motors. We found an old three-metre network patch cable that we pulled apart to get long lengths of suitable wire. If you wanted to spend rather than find something from your junk cable pile, you could probably find thinner and more flexible solutions. As the chassis sits quite nicely on a worktop, we inserted the motors into the chassis and then soldered the wires on, using the chassis as a helping hand.
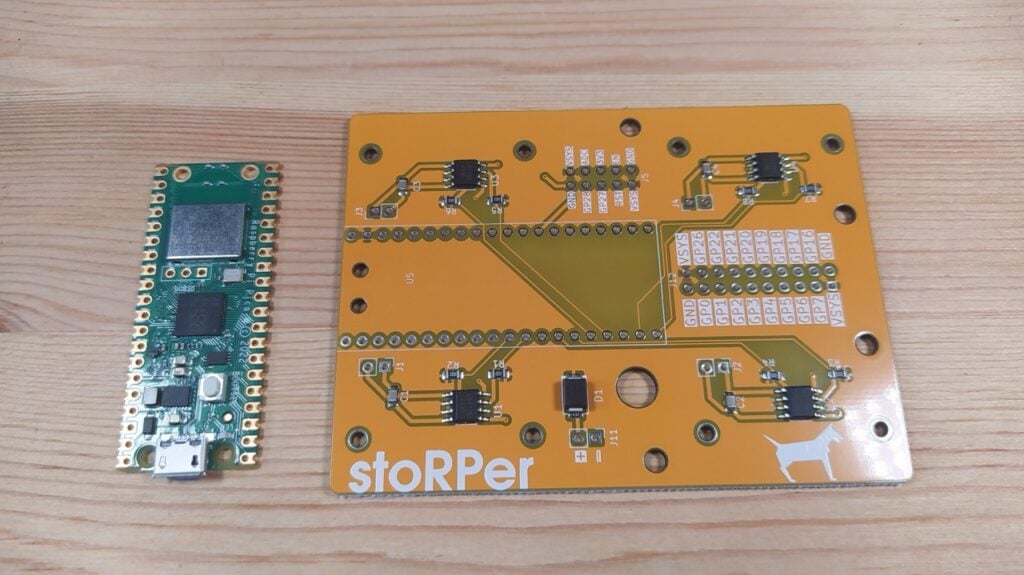
Figure 5: Using a StoRPer board is functionally the same as adding some DRV8833 modules to a Raspberry Pi Pico
Adding the buoyancy tanks is as simple as two cable ties wrapped around the chassis and the 35mm film canisters (Figure 4). You can experiment with the position of the tanks slightly after they are fitted. If you place them more out in the front and the rear, if the vehicle is floating you might find your Z-axis thruster sits slightly out of the water. Raising the tanks above the vehicle means the Z-axis propeller is always covered in water.
Once you have your motors in place and wired and you have fitted the buoyancy canisters, it’s time to test. We ran our first tests by simply holding the motor wires across an 18650 battery momentarily to work out the polarity. With all that identified, we then couldn’t resist playing with it in a washing-up bowl full of water. This proves quite worthwhile as although you can’t really do too much, you can get a sense for if you want to have positive or negative buoyancy and play with adding different amounts of water to the floatation canisters.
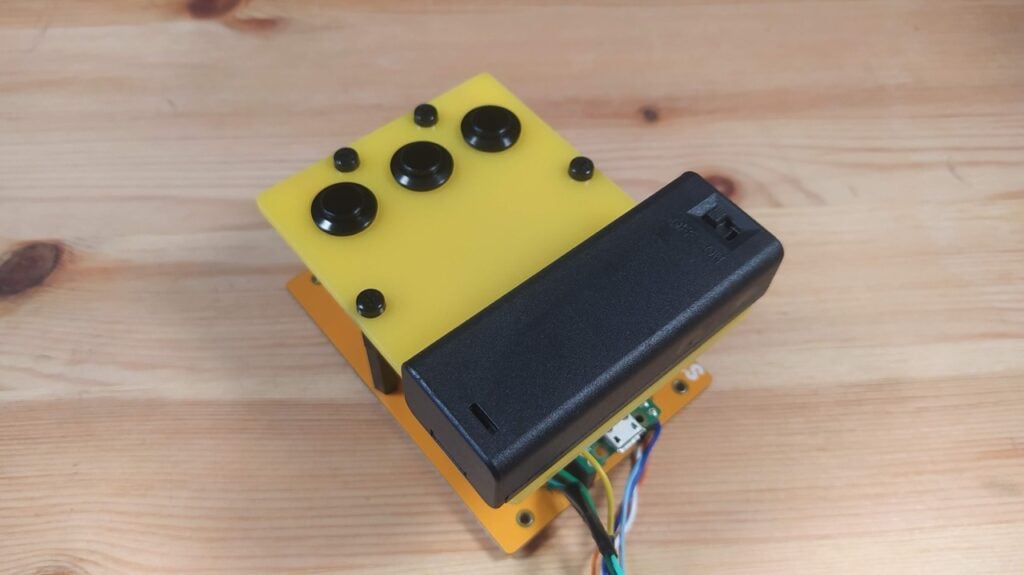
Figure 6: Adding a small panel into which we mounted the buttons as a first attempt at a controller
At this point, you could certainly make up a straightforward controller box with just some buttons or switches for each motor and some batteries. However, we went with the addition of a Raspberry Pi Pico as a controller, as this allowed us to drive the motors using pulse-width modulation (PWM), which allows us to control their speed and direction. To do this, we needed to use some motor drivers and we actually used a StoRPer board, which is a PCB we made as part of our Design an RP2040 board withKiCad book and articles that featured in HackSpace Magazine. The StoRPer board (Figure 5) is essentially a breakout board that connects some of Pico’s GPIO pins to four DRV8833 motor drivers. You could totally emulate this board on a breadboard using the StoRPer schematic and components; however, DRV8833 motor drivers are commonly sold as small modules on breakout boards and that would make for a simple option.
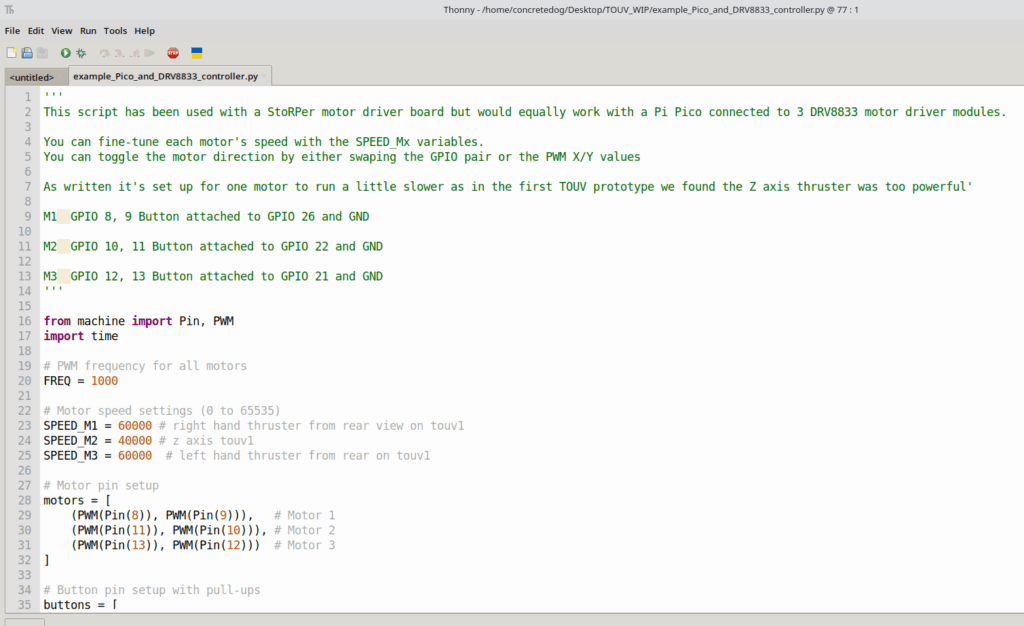
For our first controller system, we mounted three momentary press-to-make buttons in a panel (Figure 6) and connected them to Raspberry Pi Pico’s GPIO. In the MicroPython code (Figure 7), we have identified the GPIO pins for the buttons and defined them and set up a PWM system for each of the motors. Swapping the pair of pin number values for each motor can then reverse that motor and we can also change the speed values for each motor.
Figure 7: Using MicroPython on the Pico meant we could quickly make changes to motor speeds and directions
For our more serious testing, we moved to a second-hand inflatable hot tub. These can often be found second-hand, neglected and filthy, for very little money and make for an excellent large test environment for water-based projects. We gave ours a pretty good scrub and when we filled it, we gave it a dose of chlorine to kill off any bugs a couple of days before using it (to allow the chlorine to dissipate). As an aside, it’s great fun to place an action camera in a waterproof case in the tub/tank and capture some footage/images of your underwater test missions! Here is a link to an edited minute of underwater testing.
One thing we will change is that our wires are hard-wired to the controller and it would be beneficial, especially at the testing stage, to be able to quickly remove the wires so the controller alone can be taken back to the laptop inside (not near the hot tub) for code tweaks. We did a lot of drying of the vehicle and wires every time we needed to make a change. We powered our system a couple of different ways: either with an 18650 cell or with a USB power bank. With the 5V of the power bank, the motors spin quite quickly and the vehicle has too much thrust and is difficult to control, but this is easily rectified with changes to the speed values in the MicroPython script. We’re currently set up with a slight positive buoyancy with the Z-axis thruster set to turn a lot slower than the horizontal thrusters as it’s nice to be able to descend smoothly and gradually. We’ve also ended up drilling the small holes in the chassis to flood the chassis when submerged.
Designing the chassis
It’s great fun to tinker with and we have a few ideas for improvements. It would be great to make the wiring a little more flexible with some thinner and more flexible wires. We’d also like to add more functions to the controller. A switch to reverse the direction of the horizontal thrusters would be nice, as well as some latching switches that can set motors to be permanently running at a slow rate, perhaps even with potentiometers to vary the speeds. For example, we could set a slow speed for the Z-axis motor that, when activated, counters the positive buoyancy, allowing the TOUV to have a kind of ‘altitude hold’. It could be fun to add attachments like a hook or a magnet for fun ‘rescue the object’ games and challenges. We would of course love to get a camera on board, and sensors and more functionality, but we think that might be best on a larger DIY submersible project. Keep an eye out for that in the future. In the meantime, if you want to build a TOUV, the files are in this GitHub repository.
Raspberry Pi Official Magazine #157 out NOW!
You can grab the latest issue right now from Tesco, Sainsbury’s, Asda, WHSmith, and other newsagents, including the Raspberry Pi Store in Cambridge. It’s also available from our online store, which ships around the world. And you can get a digital version via our app on Android or iOS.
You can also subscribe to the print version of our magazine. Not only do we deliver worldwide, but people who sign up to the six- or twelve-month print subscription get a FREE Raspberry Pi Pico 2 W!