Streamline dataset creation for the Raspberry Pi AI Camera
Starting an AI project often begins with building a quality dataset, which can be a complex and time-consuming task. This dataset contains the data you want to use to train, test, and verify that your AI model works. This tutorial introduces a practical approach to help simplify the process.
With the Sony IMX500 sensor on the Raspberry Pi AI Camera, you can use your own datasets to improve your AI models. Whether you’re an experienced maker or just beginning to explore the world of edge AI, this guide will help you organise, refine, and export datasets with ease. Let’s look at how this tool can support you in building smarter AI models, faster.
The challenge of dataset creation
Dataset preparation is an important yet sometimes challenging aspect of vision AI projects. Capturing images, organising them, cropping out irrelevant details, and ensuring they’re formatted correctly is a lot of work. This process can be a roadblock that slows down progress or discourages you from starting in the first place. But with the right setup and tools, you can simplify these tasks and focus on your AI development.
Setting up and getting started
For this tutorial, we will use a tool that provides some convenient features for dataset creation: GUI Tool. This makes it easier to capture images that are very close to the deployment environment and highly suitable for training, since the data comes directly from the IMX500 image sensor.
GUI Tool runs on a Raspberry Pi with an AI Camera attached, and you access it via a web browser using another computer on the same network.
To run the tool, you’ll need Node.js and uv software:
$ sudo apt install nodejs npm
$ curl -LsSf https://astral.sh/uv/install.sh |
sh
Check that everything installed correctly with:
$ node --version
$ npm --version
$ uv --version
Now clone the repository from GitHub:
$ git clone https://github.com/SonySemiconductorSolutions/aitrios-rpi-sample-app-gui-toolNavigate into the new folder and install the software in the root of the folder:
$ make setupTo start the GUI Tool, run:
$ uv run main.pyYou’ll need the IP address:
$ hostname -IOr hostname:
$ hostname…of your Raspberry Pi to access it on the network.
Access the GUI Tool
Now move to the second computer on your local network and open a browser. Navigate to:
http://<your-raspberrypi-IP-address>:3001…to access the tool’s interface.
You can also access the GUI Tool directly from your Raspberry Pi and AI Camera via:
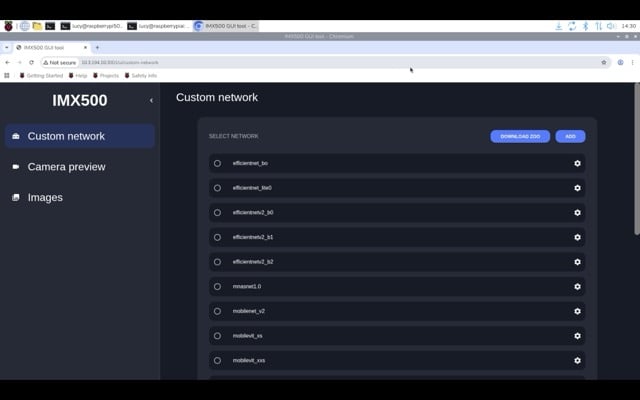
http://127.0.0.1:3001You will see the GUI Tool web interface as shown in Figure 1.
Creating a dataset using the IMX500 sensor
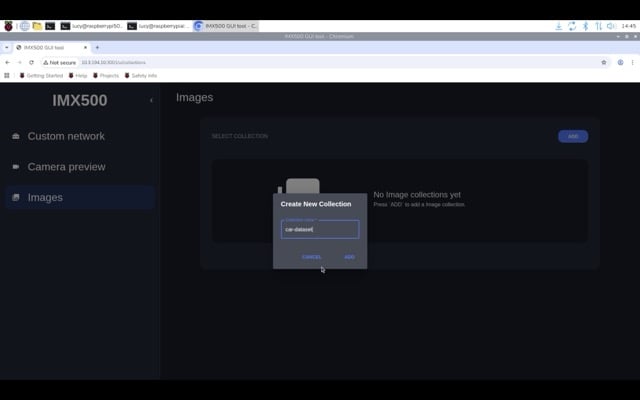
Once the setup is complete, you can use the GUI Tool to create and organise your dataset. Choose the ‘Images’ tab in the sidebar and click ‘Add’ to create a new dataset. Give the dataset a name in the pop-up window; for example, ‘car-dataset’ (Figure 2). Click ‘Add’ to create the dataset.
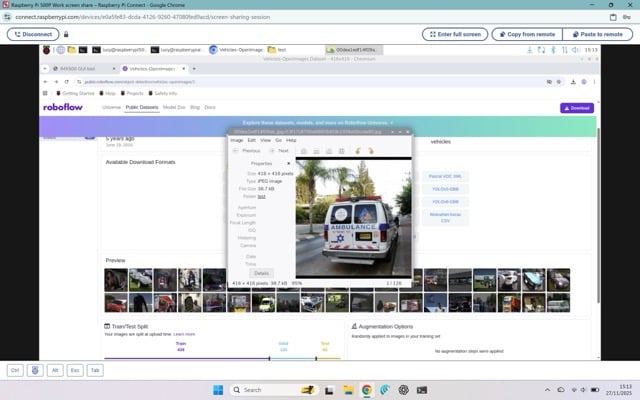
Now we need to add images by uploading them from your computer. For this tutorial, we have used the Vehicles-OpenImages Dataset from Roboflow (Figure 3).
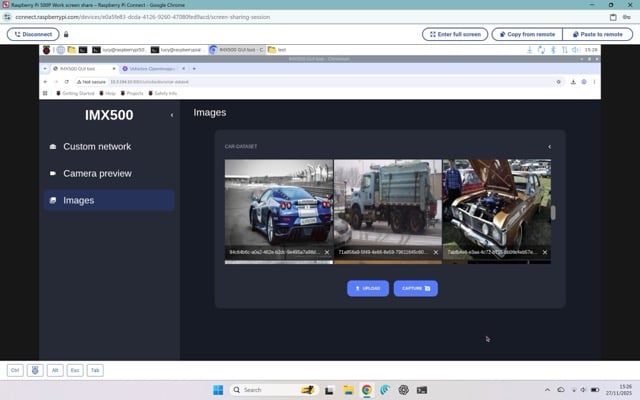
Click ‘Upload’ and choose an image from your Raspberry Pi OS file system. The image will appear in the car dataset (as in Figure 4).
Capture images with the camera
It is also possible to use the GUI Tool to automate image capture directly from a camera attached to your Raspberry Pi. If you have a Raspberry Pi AI Camera connected, you can also gather input tensor data alongside the raw image.
Choose the ‘Camera preview’ tab to view the image from your camera.
Select collection: Click ‘Select Collection’ and choose a dataset to add the images to.
Input: Click the ‘Timer’ switch to automate image capture at set intervals. For example, to capture a frame every 10 seconds for 50 images, set the capture rate to 0.1 and the number of photos to 50. Activate the image capture and let the tool handle the rest.
Input tensor: The Raspberry Pi AI Camera works differently to traditional image processing systems. The IMX500 sensor includes an internal ISP that preprocesses the sensor data and supplies the input tensor directly to its on-board AI accelerator chip. So, for optimal performance, it’s highly recommended that you train models using the exact input tensor data produced by the IMX500 sensor, rather than relying on raw images or preprocessed images only. This ensures that the model learns from data that precisely matches the runtime conditions, which leads to better model performance.
Fortunately, we can very quickly get this input tensor data by enabling the ‘Input Tensor’ flag during the image capturing process.
Start capture: Click the camera icon to start the image capture process.
Manage images
Head to the ‘Images’ tab to upload, delete, or capture images directly into your dataset to keep it organised.
Once your dataset is ready, click ‘Images’, then click the cog icon next to your dataset. Select ‘Download’ to save the images as a ZIP file on your computer.
Practical example: Recognising cars
Imagine you’re developing an AI model for car recognition with the IMX500 sensor. Here’s what the process might look like:
- Create a ‘car-dataset’ dataset
- Capture images of cars using the IMX500 sensor
- Automate the capture process to ensure consistency
- If needed, crop images to focus on relevant areas, such as individual cars
- Organise and manage these images within the tool
- Export the dataset and use it to annotate and train your AI model
Training your AI model
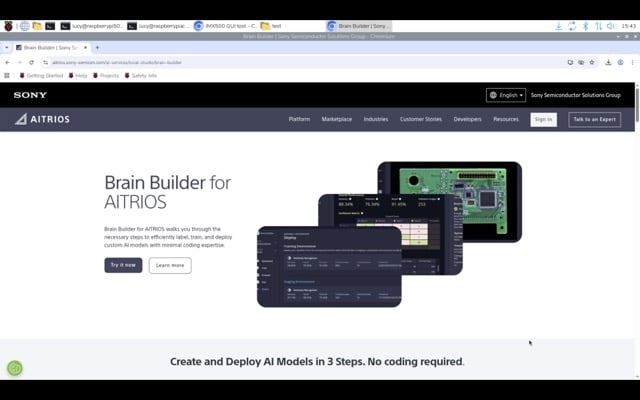
Once your dataset is ready, the next step is annotation, followed by training with TensorFlow or PyTorch. Alternatively, for a streamlined and user-friendly experience, you can use a dedicated tool to simplify these steps. One tool that can assist you is Brain Builder for AITRIOS (Figure 5) from the Studio Series of AI tools and services for AITRIOS.
Annotating
Annotating your dataset is a critical step in training an AI model because it teaches the AI exactly what you want it to learn. If the annotations contain mistakes, the model will learn those mistakes as well, which can reduce its accuracy.
There are many tools available for annotation, such as Roboflow or CocoAnnotator, that help you label your datasets according to the type of model you plan to train.
When choosing an annotation tool, make sure to check which export formats it supports. Your dataset must be exported in a format compatible with the AI model you want to train.
Training
Once your dataset is annotated and exported, you are ready to start training. We suggest you follow your chosen framework’s guides on how to create a training script and what hardware you might need.
Brain Builder for AITRIOS
This tool is designed to simplify the annotation and training process, which might be helpful for users with varying levels of AI expertise. With Brain Builder for AITRIOS, you can annotate and train your AI models in a few steps, all inside the same tool. This means your annotated dataset can be sent straight into training, already in the right format.
Brain Builder for AITRIOS currently supports three types of models: Classification, Object Detection, and Anomaly Hi-Fi. You can train and evaluate your model and, when you are happy with the accuracy, export it for IMX500 without any hassle.
Deploying your AI model
Once your model is trained, you can package it and then deploy it on the IMX500:
- Package your model on your Raspberry Pi
- Build an application to visualise the results, such as counting cars
Creating datasets isn’t just a technical task — it’s a gateway to collaboration, learning, and real-world innovation. The possibilities are wide-ranging: educators can introduce students to AI and machine learning; makers can build smarter IoT devices, such as home security systems or gesture recognition tools; and researchers can accelerate their work on projects including wildlife conservation, medical imaging, and more.
This tutorial featured in Raspberry Pi Official Magazine #161
You can grab this issue from Tesco, Sainsbury’s, Asda, WHSmith, and other newsagents, including the Raspberry Pi Store in Cambridge. It’s also available from our online store, which ships around the world. And you can get a digital version via our app on Android or iOS.
You can also subscribe to the print version of our magazine. Not only do we deliver worldwide, but people who sign up to the six- or twelve-month print subscription get a FREE Raspberry Pi Pico 2 W!
The post Streamline dataset creation for the Raspberry Pi AI Camera appeared first on Raspberry Pi.
from News - Raspberry Pi https://ift.tt/U5uY1Ol
Labels: News - Raspberry Pi, IFTTT

0 Comments:
Post a Comment
Subscribe to Post Comments [Atom]
<< Home