Object detection with Ultralytics YOLO26 on Raspberry Pi
In celebration of #MakerMonday this week, we’re taking a look at how well YOLO‘s AI models deploy and run on Raspberry Pi. This is an exceptionally in-depth tutorial, so we have just shared part of the installation with you here; the rest of the tutorial can be found in the latest issue of Raspberry Pi Official Magazine, pages 70–77.
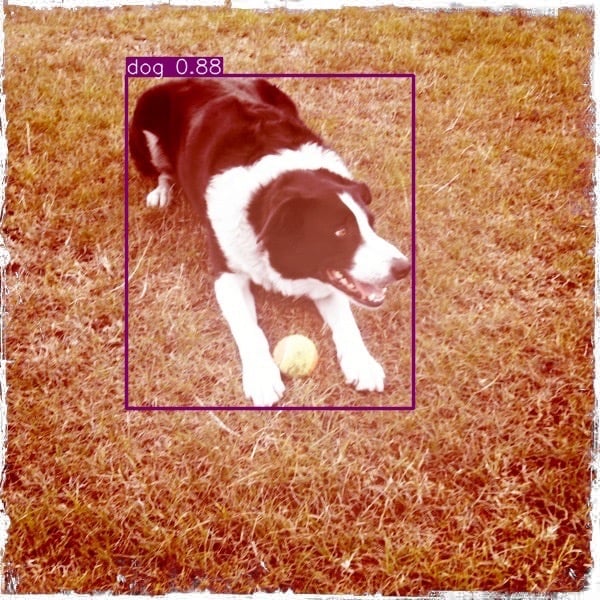

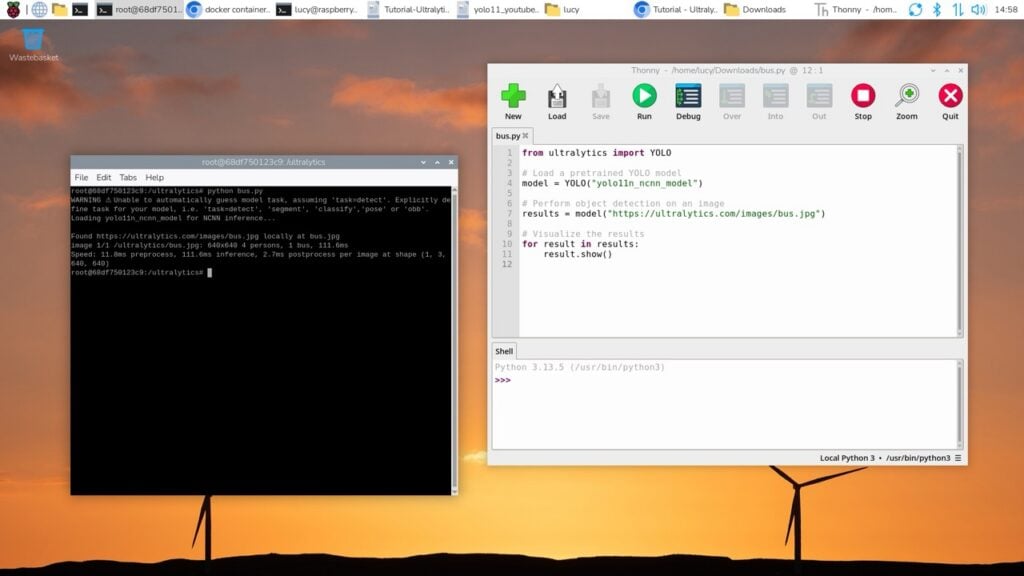
YOLO (You Only Look Once) is a powerful object detection model created by Ultralytics that enables you to identify content in images and videos from the command line and Python. From here, you can perform classification and respond to images or videos with your code.
When paired with a Raspberry Pi Camera Module, YOLO forms a powerful means of identifying objects that your Raspberry Pi board can react to; you can use it with sensors and actuators connected to the Raspberry Pi to perform real-time identification and reaction. You can also use it to analyse images and video files.
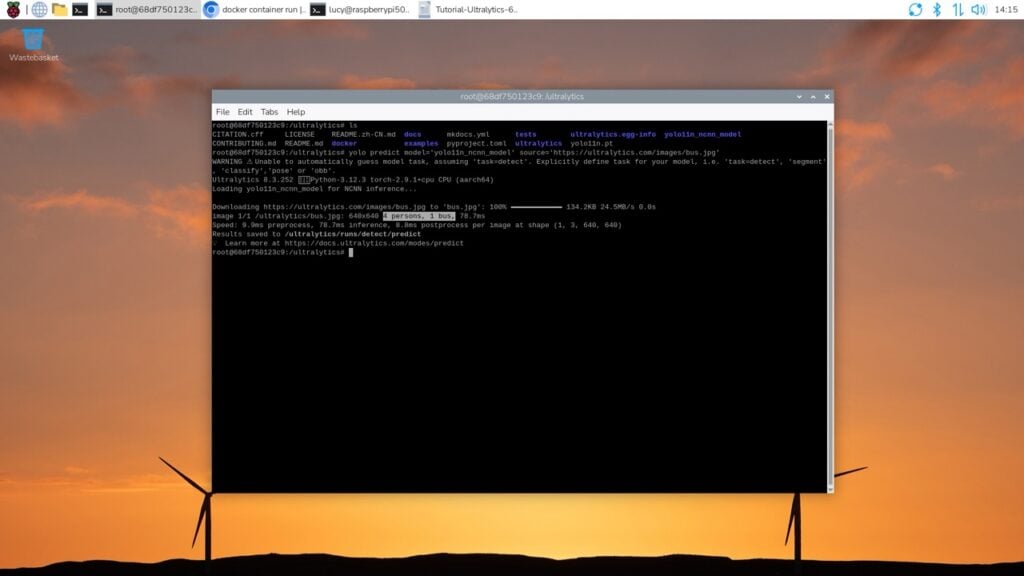
YOLO26 has just been released, and the YOLO26n model is what we are using here. It’s custom-built for speed, accuracy, and versatility. You can use YOLO out of the box or train your own datasets on it.
In this tutorial, we’re going to look at installing the Ultralytics framework with images and video files, both online and in our computer system. We’ll also look at setting up Docker so that you can install the environment and the programs needed.
You don’t need a Raspberry Pi Camera Module for this, but a reasonably powerful Raspberry Pi will help — we are using a Raspberry Pi 5 for this tutorial. In following tutorials, we will look at integrating a Raspberry Pi Camera Module.
Install Docker
Set up your Raspberry Pi 5 with Raspberry Pi OS (see Raspberry Pi Documentation for help with these steps). We start by installing Docker Engine in Raspberry Pi OS.

Add Docker to apt
To install Docker Engine, you should be running the latest version of Raspberry Pi OS based on Debian Trixie (it will also work on Bookworm and Bullseye, however). These instructions follow the Docker documentation guide for Debian. Docker provides separate Raspberry Pi installation instructions, but these are geared towards the old 32-bit version of Raspberry Pi OS, so stick with the Debian install.
First, make sure you have uninstalled any old Docker packages. Open a terminal window and enter:
$ sudo apt remove $(dpkg --get-selections
docker.io docker-compose docker-doc podman‑docker containerd runc | cut -f1)
Unless you have Docker already installed, apt will report that these packages are not found.
Next we’ll add Docker’s official GNU Privacy Guard (GPG) key to the keyrings folder. First, we update apt, then install ca-certificates and curl:
$ sudo apt update
$ sudo apt install ca-certificates curl
These should already be installed. We make sure our keyrings directory has the correct permissions: 0755. This enables the file owner (our admin account) to read, write, and execute; just read and execute permissions are set for groups and others. We do this with a funky install command that is normally used for copying files, but in this instance it’s being used to adjust permissions:
$ sudo install -m 0755 -d /etc/apt/keyringsNow we use curl to download Docker’s GPG key and place it into our keyrings directory with the file name docker.asc:
$ sudo curl -fsSL https://download.docker.com/linux/debian/gpg -o /etc/apt/keyrings/docker.ascWe need to ensure that all users can read the docker.asc file. We do this with the standard chmod command with a+r options:
$ sudo chmod a+r /etc/apt/keyrings/docker.ascNext comes a funky multi-line piece of code that creates a file called docker.sources in our /etc/apt/ directory and contains the details of the Docker repository. Enter the first line and you will see a > in the terminal. Enter each line carefully and press RETURN after each one. Each line is added to the docker.sources text file until you enter EOF (at which point you return to the command line):
$ sudo tee /etc/apt/sources.list.d/docker.sources <<EOF
Types: deb
URIs: https://download.docker.com/linux/debian
Suites: $(. /etc/os-release && echo "$VERSION_CODENAME")
Components: stable
Signed-By: /etc/apt/keyrings/docker.asc
EOF
Check that the docker.sources file has been created correctly:
$ cat /etc/apt/sources.list.d/docker.sourcesThe output is expected to list the following, where Suites is the VERSION_CODENAME of your operating system (trixie):
Types: deb
URIs: https://download.docker.com/linux/debian
Suites: trixie
Components: stable
Signed-By: /etc/apt/keyrings/docker.asc
If there’s a problem, use vim or nano to edit your file:
$ sudo nano /etc/apt/sources.list.d/docker.sourcesCheck the update
Now update the system and check access to Docker downloads:
$ sudo apt updateThe output should include a line like this:
Get:5 https://download.docker.com/linux/debian trixie InRelease [32.5 kB]Install Docker
Now that the Docker repository is in apt, it’s time to install the various elements. Enter this line in the terminal:
$ sudo apt install docker-ce docker-ce-cli containerd.io docker-buildx-plugin dockercompose-pluginDocker should run automatically after installation. To verify that Docker is running, use:
$ sudo systemctl status dockerPress q to exit systemctl and return to the command line. Some systems may have this behaviour disabled and will require a manual start:
$ sudo systemctl start dockerFinally, verify that the installation is successful by running the hello-world image:
$ sudo docker run hello-worldIf this is the first run, it will pull the library/hello-world container from the Docker Hub. You will see a message containing:
Hello from Docker!This message shows that your installation appears to be working correctly.
Check out the latest issue of Raspberry Pi Official Magazine to learn how to finish setting up Docker and start using YOLO26n.
Issue 162 of Raspberry Pi Official Magazine is out now!
You can grab this issue from Tesco, Sainsbury’s, Asda, WHSmith, and other newsagents, including the Raspberry Pi Store in Cambridge. It’s also available from our online store, which ships around the world. And you can get a digital version via our app on Android or iOS.

You can also subscribe to the print version of our magazine. Not only do we deliver worldwide, but people who sign up to the six- or twelve-month print subscription get a FREE Raspberry Pi Pico 2 W!
The post Object detection with Ultralytics YOLO26 on Raspberry Pi appeared first on Raspberry Pi.
from News - Raspberry Pi https://ift.tt/jrH6OtA
Labels: News - Raspberry Pi, IFTTT

0 Comments:
Post a Comment
Subscribe to Post Comments [Atom]
<< Home