Pioreactor: An automated Raspberry Pi bioreactor
Welcome to another glorious #MakerMonday, on which we celebrate your Raspberry Pi builds. Today, let’s take a look at ‘Pioreactor’ — an amazing project designed to automate long bioreactor experiments, featured in the latest issue of Raspberry Pi Official Magazine.
Whilst at the Open Hardware Summit 2025 in Edinburgh, UK, we met Gerrit, who spoke about growing food with electricity while representing AMYBO, an online community dedicated to developing sustainable protein food sources.
The talk is excellent, and it’s available on YouTube. In it, you can see and hear a lot of information about the Pioreactor: a tiny automated bioreactor that allows complex science to take place on your desk. It’s powered by a Raspberry Pi, and is the go-to tool for many professional, amateur, and hobbyist biologists and chemists; it’s also used by a fascinating research community called AMYBO.
What is a bioreactor?
A bioreactor is a vessel that provides an optimised environment for growing cells, microorganisms, and microbial cultures. In its simplest form, it could just be a jar, but the term ‘bioreactor’ commonly describes more complex setups in which the environment can be controlled and automated. Bioreactors are typically used in the development of pharmaceuticals, as well as in the food sciences, medical sciences, and many other chemistry- and biology-adjacent sectors.
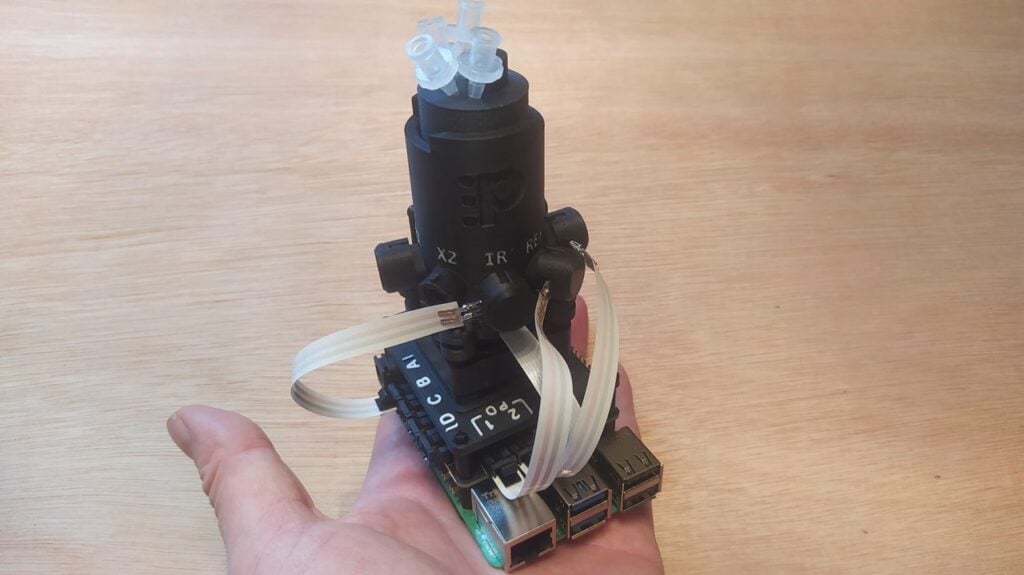
The Pioreactor is small: the working volume of our version is just 20ml (see Figure 1). You definitely aren’t going to grow enough algae for your fuel cell, or to create a decent food supply. For experiments and research, however, it offers a wide range of environmental controls straight out of the box. It’s capable of automating experiments over long periods of time and can also log data about the experiments you schedule it to perform. You can see the bill of materials (BOM) on the AMYBO documentation website.
How to build the Pioreactor
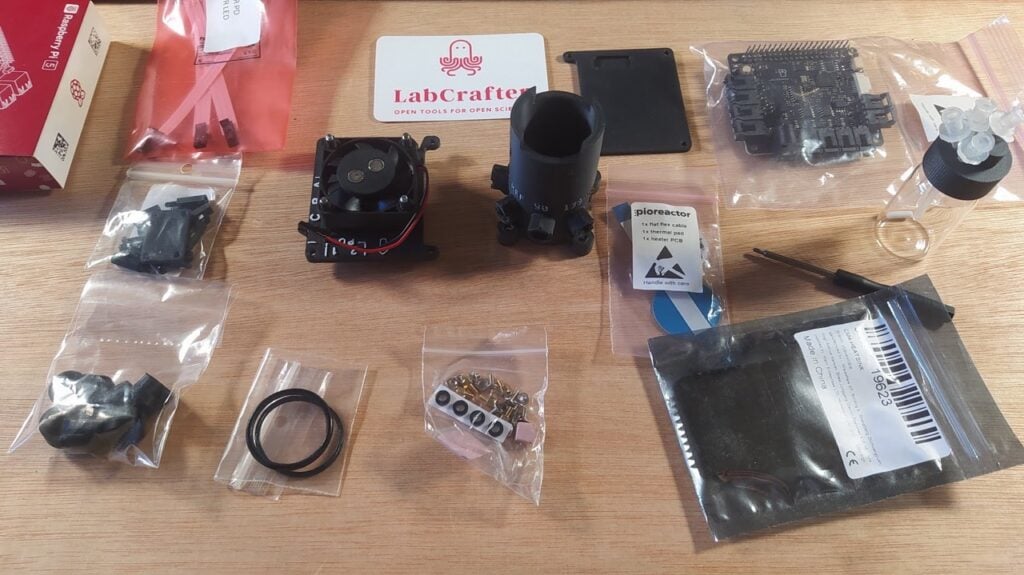
Building the Pioreactor is pretty straightforward — all you need is a Pioreactor kit. Gerrit is the co-founder of LabCrafter, a company that supplies open-sourced science equipment, including the OpenFlexure microscope kits we wrote about in issue 158. It also stocks the current models of the Pioreactor, as well as numerous add-on accessories and expansions. The kit arrived from LabCrafter really well packed, in nice, sustainable, recyclable packaging, ready to be built.
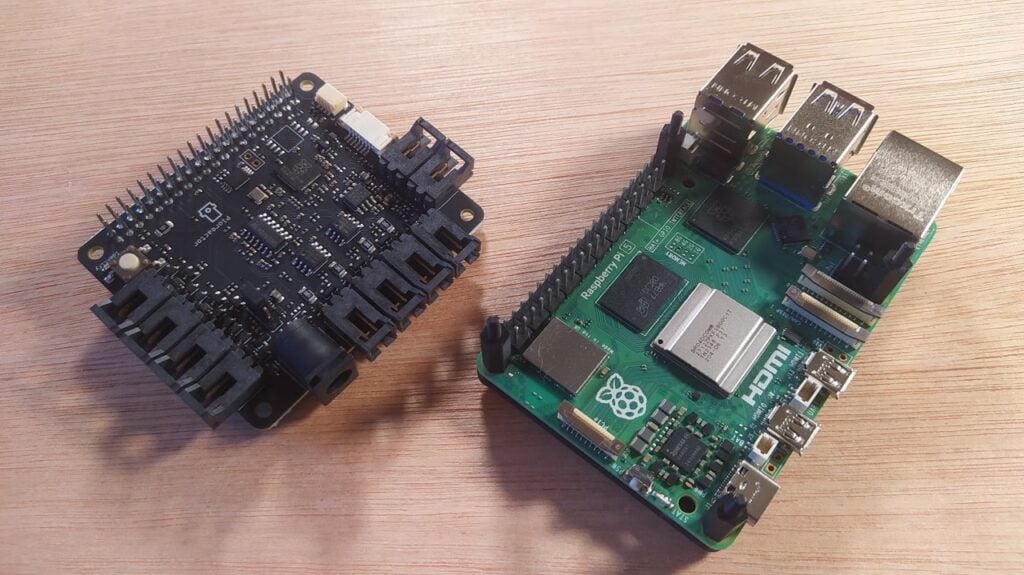
You can build a Pioreactor using any choice of Raspberry Pi model, whether that’s a Model A, a Model B, or any of the Zero-series boards. We went for a Raspberry Pi 5 with 4GB RAM (Figure 2), as we knew this would provide great performance. You begin by simply attaching a base to your Raspberry Pi, followed by some standoffs, before finally fitting the Pioreactor HAT onto Raspberry Pi 5’s GPIO header. The instructions are online and they are excellent. Do, however, double-check which version of the Pioreactor you have, as the assembly approach has changed slightly for the recent v1.5 hardware design update.
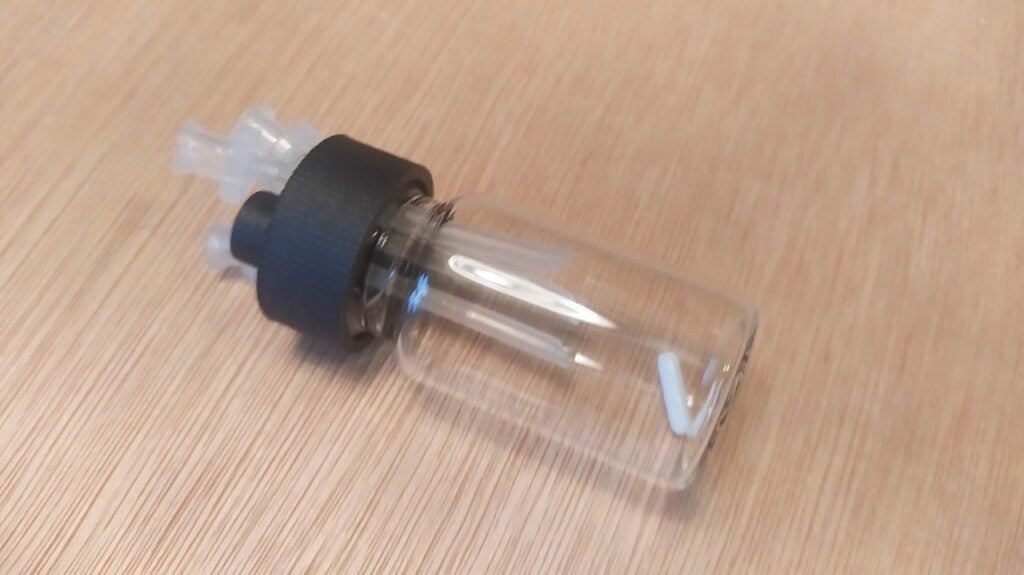
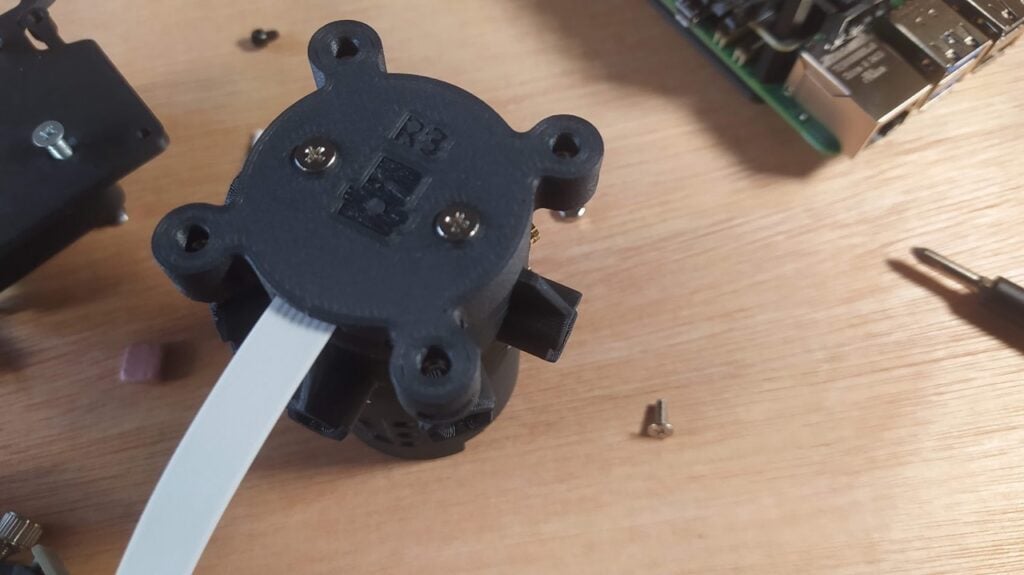
We then move on to assembling the ‘wetware’ section: the main chamber of the Pioreactor that holds the glass vial that contains your experiment. Fit the supplied O-rings to the base of the vial chamber and the chamber wall, then insert the small heater element into the chamber. The clearances for various parts of the mechanism are quite accurate (Figure 3), so you need to double-check that you are assembling it using the correct bolts; handily, the packaging has a labelled, to-scale image of all the bolts to check them against.
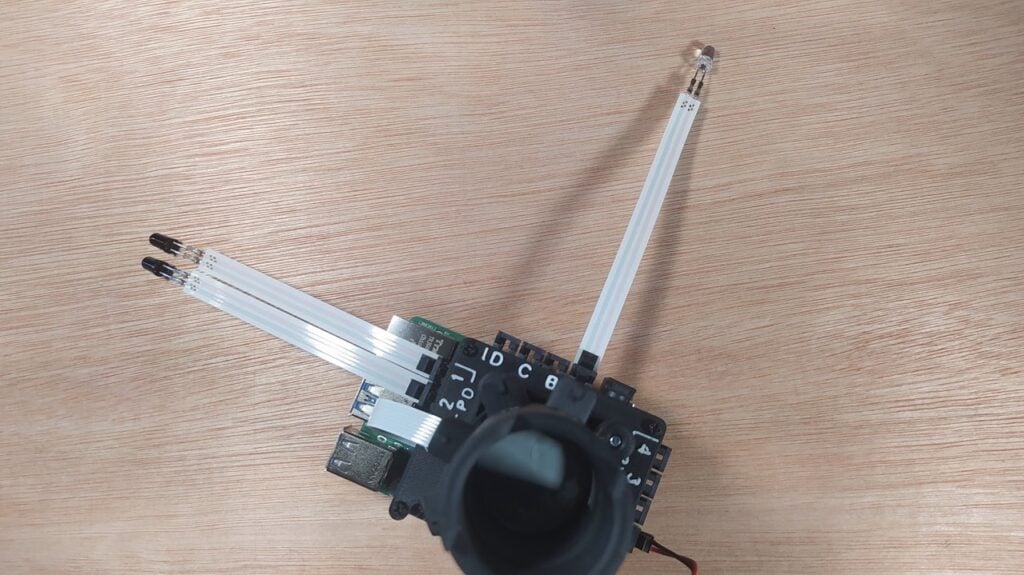
There are numerous holes in the side of the chamber wall, allowing for the addition of an optical system later on. The included optical system consists of an infrared (IR) LED and two photodiodes in the same 5mm LED form factor. These are fitted later in the build, allowing you to automatically measure the optical density of your experiment. This is an obvious potential metric for growth. Imagine starting with a reasonably clear liquid in which an organism, such as yeast, is growing; over the course of the experiment, the optical density of the liquid would be expected to increase as the IR LED becomes more and more obscured by the cloudiness of the mixture.
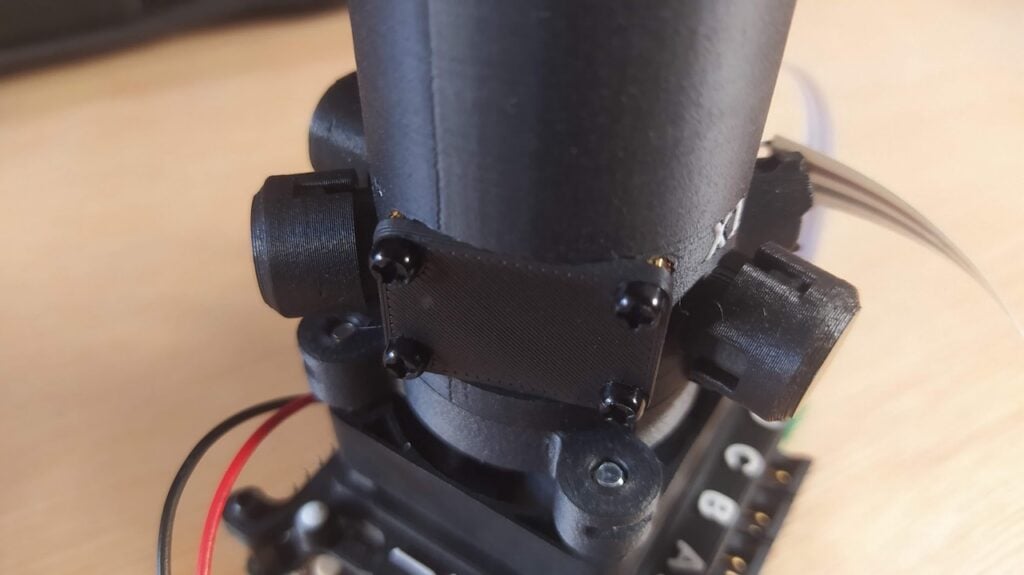
Also on the chamber wall is a small rectangular aperture with some small threaded inserts in the corner. This is a ‘viewing window’ (Figure 4), and there is a supplied blanking plate for this area. The viewing window is also designed to receive additional hardware. One option is to add an Adafruit AS7341 sensor, which is a pretty well-featured spectrometer. You can purchase this separately, and there is software for this device that enables you to directly retrieve readings from it.
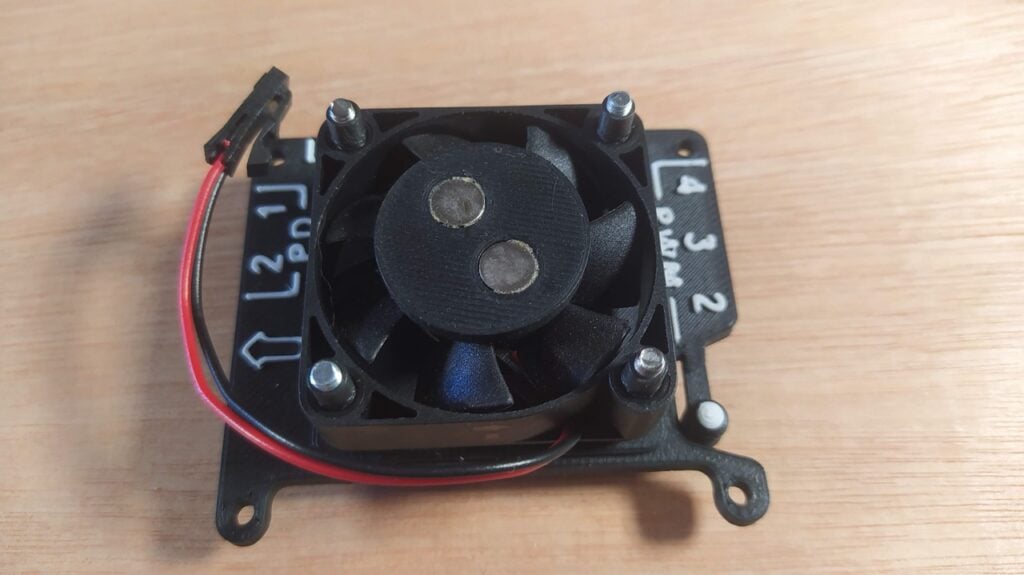
An upper faceplate sits between the Pioreactor HAT and the vial chamber. The faceplate has a mount for a fan unit, and the vial chamber assembly fits on top of the fan’s mounting bolts. The fan, you will notice, has been retrofitted with a pair of strong magnets (Figure 5). This is because the fan isn’t really used as a fan — the magnets actually create a stirring mechanism for inside the vial. Supplied with the kit is a tiny, plastic-covered metal stir bar that sits inside the vial; when the fan is instructed to turn, the magnets cause the stir bar to spin, allowing you to schedule periodic agitations of your experiment.
Assembly continues by attaching the fan and the vial chamber to the upper faceplate, then mounting the faceplate and attachments onto the HAT and the Raspberry Pi. Rugged connections are made for the fan/stirrer cable, and the heater element’s ribbon cable is also fitted at this point.
Finally, add the IR LED and the two supplied photodiodes and cover them with the neatly designed protective covers (Figure 6). The kit includes some spare covers, so for now, we can cover the additional chamber holes with them (these holes are there so you can add further LEDs, depending on your experiment’s needs). Many bioreactor experiments require some form of light source, so it’s common to mount 5mm LEDs of the target wavelength into these holes.
Installing the software
Once you have all of the hardware assembled, it’s time to grab a microSD card and install the software that runs your Pioreactor. This is neatly achieved using the custom Raspberry Pi OS image supplied by the Pioreactor team. With the latest version of the official Raspberry Pi Imager application, installation is easy.
After booting Raspberry Pi Imager, you need to click the ‘App Options’ button on the main page.
If you’re using the AppImage version of the Raspberry Pi Imager tool on Ubuntu, you’ll need to run Imager with root permissions. To do this, navigate to the directory where the AppImage is and then launch Imager with:
$ sudo ./imager_2.0.0_amd64.AppImageOn the App Options page, you can edit the ‘content repository’ tab and add the custom URL for the Pioreactor OS image. If you then reboot Imager, you should be able to select your Raspberry Pi device and see the Pioreactor OS available to install to your microSD card.
The Pioreactor instructions walk you through this process really well. In essence, Imager will prompt you to set localisation settings, then enter a specific username and password from the Pioreactor instructions, along with your own Wi-Fi network credentials. Don’t worry, though: you can change these down the line.
Booting your Pioreactor
Once the software is installed, you can boot your Pioreactor by connecting a power supply. We made sure to use an official Raspberry Pi power supply, and after a few minutes we saw a blue LED blinking on the Pioreactor HAT. Then, on a laptop connected to the same Wi-Fi network, we opened a web browser and navigated to http://pioreactor.local. A pop-up window asked us to confirm which Pioreactor version we have; after selecting this, a wonderful dashboard for our Pioreactor appeared (Figure 7).
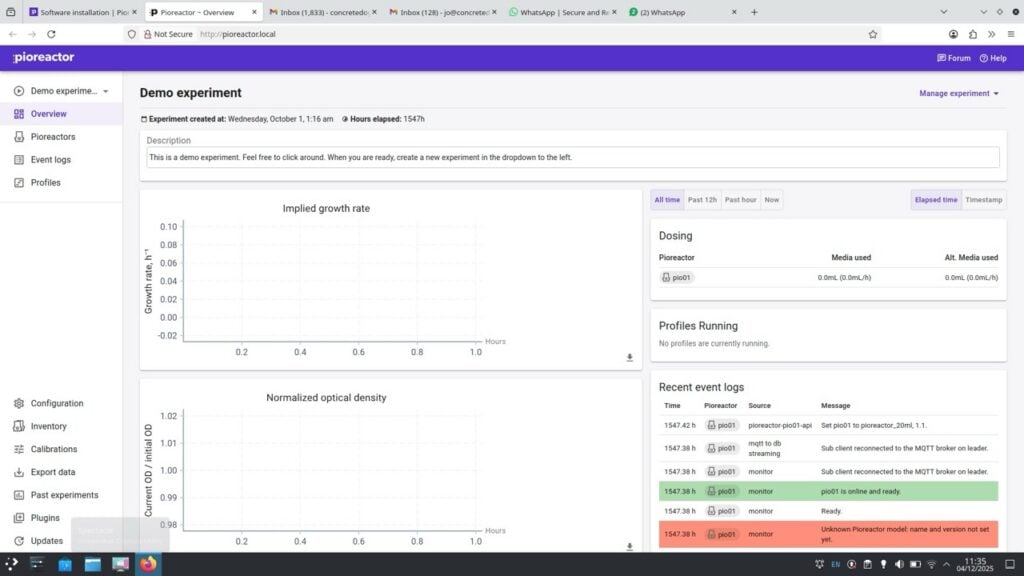
There’s lots you can check, even without beginning to run an experiment on your Pioreactor. As a simple test, you can select the ‘Profiles’ tab from the left-hand side of the screen and then choose the ‘Demo Stirring Example’ from the drop-down list of available profiles. This little community-contributed example will turn on the stirring system at a particular number of revolutions per minute (RPM), increase the speed of stirring after 90 seconds, then stop stirring after three minutes. If you remove the lid from your vial chamber before running this, you can watch the stir bar in action.
Similarly, if you click the ‘Pioreactors’ tab from the list on the left-hand side, you can select your Pioreactor (you can run multiple from a single interface) and assign it as ‘leader’. Then, if you click the ‘Manage’ button, you will see a list of ‘Activities’ that you can run or stop running inside your experiment, impacting things like stirring, optical density, temperature control, and more.
Experimenting
A good first experiment is described on the AMYBO website. As written, it’s used to calibrate two Pioreactors to each other, but you could also run the experiment as a test for a single Pioreactor. Essentially, you are going to grow some yeast using a yeast extract peptone dextrose (YPD) broth, which is a common growth medium used in all manner of microbiological cultivations. The experiment basically grows yeast in the YPD broth, stirring and warming the mixture while taking periodic optical density measurements to track its growth (Figure 8).
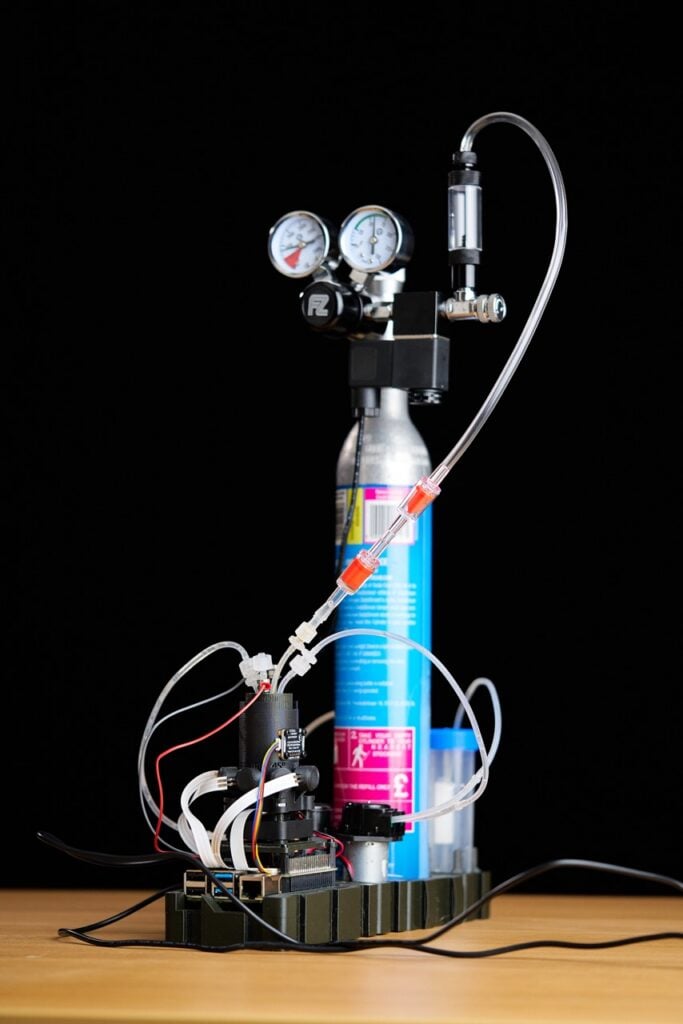
The Pioreactor is a capable device in its standalone form, but there are lots of add-ons and modifications available or in development within the community. For example, Figure 9 shows an expanded Pioreactor system that can push CO2 through the liquid in the chamber, which can be used to remove other volatile compounds from a sample. This process is known as ‘sparging’. The CO2 sparging system is well engineered, but can be made using simple items like the CO2 bottle from a Sodastream device, which are widely available and readily refillable. This modified Pioreactor also has peristaltic pumps with surgical tubing, enabling accurate dosing of additional material into a given experiment. Some of the AMYBO experiments need hydrogen and oxygen to be present in the vial chamber, and this can be achieved through in-chamber electrolysis, all of which is being explored and developed. It’s superb to see the community building and developing these complex tools for everyone.
The new issue of Raspberry Pi Official Magazine is out now!
You can grab this issue from Tesco, Sainsbury’s, Asda, WHSmith, and other newsagents, including the Raspberry Pi Store in Cambridge. It’s also available from our online store, which ships around the world. And you can get a digital version via our app on Android or iOS.

You can also subscribe to the print version of our magazine. Not only do we deliver worldwide, but people who sign up to the six- or twelve-month print subscription get a FREE Raspberry Pi Pico 2 W!
The post Pioreactor: An automated Raspberry Pi bioreactor appeared first on Raspberry Pi.
from News - Raspberry Pi https://ift.tt/orOTWKD
Labels: News - Raspberry Pi, IFTTT

0 Comments:
Post a Comment
Subscribe to Post Comments [Atom]
<< Home